GA4 content grouping provides a solution by organizing your pages into meaningful categories.
This post explains what content grouping is, shows a practical example using furniture categories, and walks you through setting up and analyzing content groups in Google Analytics 4 to gain better insights into your website's performance.
What Is GA4 Content Grouping?
Content grouping in Google Analytics 4 (GA4) allows you to organize your website or app content into meaningful groups or categories, based on your business objectives.
Suppose you have a furniture store that sells different types of furniture such as sofas, chairs, tables, and beds. You want to track the performance of each furniture category on your website.
To do that, you can create content groups for each category :
- Sofas group
- Chairs group
- Tables group
- Beds group
- Others
You can then add the relevant pages to each group :
- Sofas group: Home page, Sofas category page, Sofas product pages
- Chairs group: Home page, Chairs category page, Chairs product pages
- Tables group: Home page, Tables category page, Tables product pages
- Beds group: Home page, Beds category page, Beds product pages
- Others: "Others" contains the web pages that do not belong to any other groups.
Once you've created the content groups, you can view the performance of each group in the page report. This will allow you to compare the performance of different categories and see which categories are more popular among your website visitors.
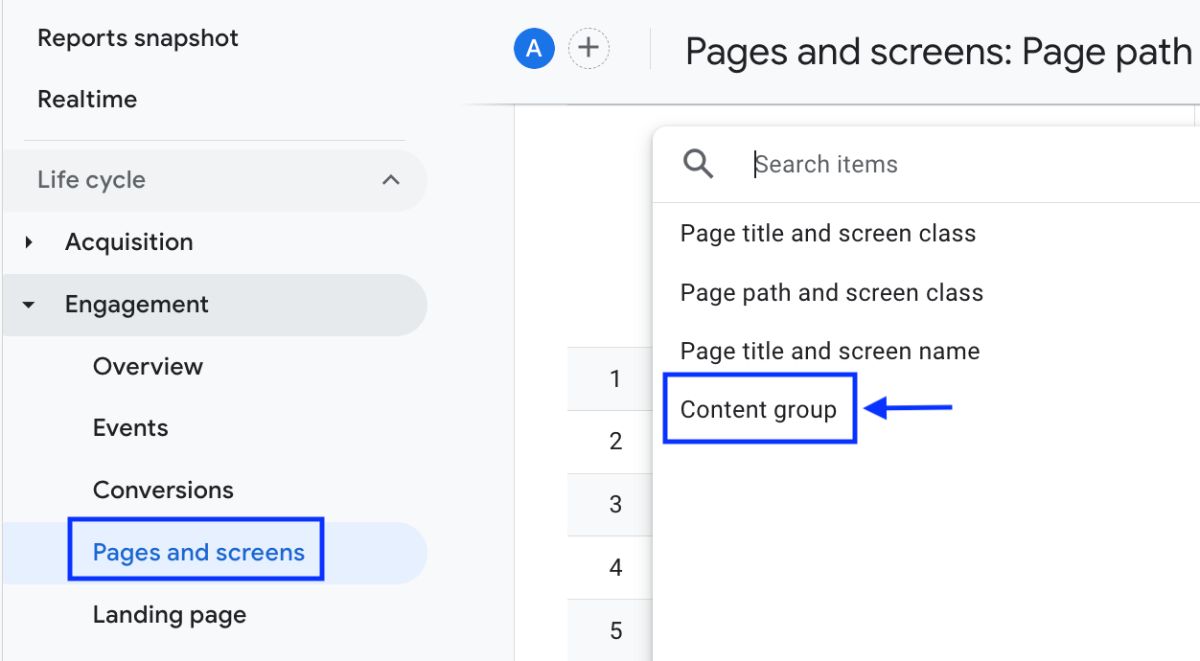
This can help you identify areas of your website that need improvement, such as pages or screens with high bounce rates, low engagement, or low conversion rates.
You can also use content grouping to analyze the behavior of specific user segments, such as new vs. returning visitors, or visitors from different geographic regions.
For example, you can see which group has the highest number of page views, which group has the highest engagement rate, which group has the highest time on the page, and so on.
How To Create Content Grouping In Google Analytics 4?
Here is a step-by-step guide on how to create content grouping in GA4:
Decide the names and number of content or product categories that you want to use as content groups in GA4.
For example, in a furniture store, you may want to create content groups for;
- Sofas,
- Chairs,
- Tables,
- Beds.
To identify the web pages that will be part of each content group, you can use regular expressions.
For instance, to identify all webpages related to the "Sofas" content group, you can use the following regular expression:
sofa|couch|lounge
Similarly, to identify all webpages related to the "Chairs" content group, you can use the following regular expression:
chair
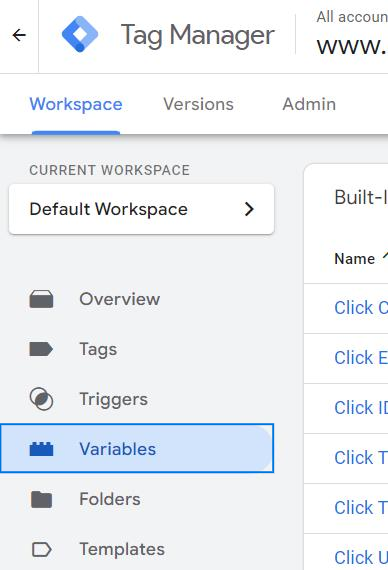
Log in to your GTM account and select the container where you want to create a regex table. Then, click on "Variables" from the left-hand side menu.
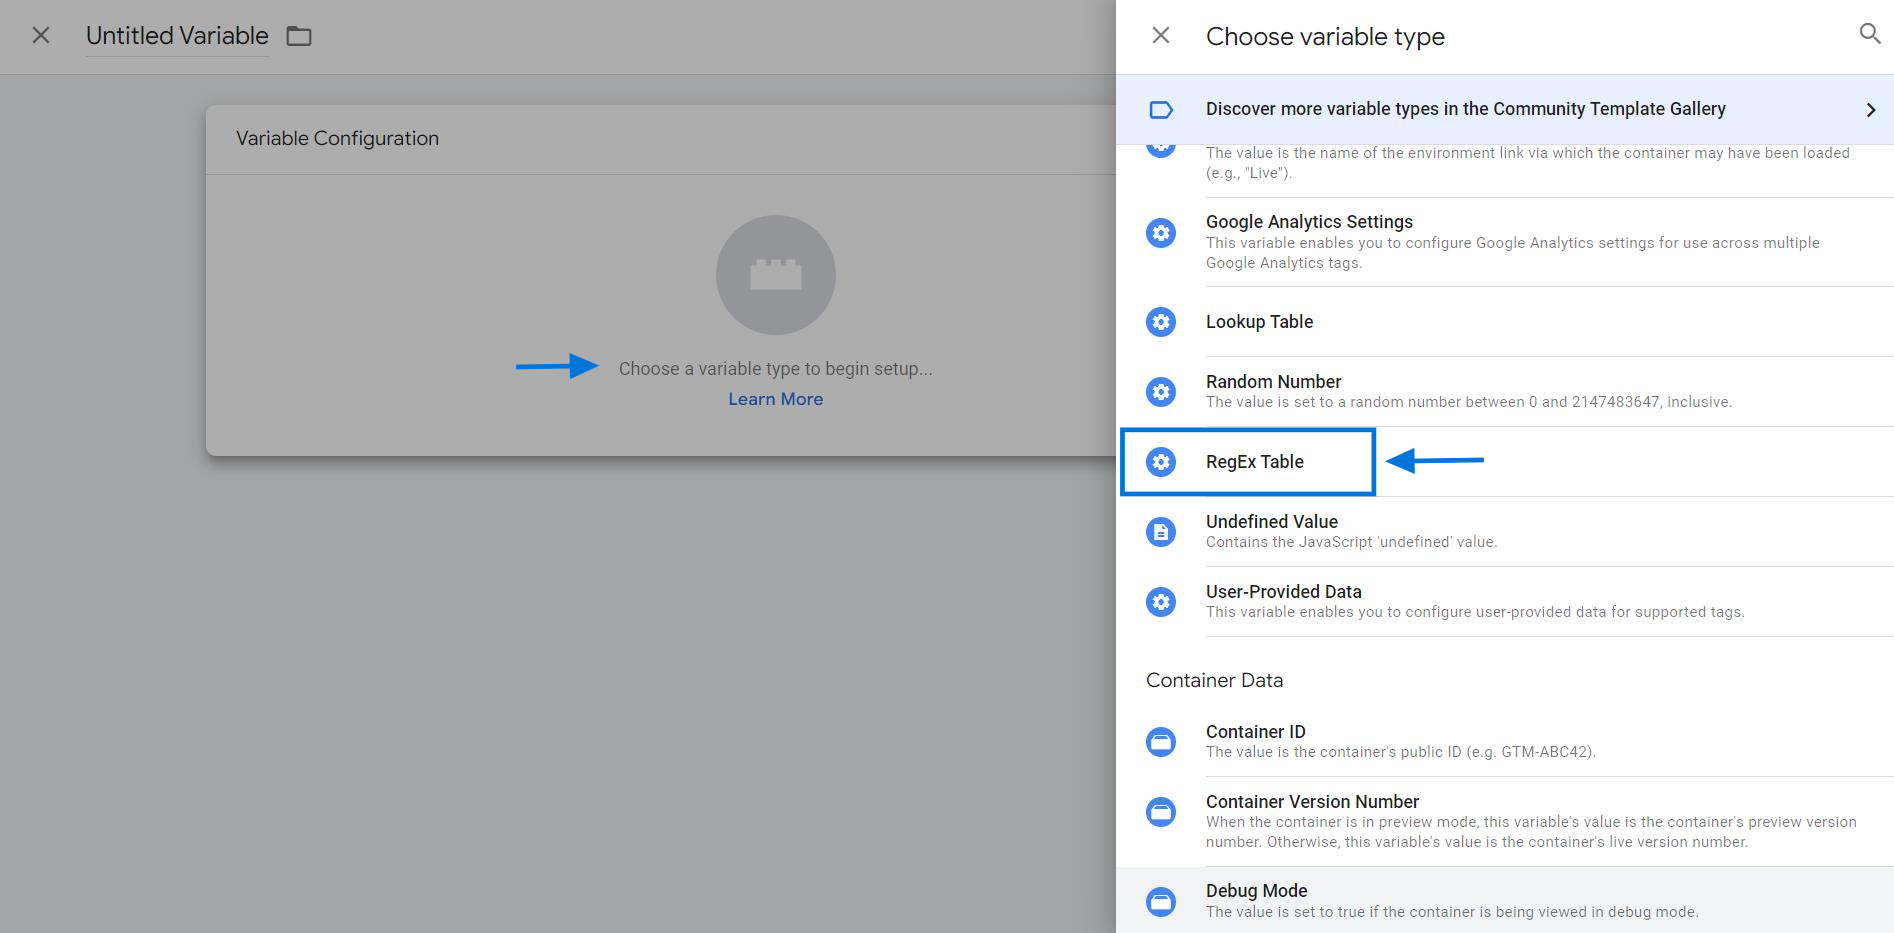
Click on "New" to create a new user-defined variable.

Click on "Choose a variable type to begin setup" and select "RegEx Table" from the list.
In this case, you can name it "Content Grouping" so that it's easy to identify and reference later on.

Click on "Input Variable" and select "{{Page Path}}" from the dropdown list, as this is the variable that contains the value you want to match using a regular expression.
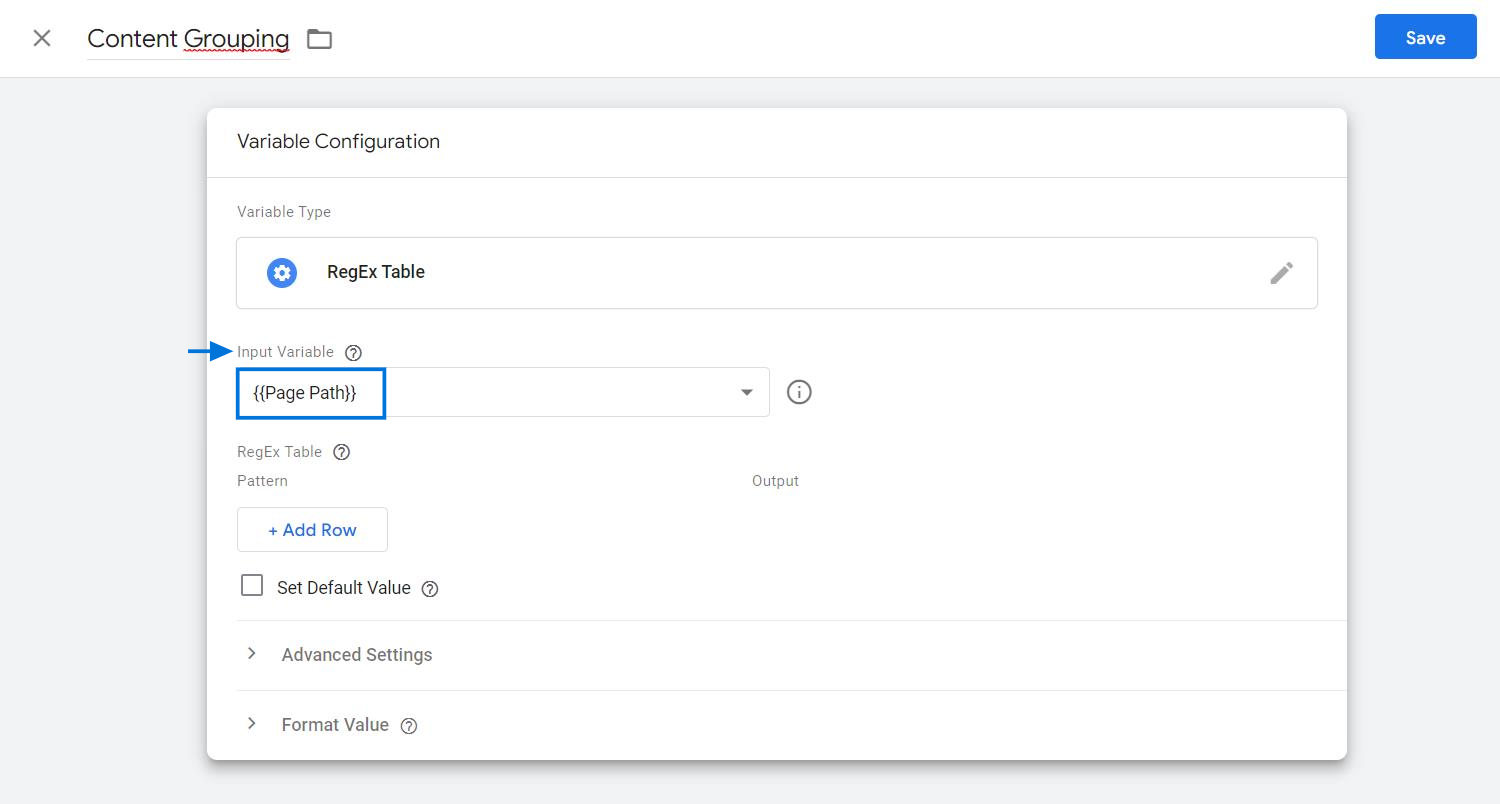
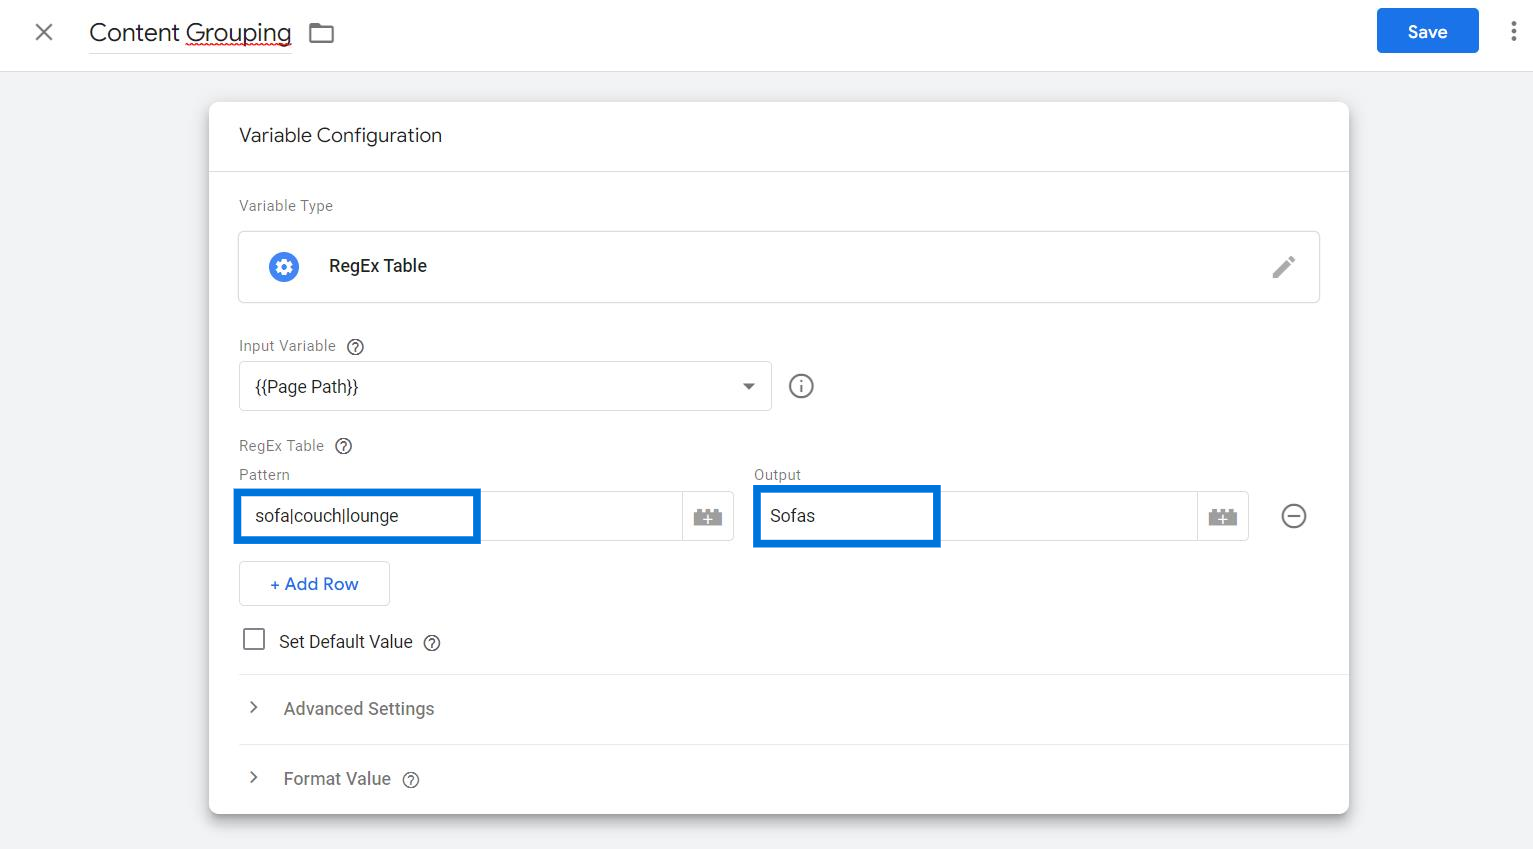
Click on "Add Row" and enter your input pattern and its corresponding output value.
Here, the input pattern will be the regular expression that we created in step 2 (sofa|couch|lounge), and the output will be the content group name (Sofas) corresponding to that expression.
Note: The pipe symbol use to separate the two and more words.
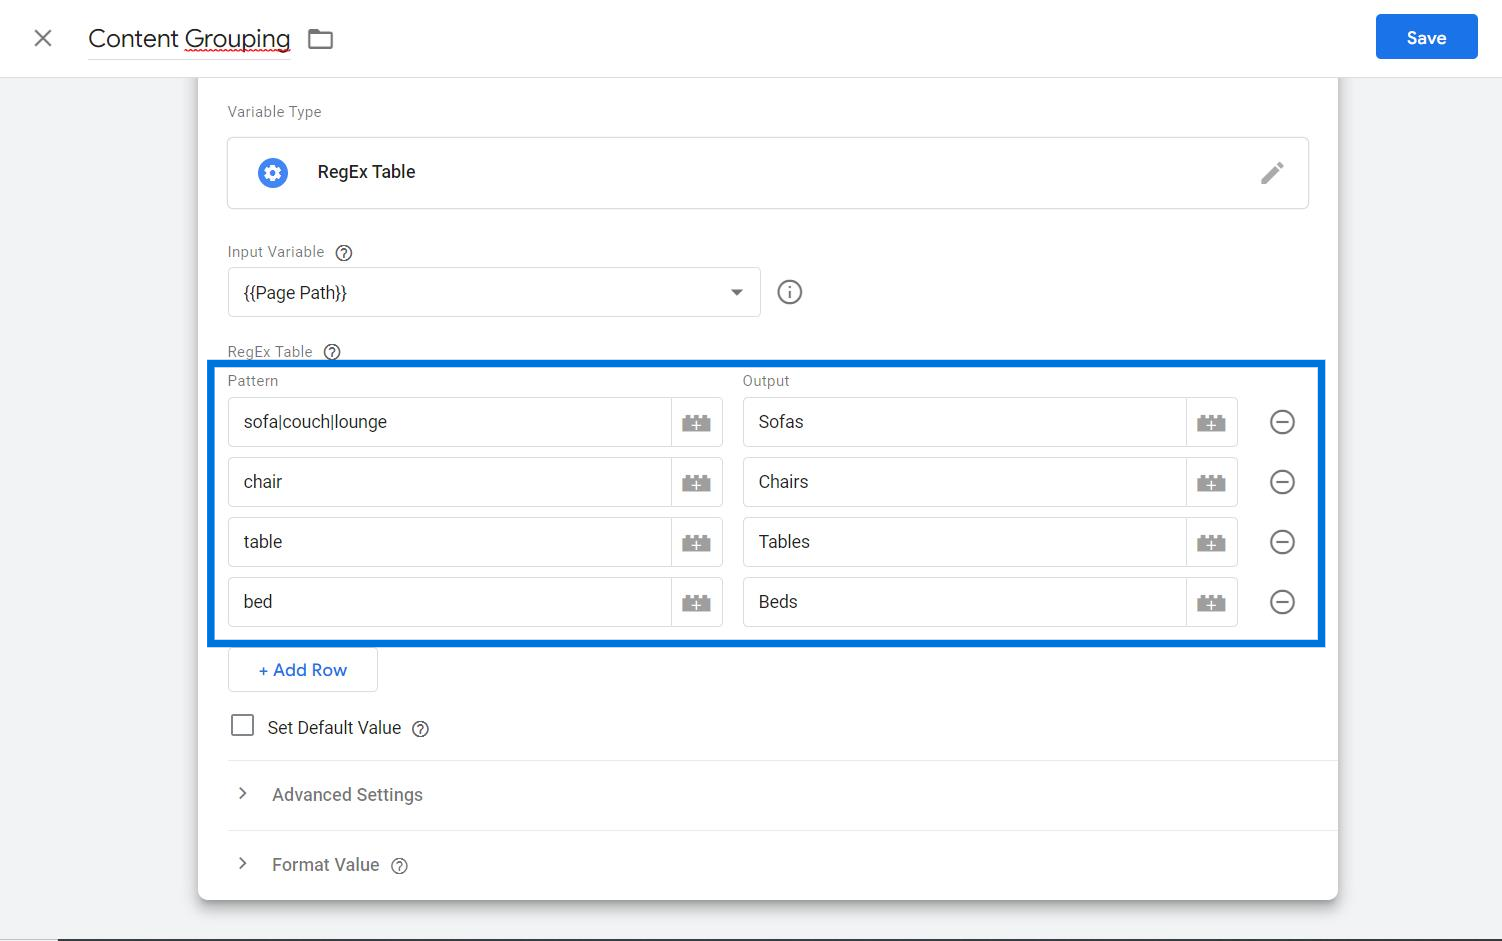
Enter all of your input patterns and their corresponding output values in the regex table, as shown in the screenshot.
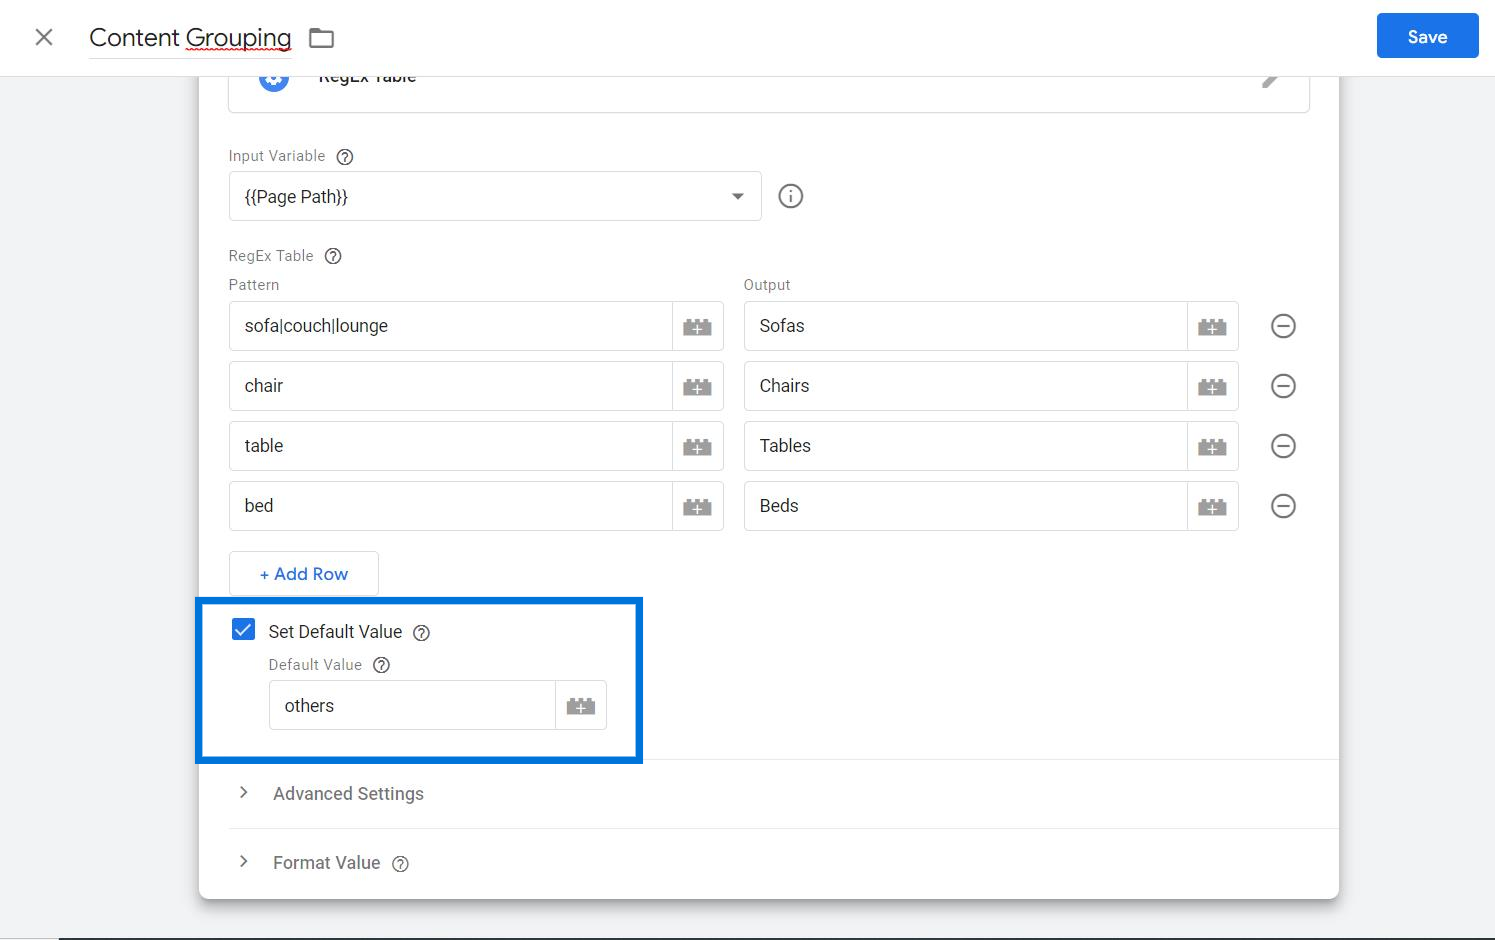
If you want to create a catch-all group for any pages that don't match your defined patterns, click on the "Set Default" checkbox and type the name of your catch-all group (e.g. "Others").
In the advanced settings area, you'll see several checkboxes.
- Uncheck the 'Full matches only' checkbox in the regex table to allow partial matches.
- Additionally, uncheck the 'Enable capture groups and replace functionality' checkbox, as Google recommends doing so when 'Full matches only' is unchecked.
- For a case-insensitive match, make sure to leave the 'Ignore case' checkbox checked.
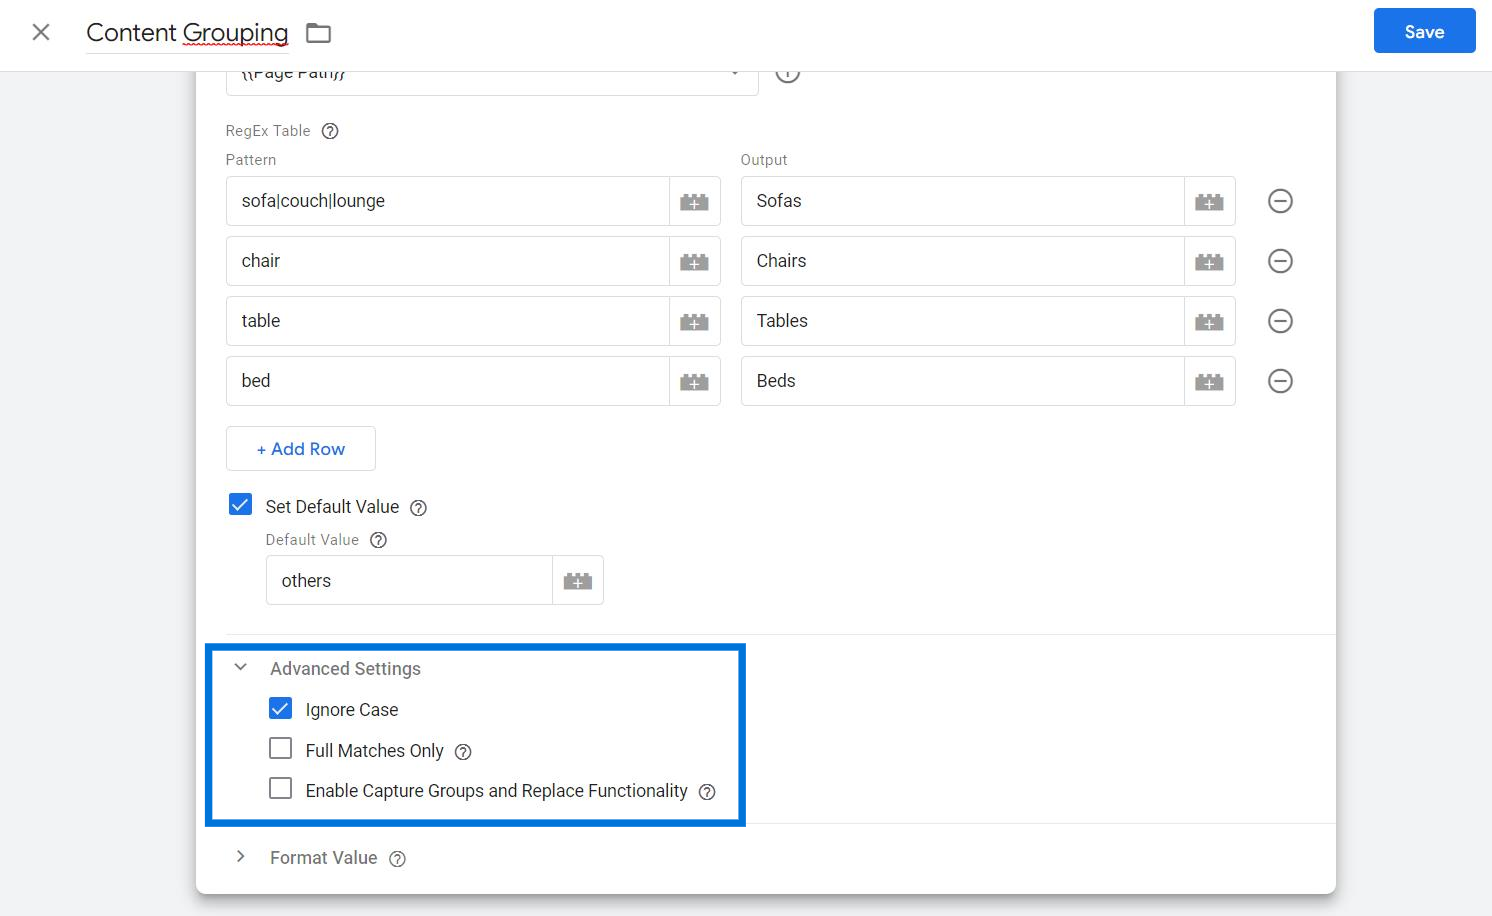
Click on the "Save" button to save the new regex table variable.
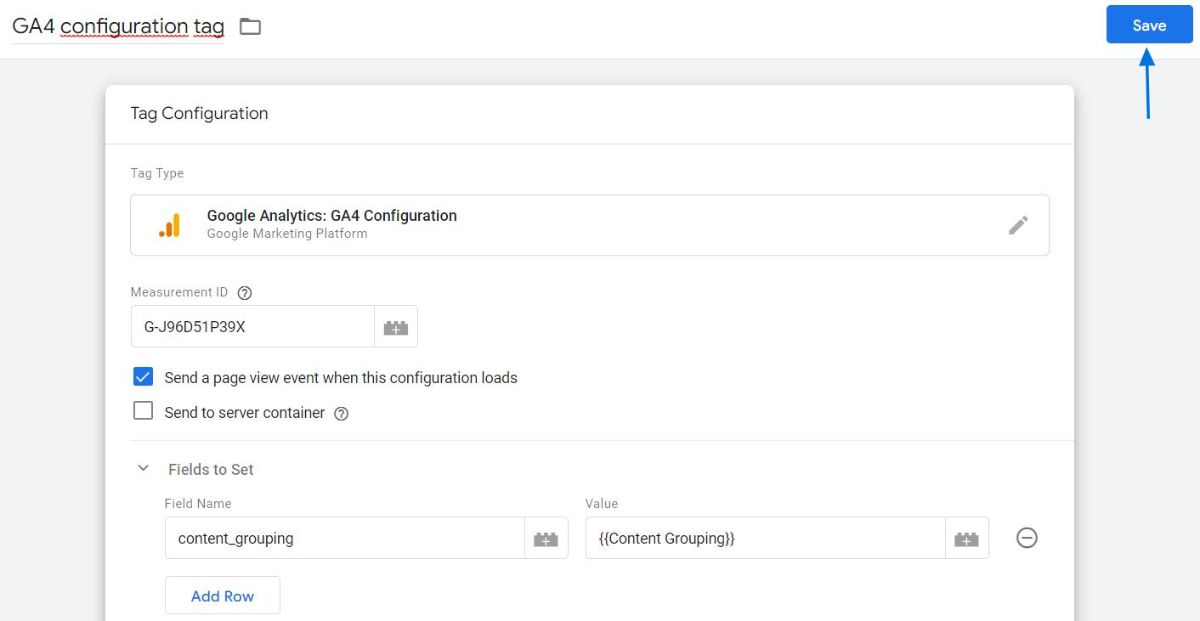
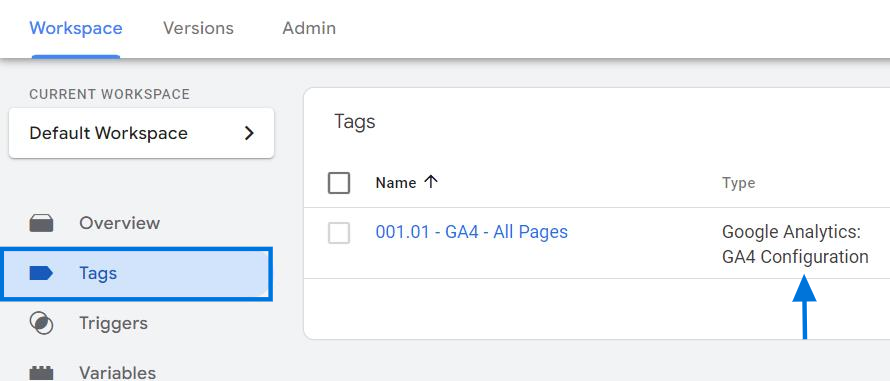
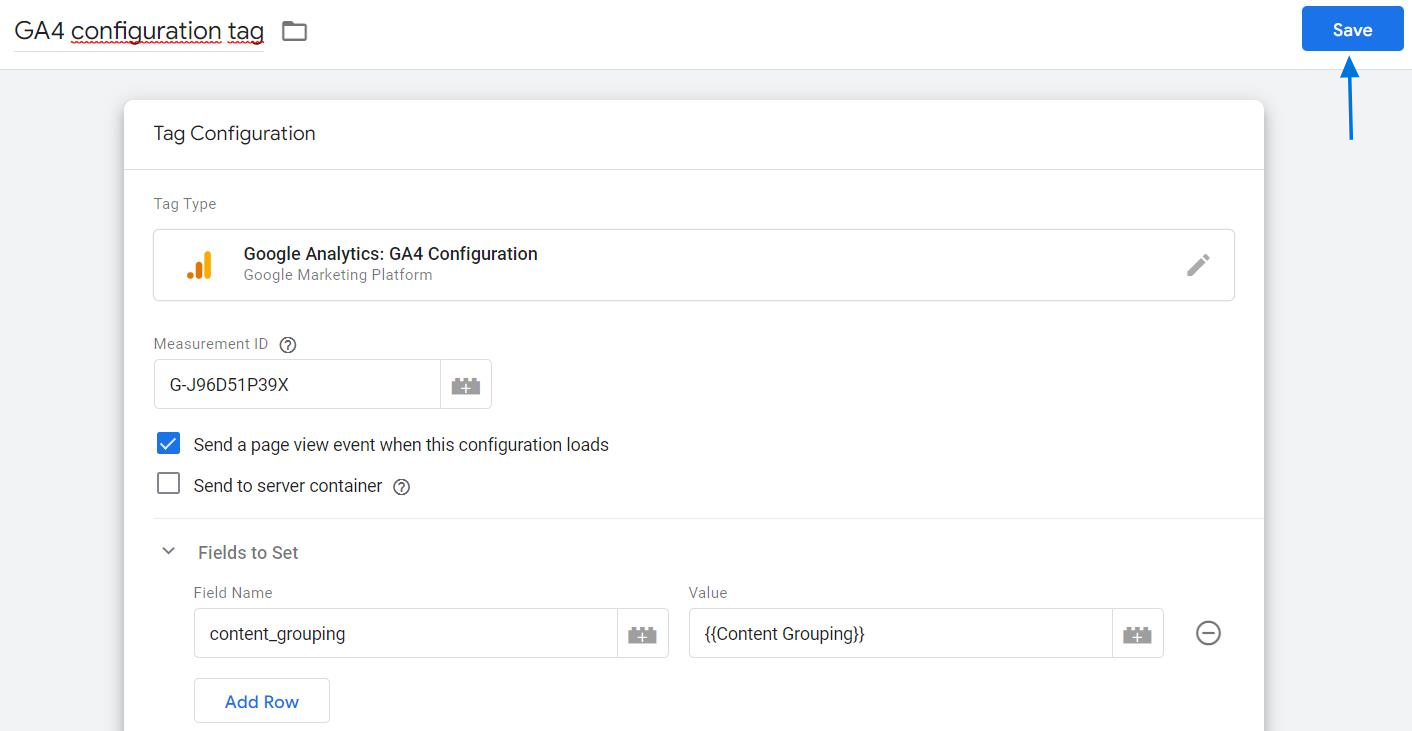
In the left-hand sidebar of the GTM, click on "Tags". Next, find your GA4 configuration tag and click on it.
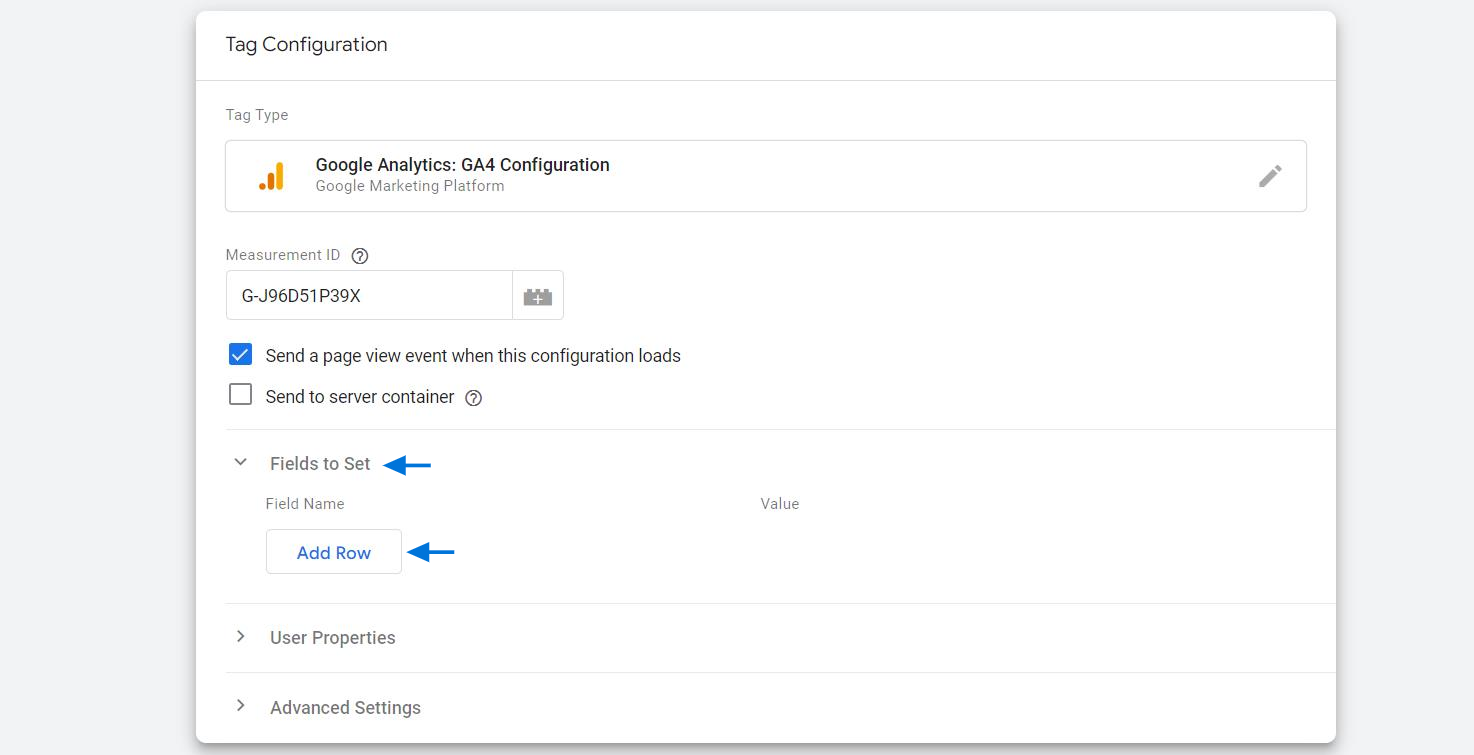
Click on the "Fields to Set" dropdown and click on "Add Row" to create a new field.
Here, you'll need to write the regex table name that we created before.
In our example, type "content_grouping" in the "Field Name" text box and "{{content grouping}}" in the "Value" text box.
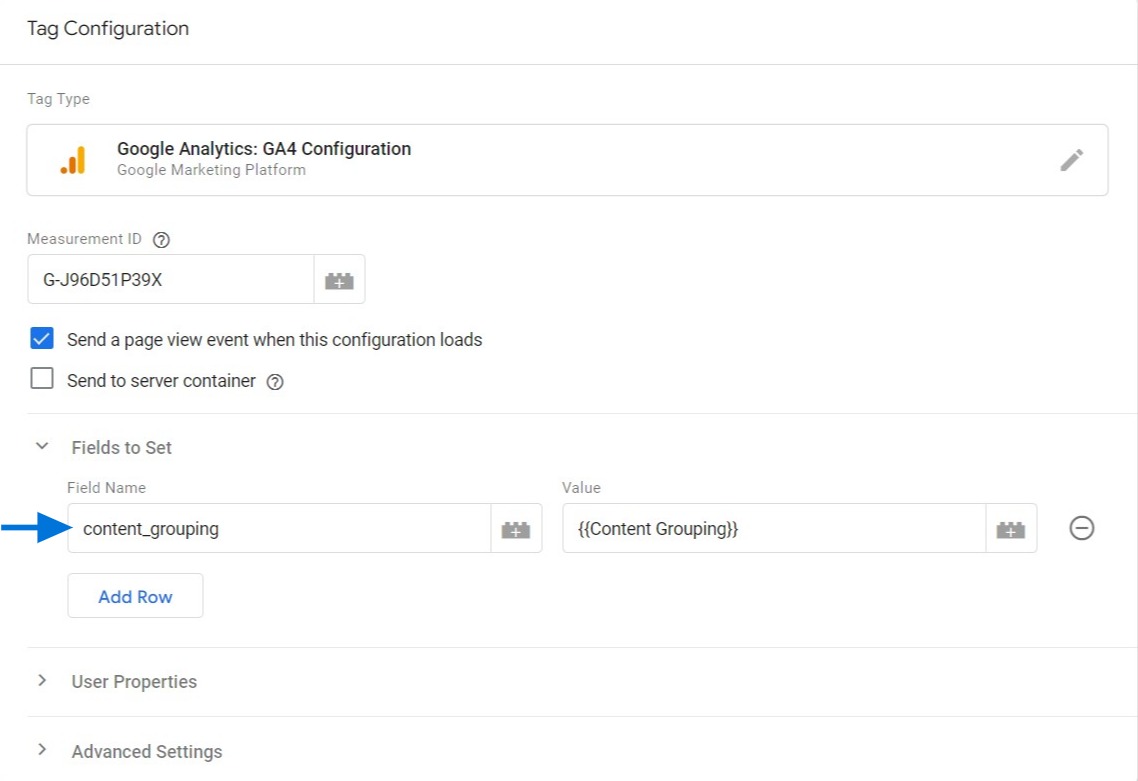
Click on the "Save" button.
How To Test New Regex Table Variable In Google Analytics 4?
Now, let's test the regex table variable to see if it is functioning properly or not.
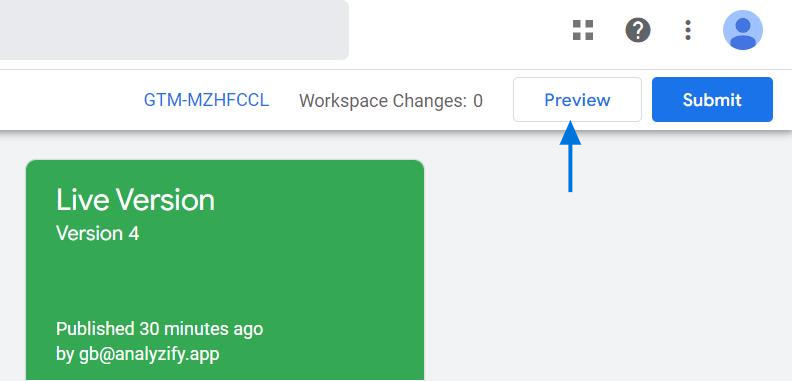
Click on the "Preview" button to enable the preview mode.
Enter the URL of your article page and click "Connect".
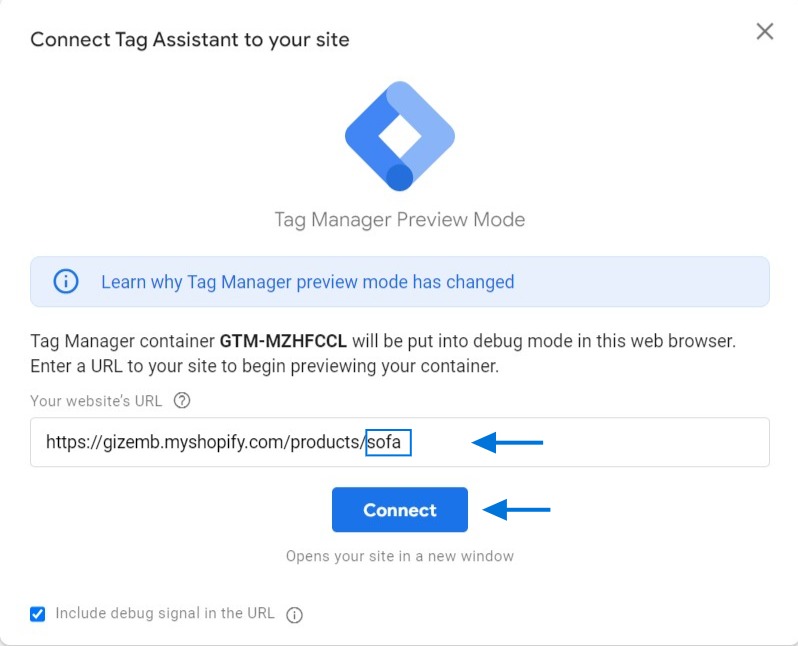
This will redirect you to the article page.
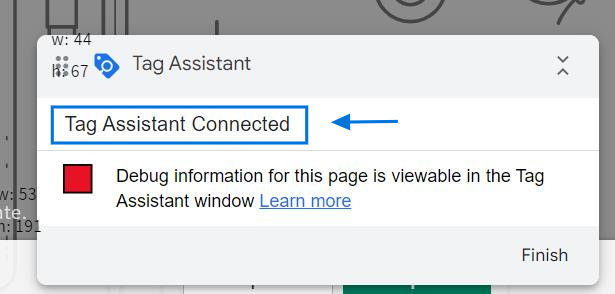
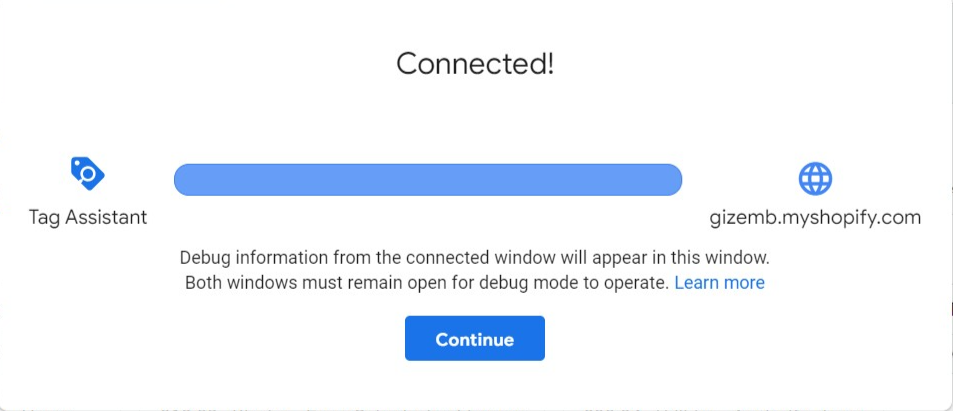
Navigate back to Google Tag Manager and click "Continue".
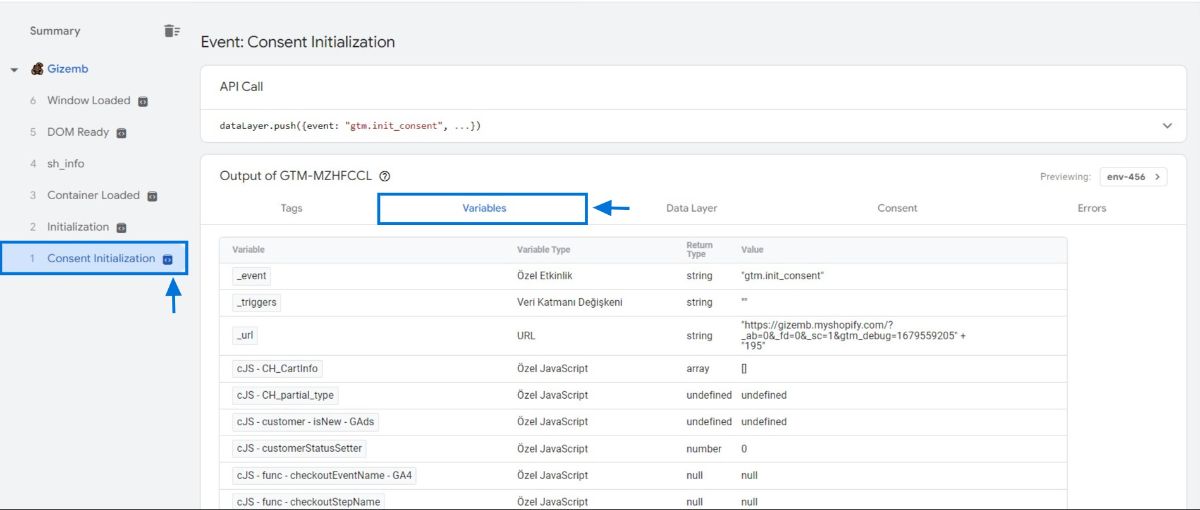
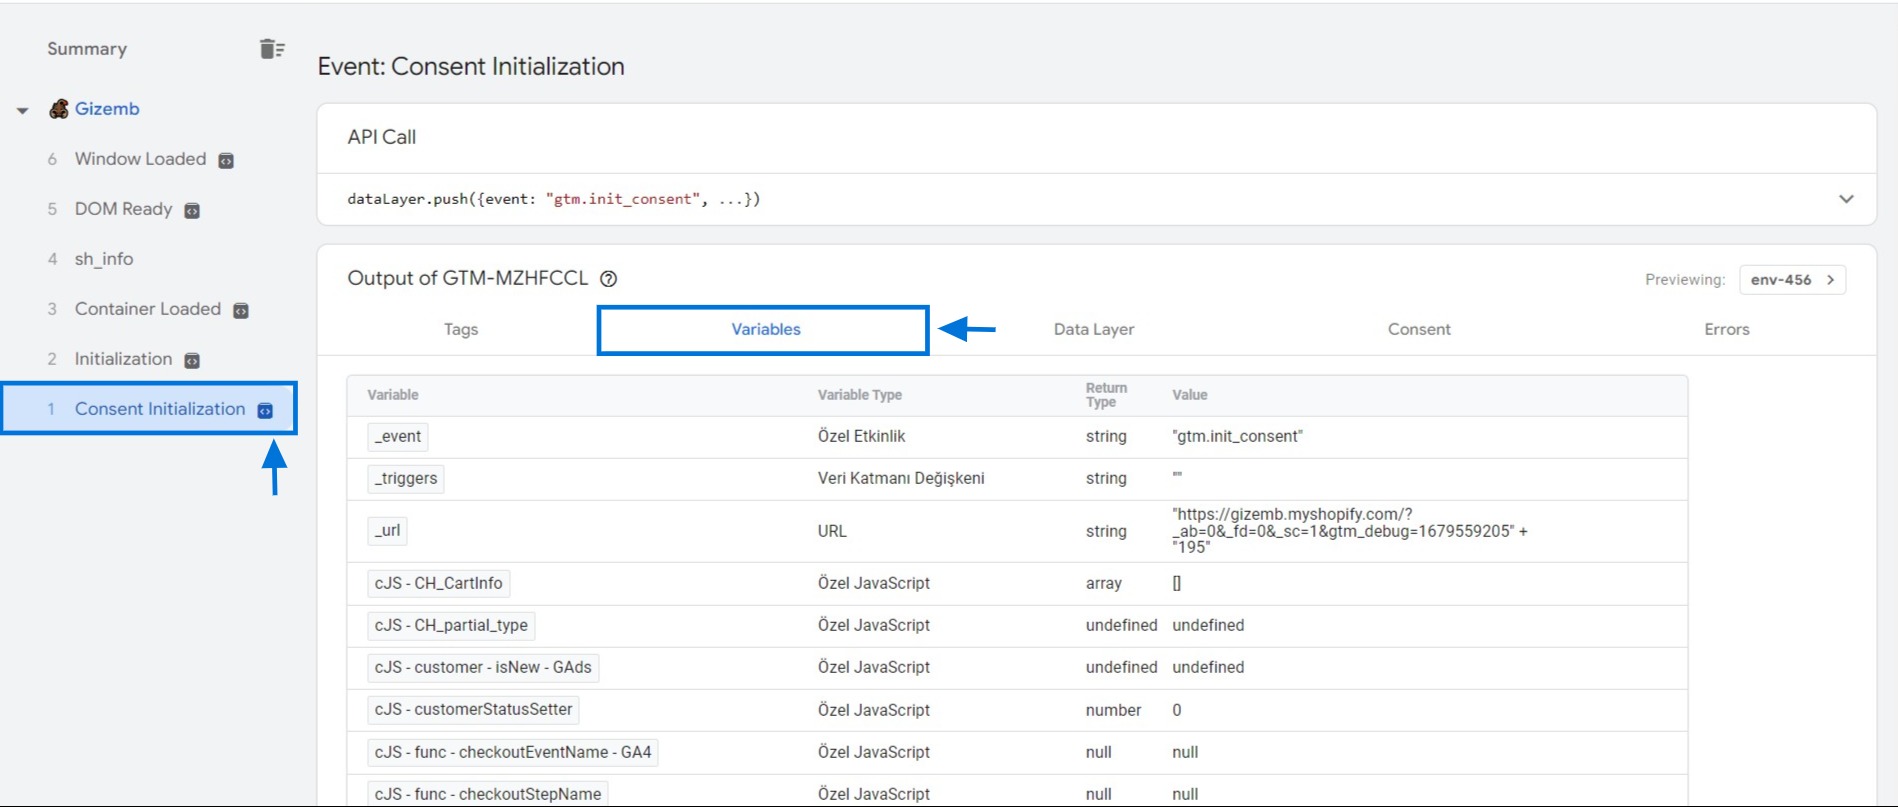
Click on "Consent Initialization" on the left-hand menu, then click on "Variables".
Scroll down to find the "Content Grouping" variable and check its value.
If the URL you entered in preview mode is related to the content grouping value, then everything is working properly.
Click on the "Cross" button to close and click "Stop Debugging".
Repeat these steps to test other articles and control their values to ensure that everything works properly.

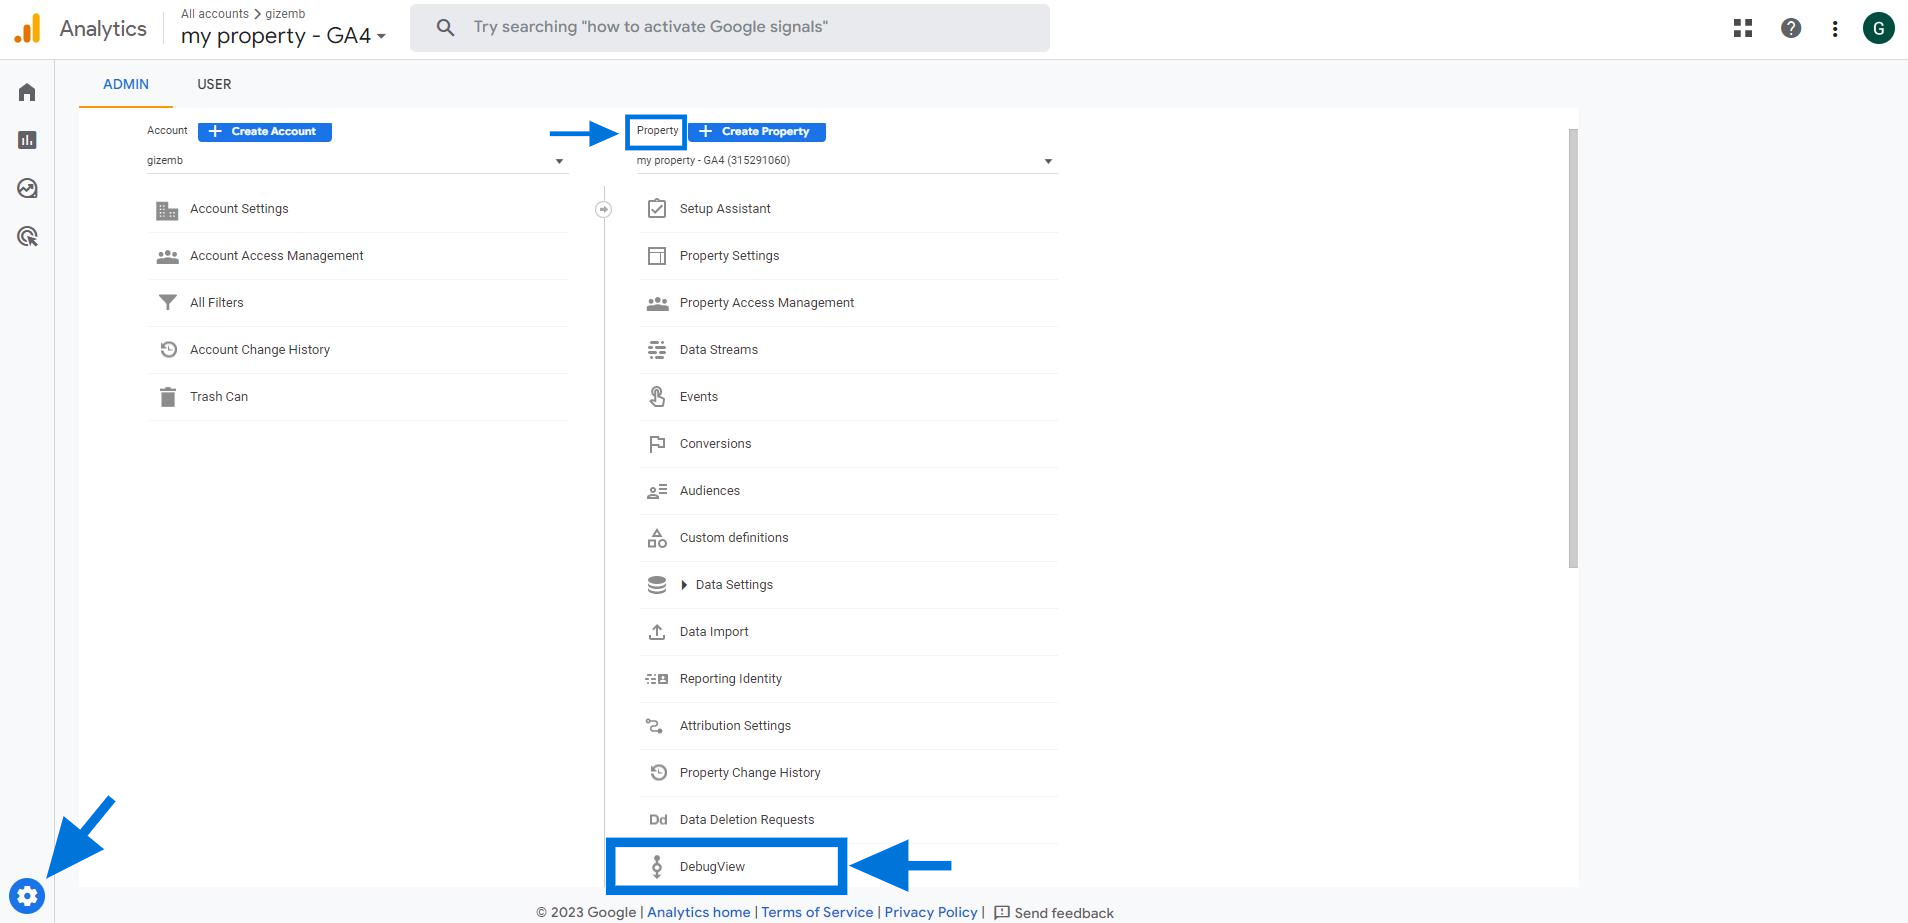
Login to your GA4 account. Click on the "Admin" icon in the bottom left corner of the screen. In the "Property" column, click on "DebugView" and then "pageview" event. Next, click on the "content_group" parameter to see the value of your content group. This will confirm that everything has been passed to GA4 properly.
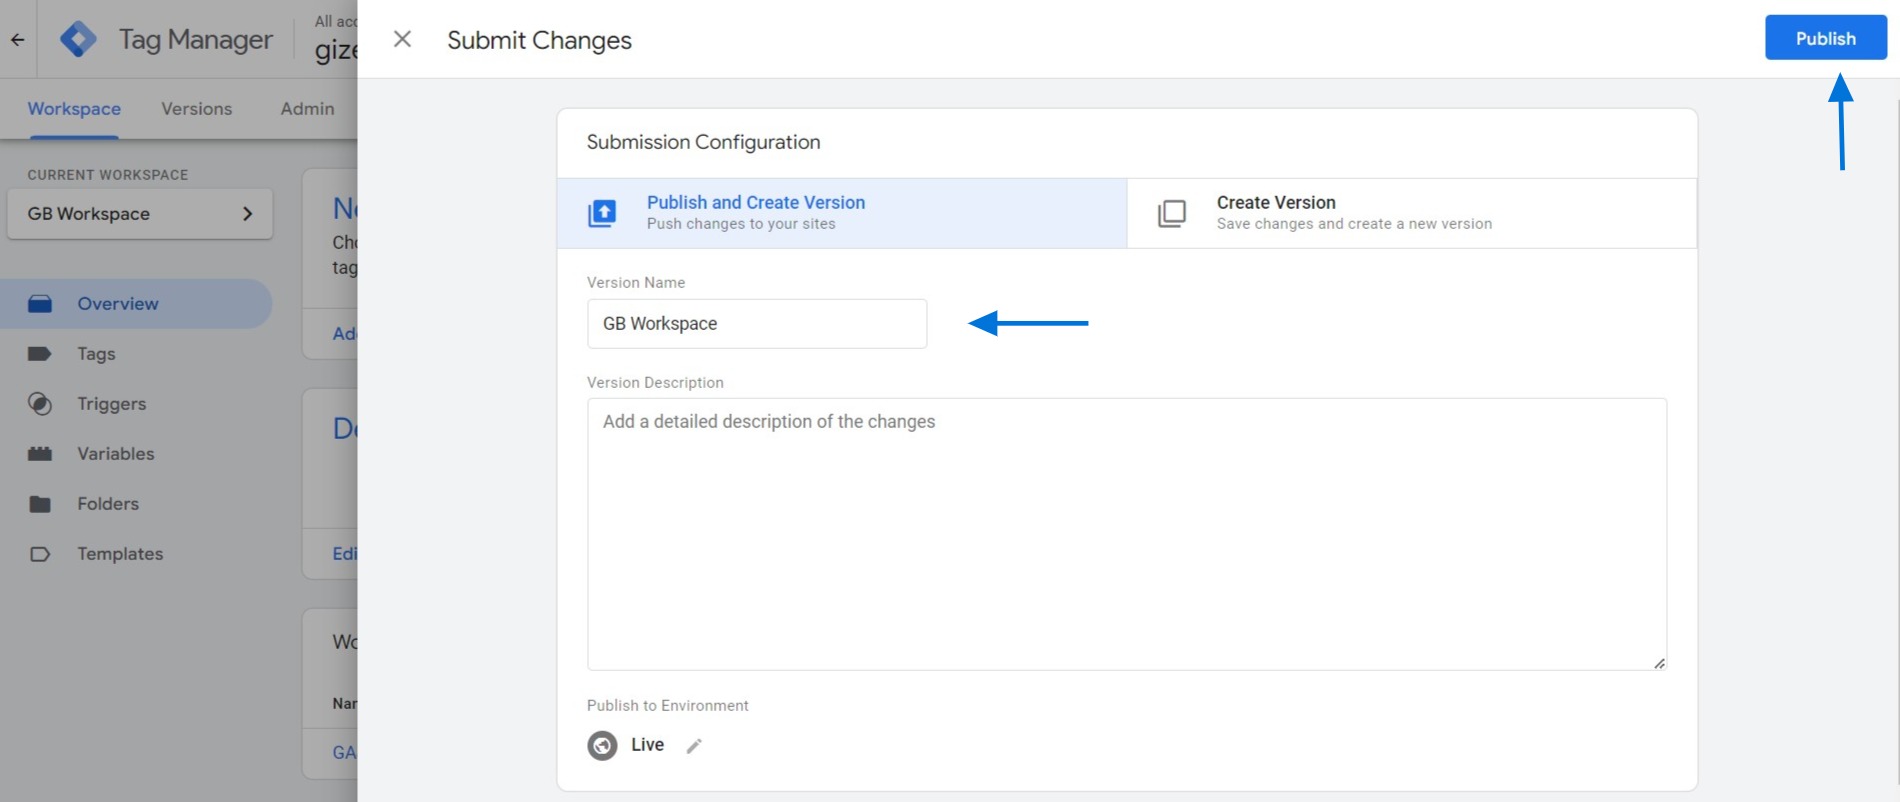
Go back to GTM, and click on the "Submit" button in the top-right corner. A side panel will open up. Give your work a new name, and click on "Publish" to complete the process.
How To Find Content Group Data In Google Analytics 4?
Here are the steps to find Content Groups in Google Analytics 4:
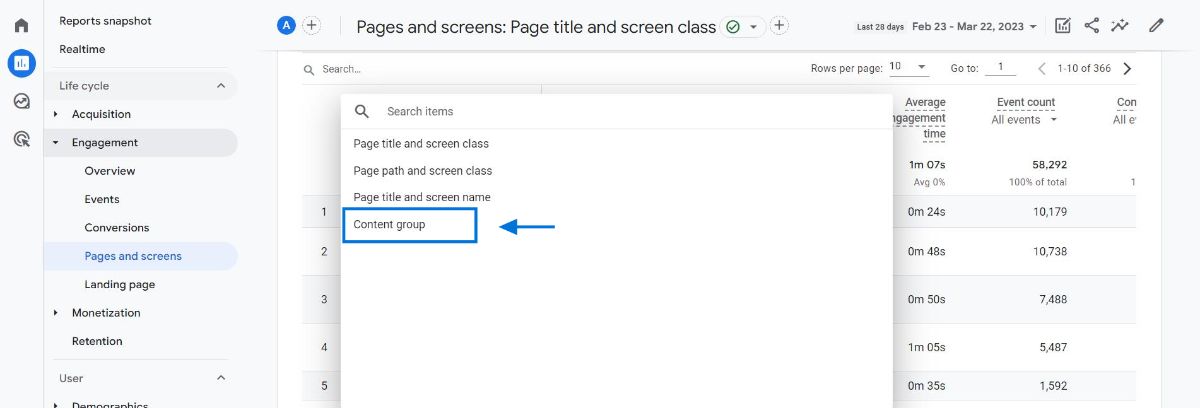
Login to your GA4 account.
In the left-hand menu, select "Reports". Next, under the "Life Cycle" section, choose "Engagement". Then, click on "Pages and Screens".
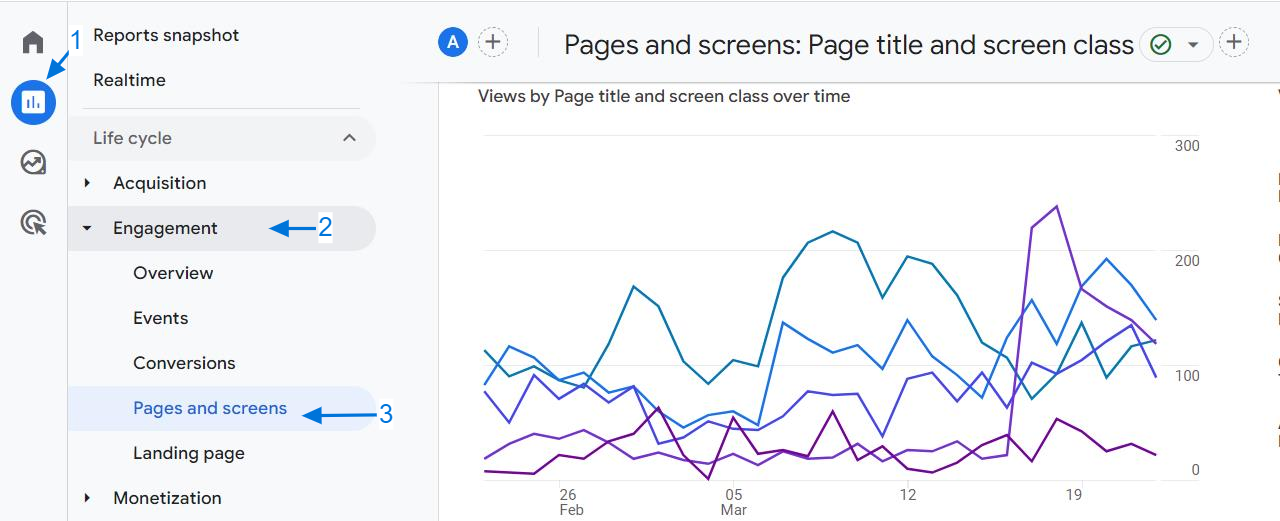
To view the content group data, click on the dimension drop-down menu in the data table.

Then, choose "Content Group" to see the data.
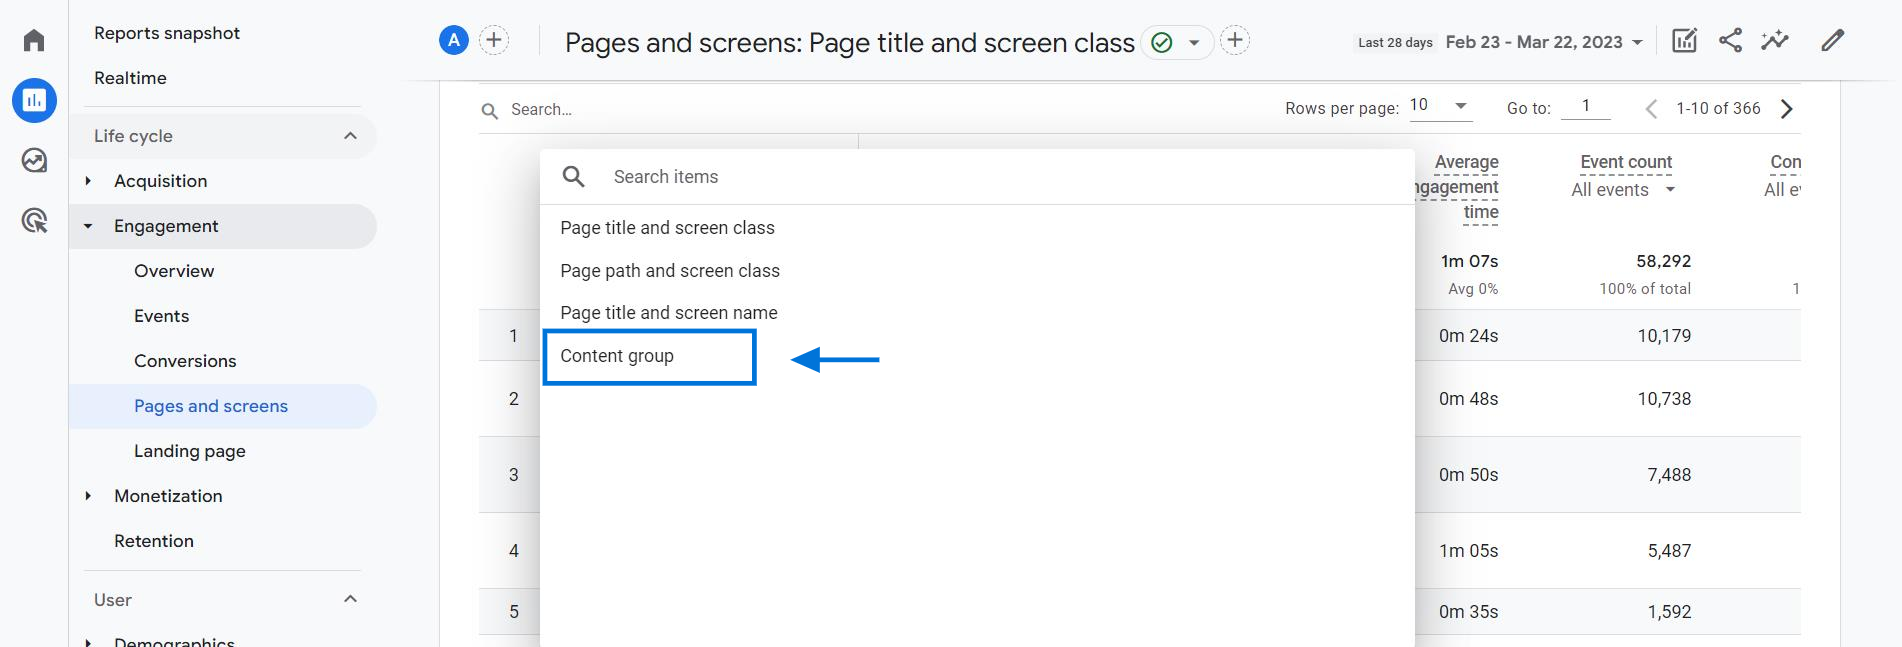
Please note that it is recommended to wait for 24 hours after setting up the content groups to view to data.
Conclusion: How to Create Content Grouping in GA4
Content grouping in GA4 transforms how you analyze your website's performance by allowing you to view data at a category level rather than page by page.
By implementing the steps outlined in this guide, you can create meaningful segments that align with your business objectives, making it easier to identify trends and make decisions to improve user experience and conversion rates.
