If you want to gather additional information beyond automatically collected events and enhanced measurement events in Google Analytics 4, you need to set up custom events in GA4 using Google Tag Manager (GTM).
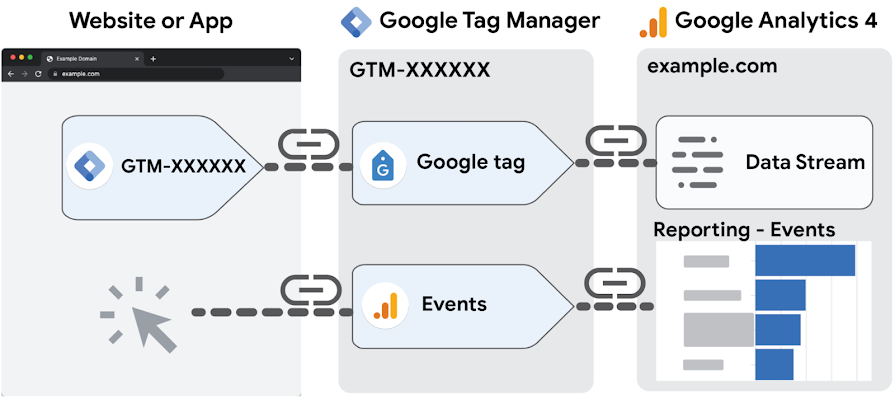
While it's impossible to explain all possible custom events in a single guide, we will provide you with the general event setting rules and reasoning along with examples.
By following our step-by-step guide, you will understand how you can create your own custom events using Google Tag Manager (GTM) according to your specific requirements.
Before you begin, make sure you have already completed the following steps:
Please note that you must have access to the GTM container and the Editor (or above) role to the Google Analytics 4 account for the website.
In addition, using Tag Assistant to debug will be helpful in the following steps, so you can install chrome extension here .
GA4 Event Tracking with GTM
To send any custom event to a Google Analytics 4 property, in theory you need to apply these steps:
1. Create a GA4 Event Tag
Access your Google Tag Manager account and open the desired container. Create a new tag and select the Google Analytics: GA4 Event option.
-
- To create a recommended event, you have to use one of the predefined event names (e.g. add_to_cart).
- If you want to create a special event that is NOT listed in recommended event names, enter a new custom event name (examples names: signup_newsletter, button_clicks, reviewlink_clicks).
2. Create a Trigger
Define the conditions for when you want the event to be sent. This could include specific page views, clicks, form submissions, or other user interactions. Choose the appropriate trigger type to fire the event.
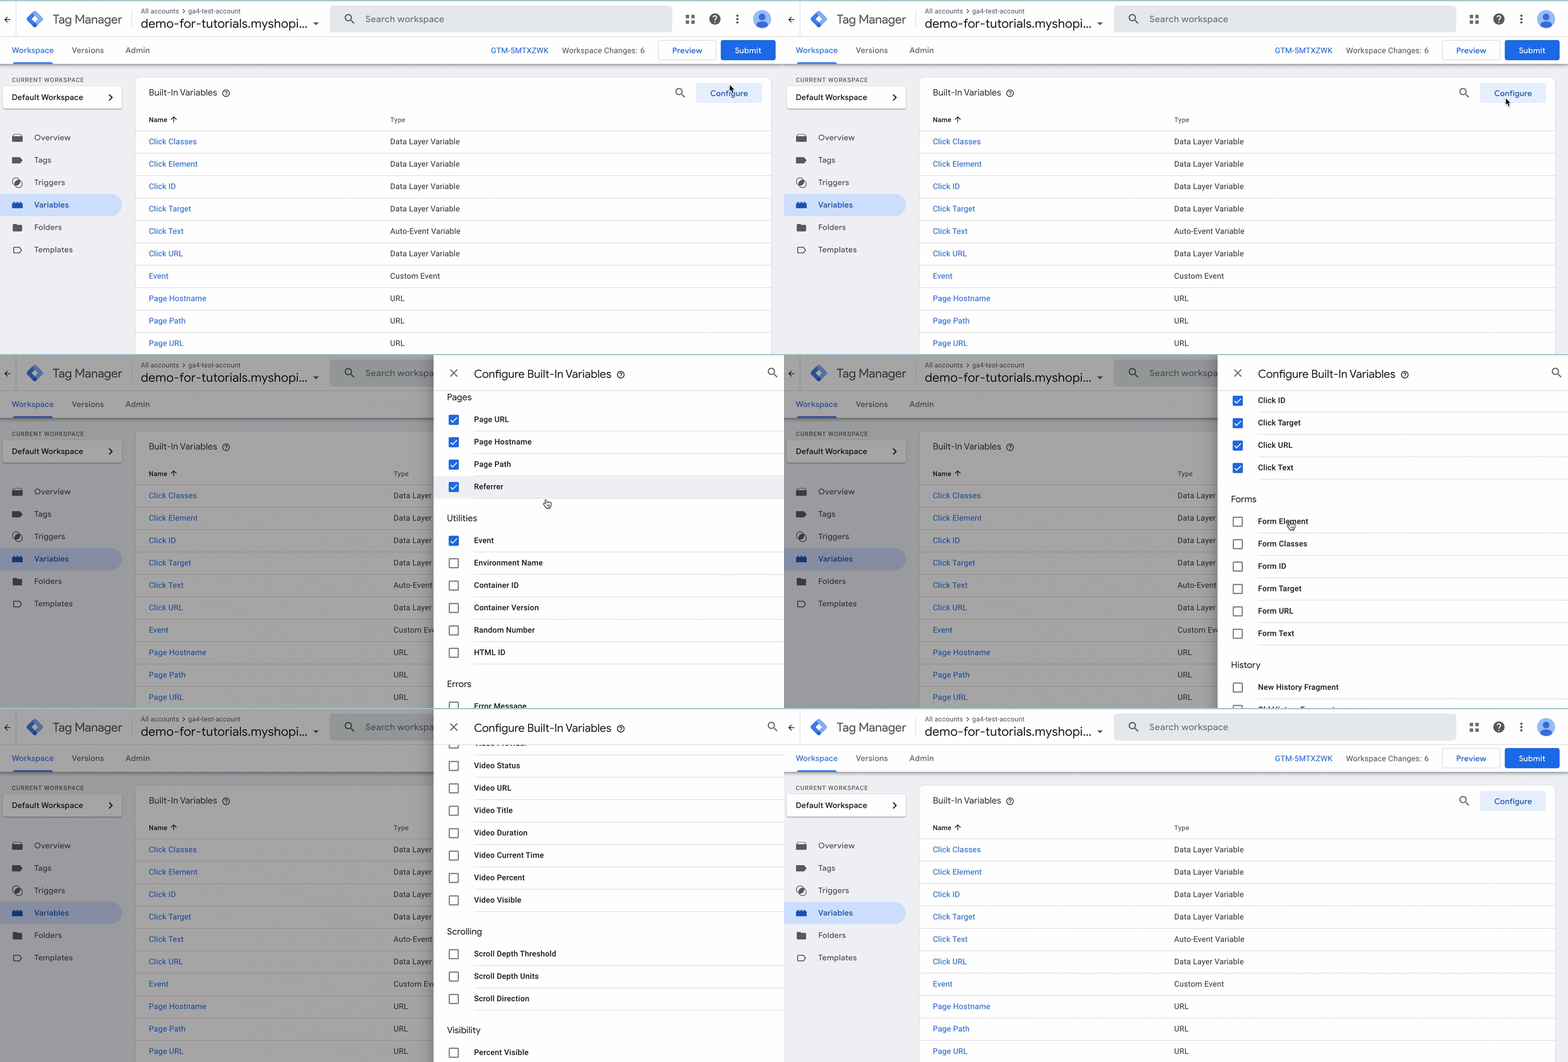
- Before configuring a trigger , make sure the related variables are activated. For example, if you want to track videos on your website, you should enable video variables. In our case, since we are creating a specific click event, we will activate all click variables. As a side note, the variables used in this example are built-in GTM variables .
Here's how you can do it:
-
- Navigate to the Variables section.
- Look for the variables related to your custom event tracking and enable them by clicking on the variable and selecting the checkbox.
3. Configure the GA4 Event Tag
Provide relevant information for the event, and customize the settings to match the specific event you want to track.
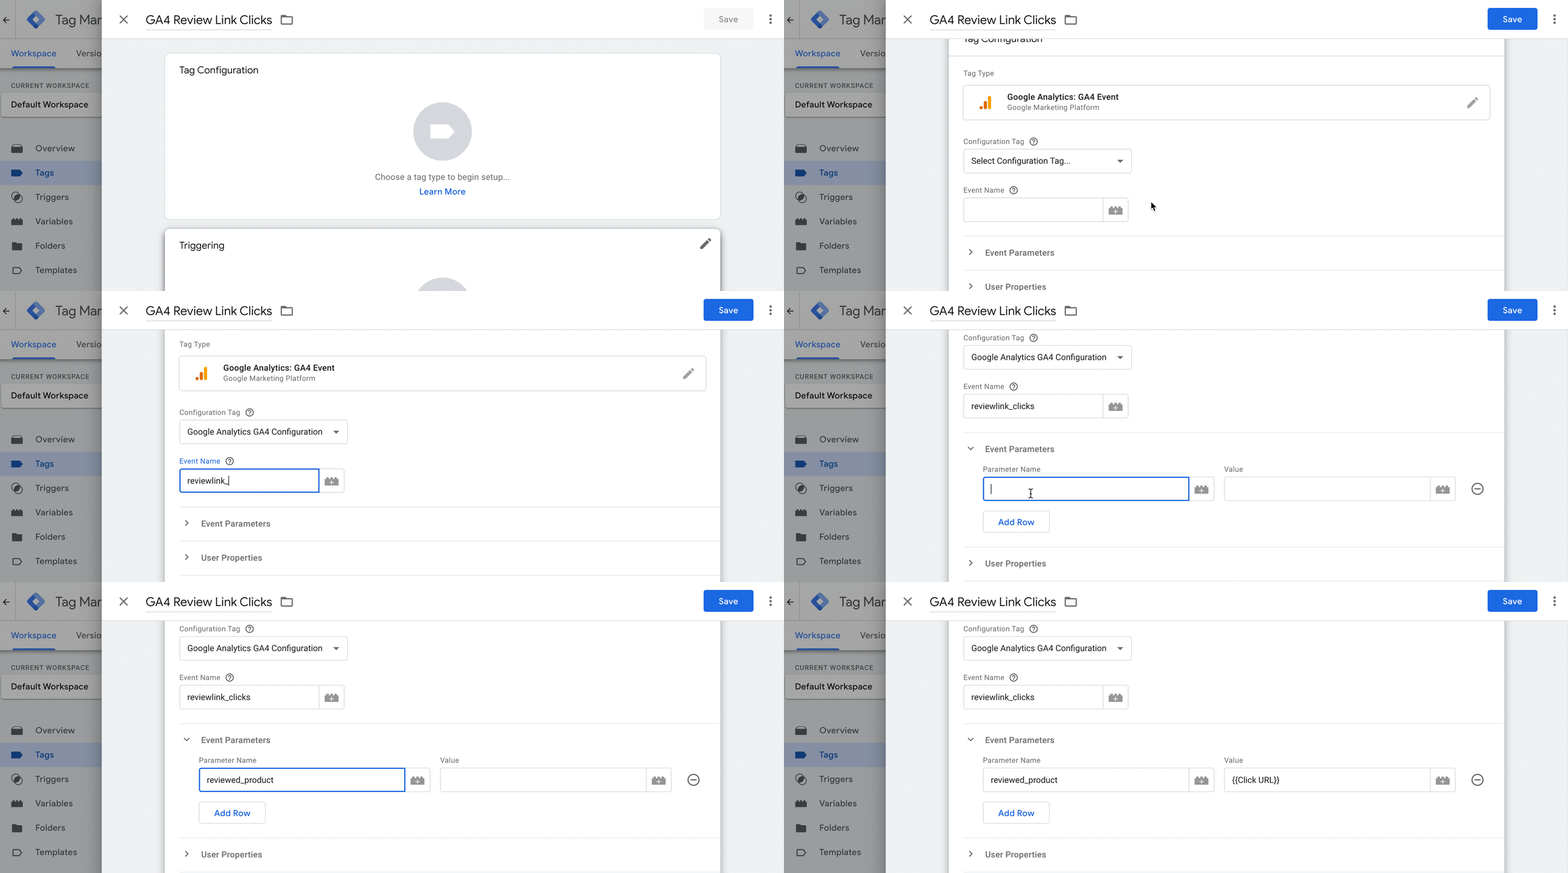
- For custom events, Google Analytics: GA4 Event will be your type of tag.
- Find a suitable name according to the user interaction you want to track.
- In this stage, you can adjust additional settings such as Event Parameters and User Properties. For instance, let's say you want to track clicks on certain review links for a specific product. When you configure event tag, you may want to send additional parameters to have that specific review links. Therefore, you will create Event Parameter as shown below. ( Note: You can decide the name of events and parameters).
4. Save and Publish
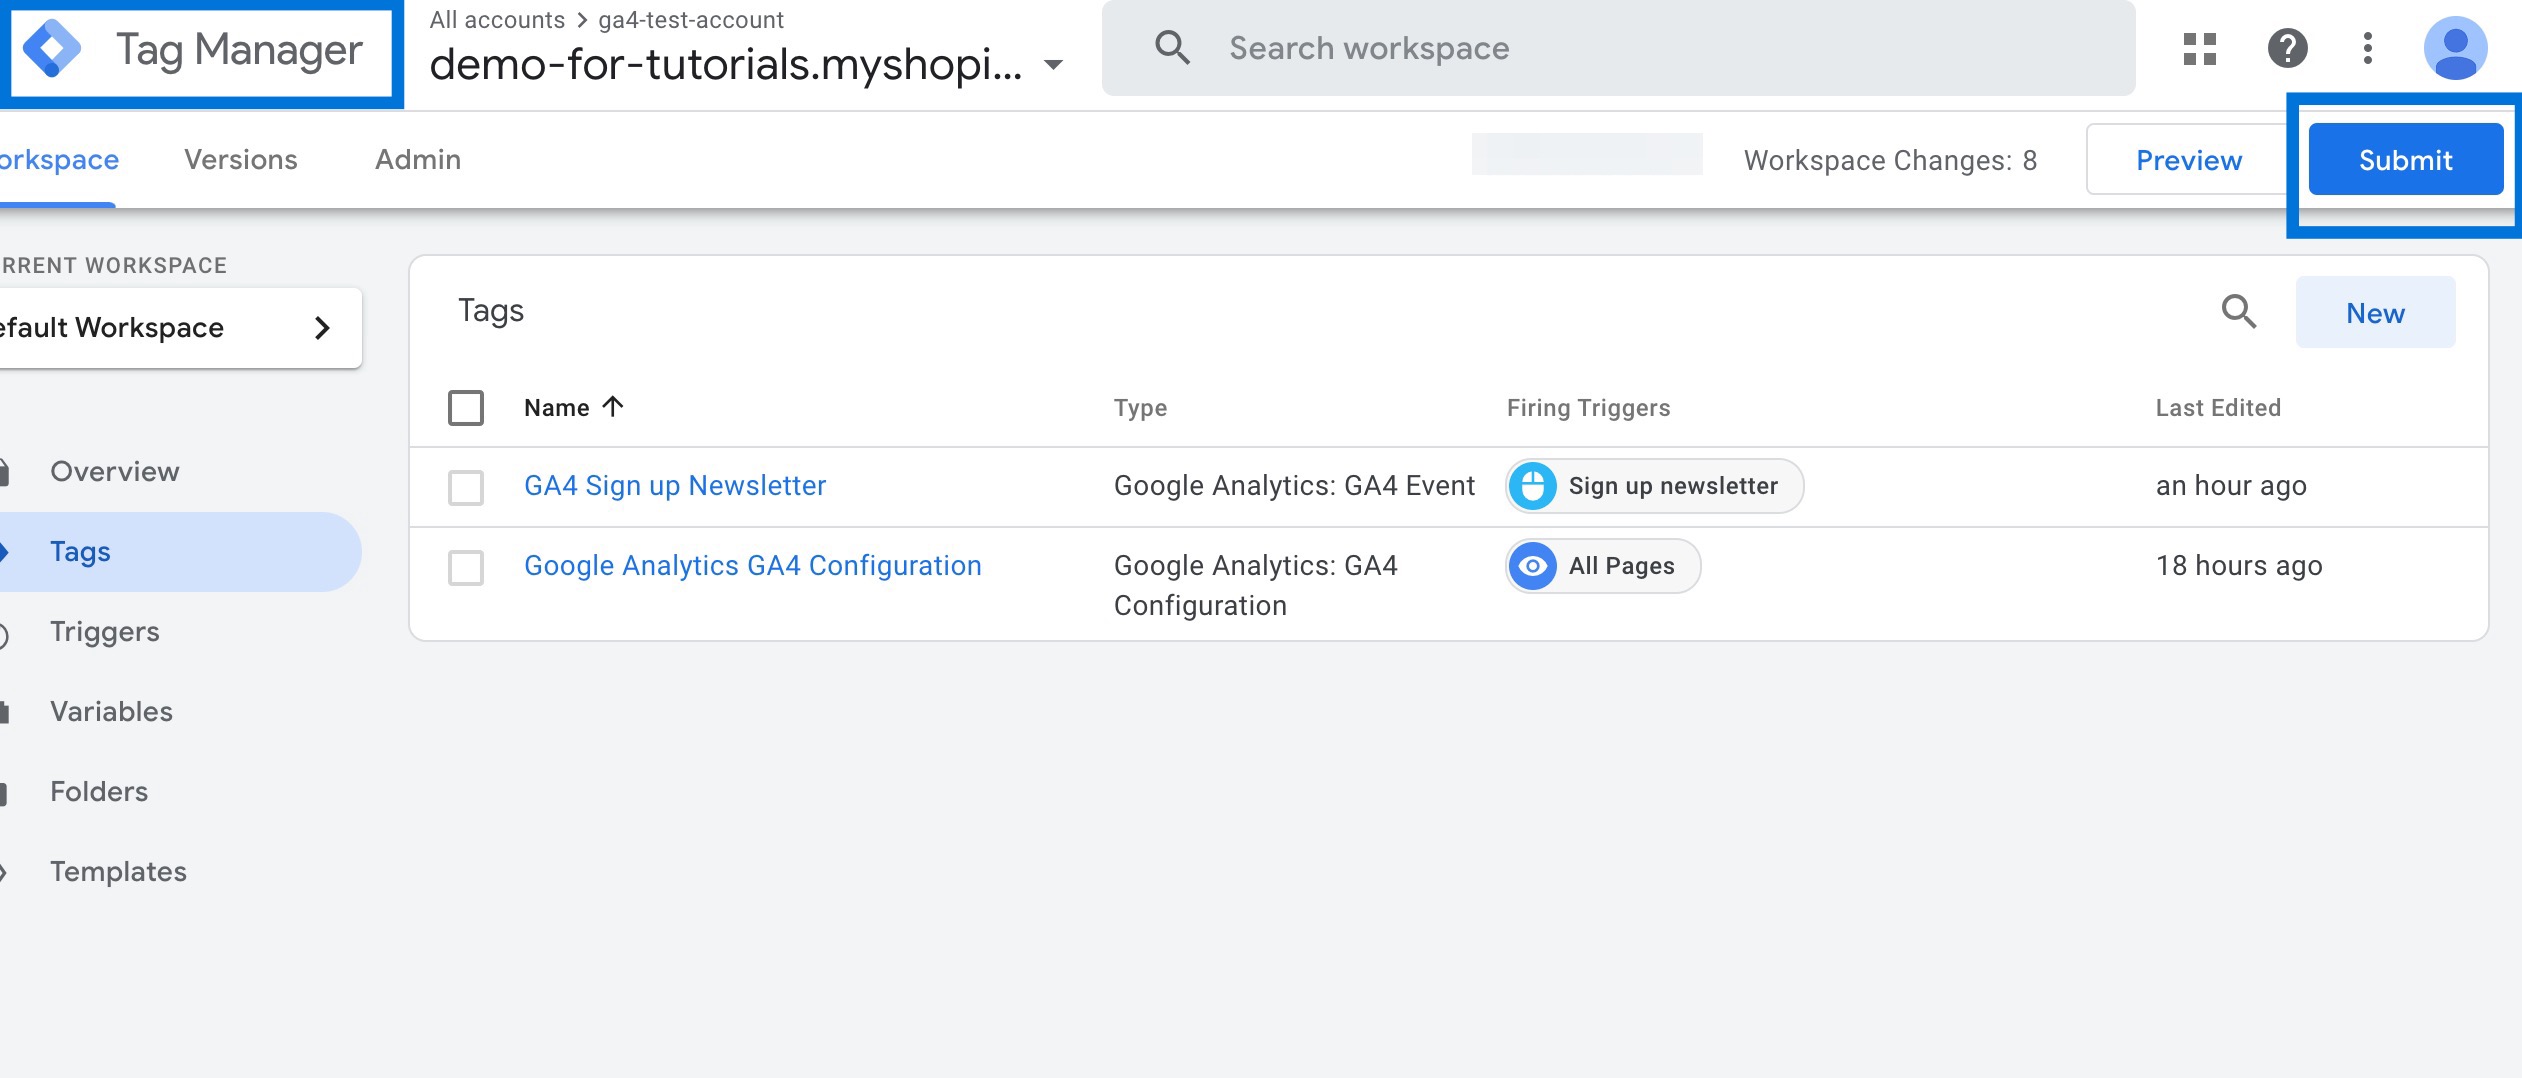
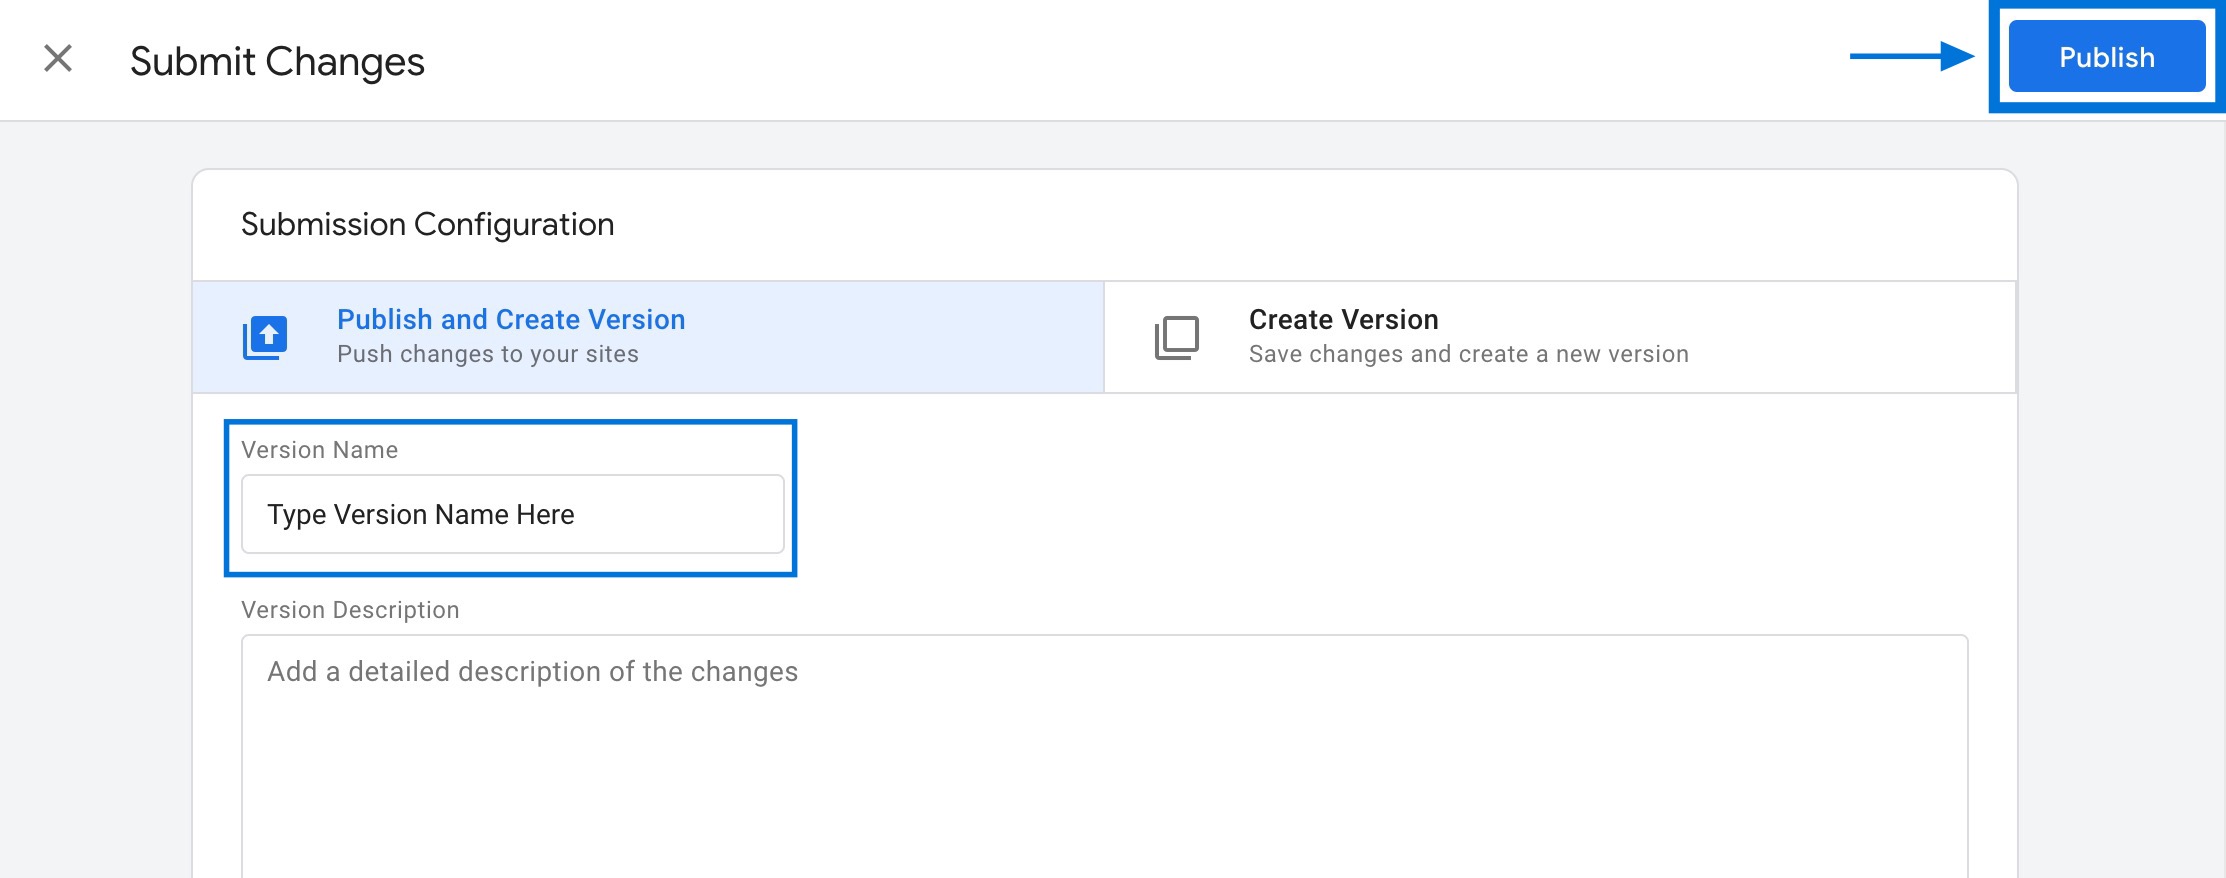
Lastly, you need to save and submit the changes in Google Tag Manager. You must publish the changes to ensure they track your website.
How to Create GA4 Event with GTM?
Let's walk through an example of creating a custom GA4 event using GTM.
Assume that we want to track clicks on a button to sign up for our newsletter on our website.
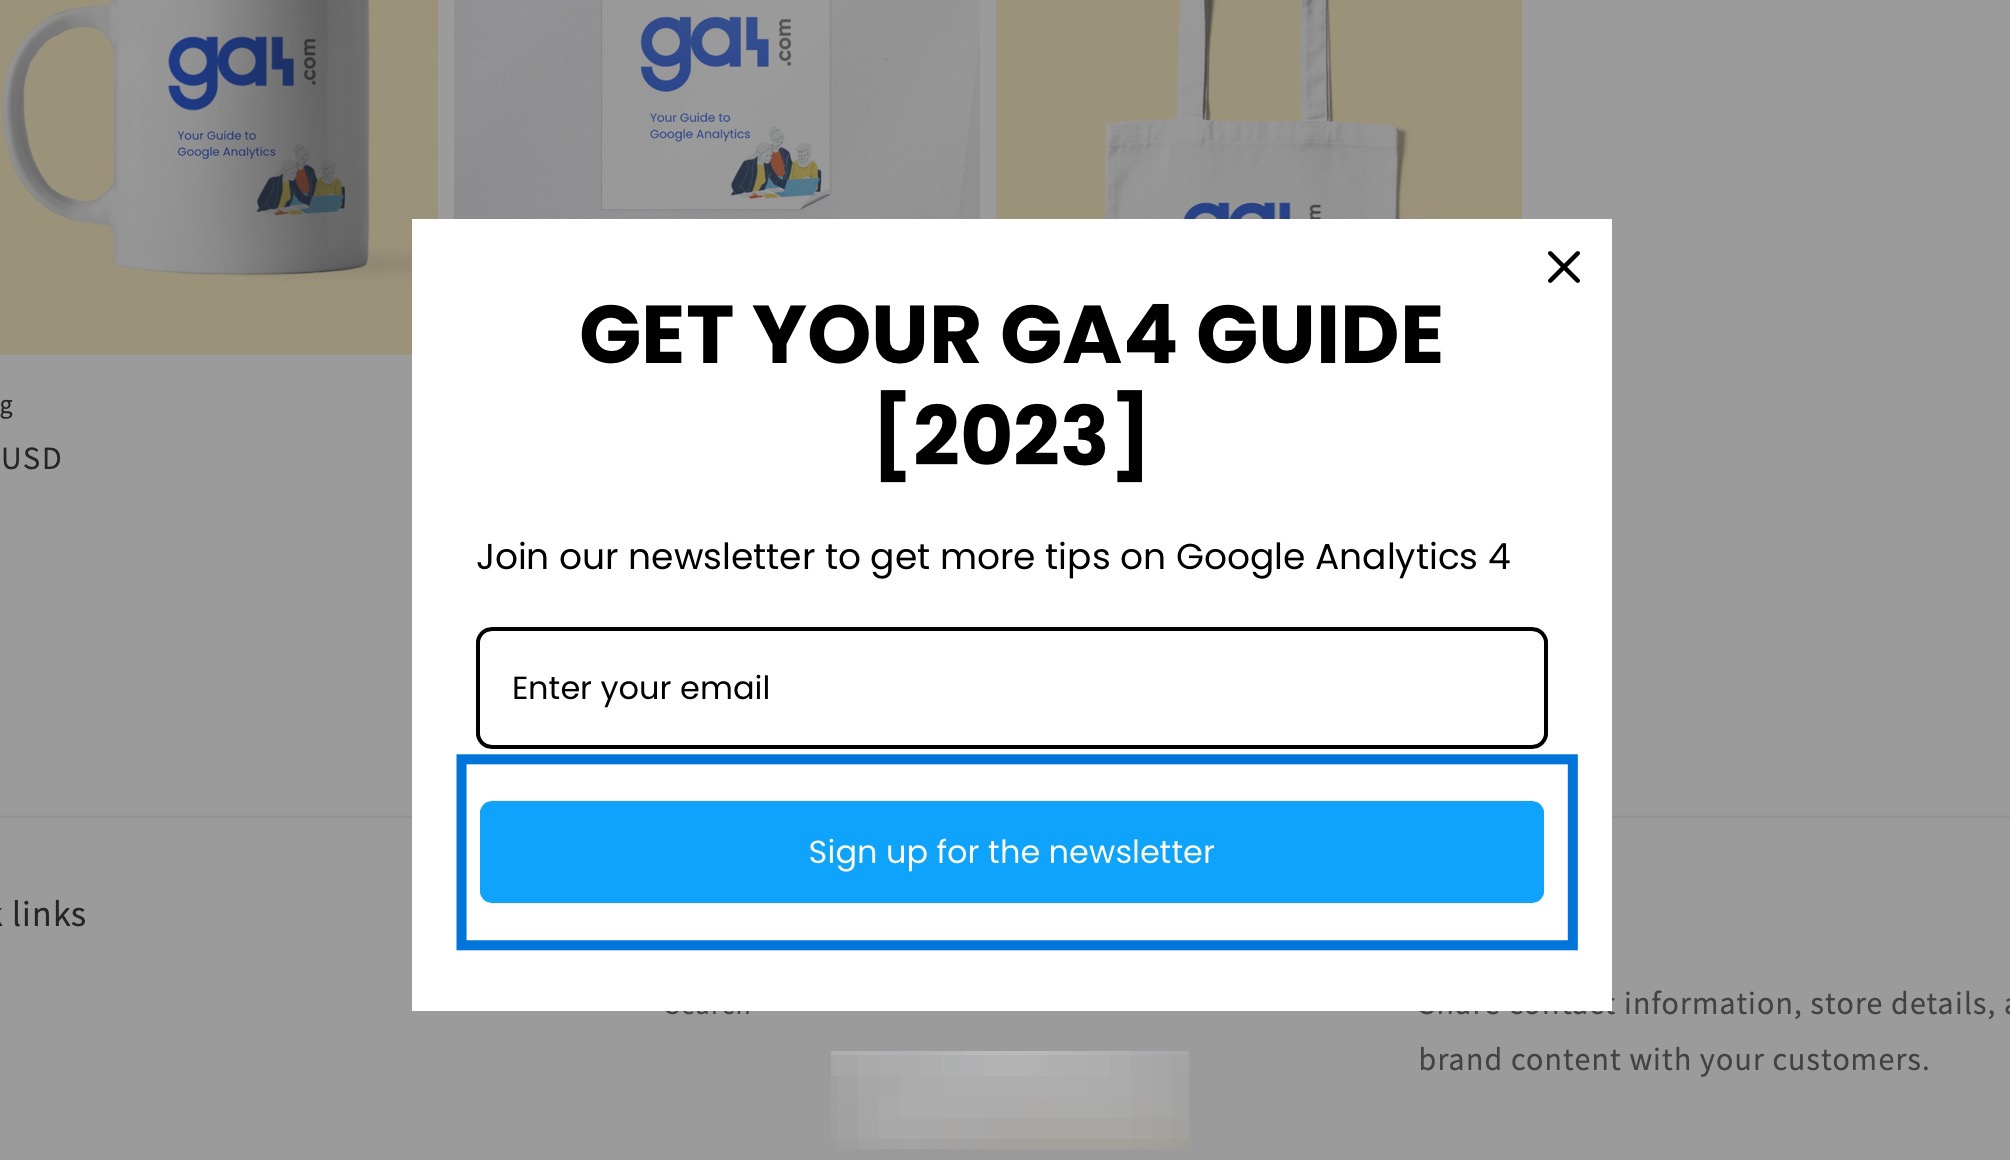
Here is how we can track clicks on this specific button step by step:
Go to Google Tag Manager and check Variables. You need to enable all the click variables.
As a side note, the variables used in this example are built-in GTM variables.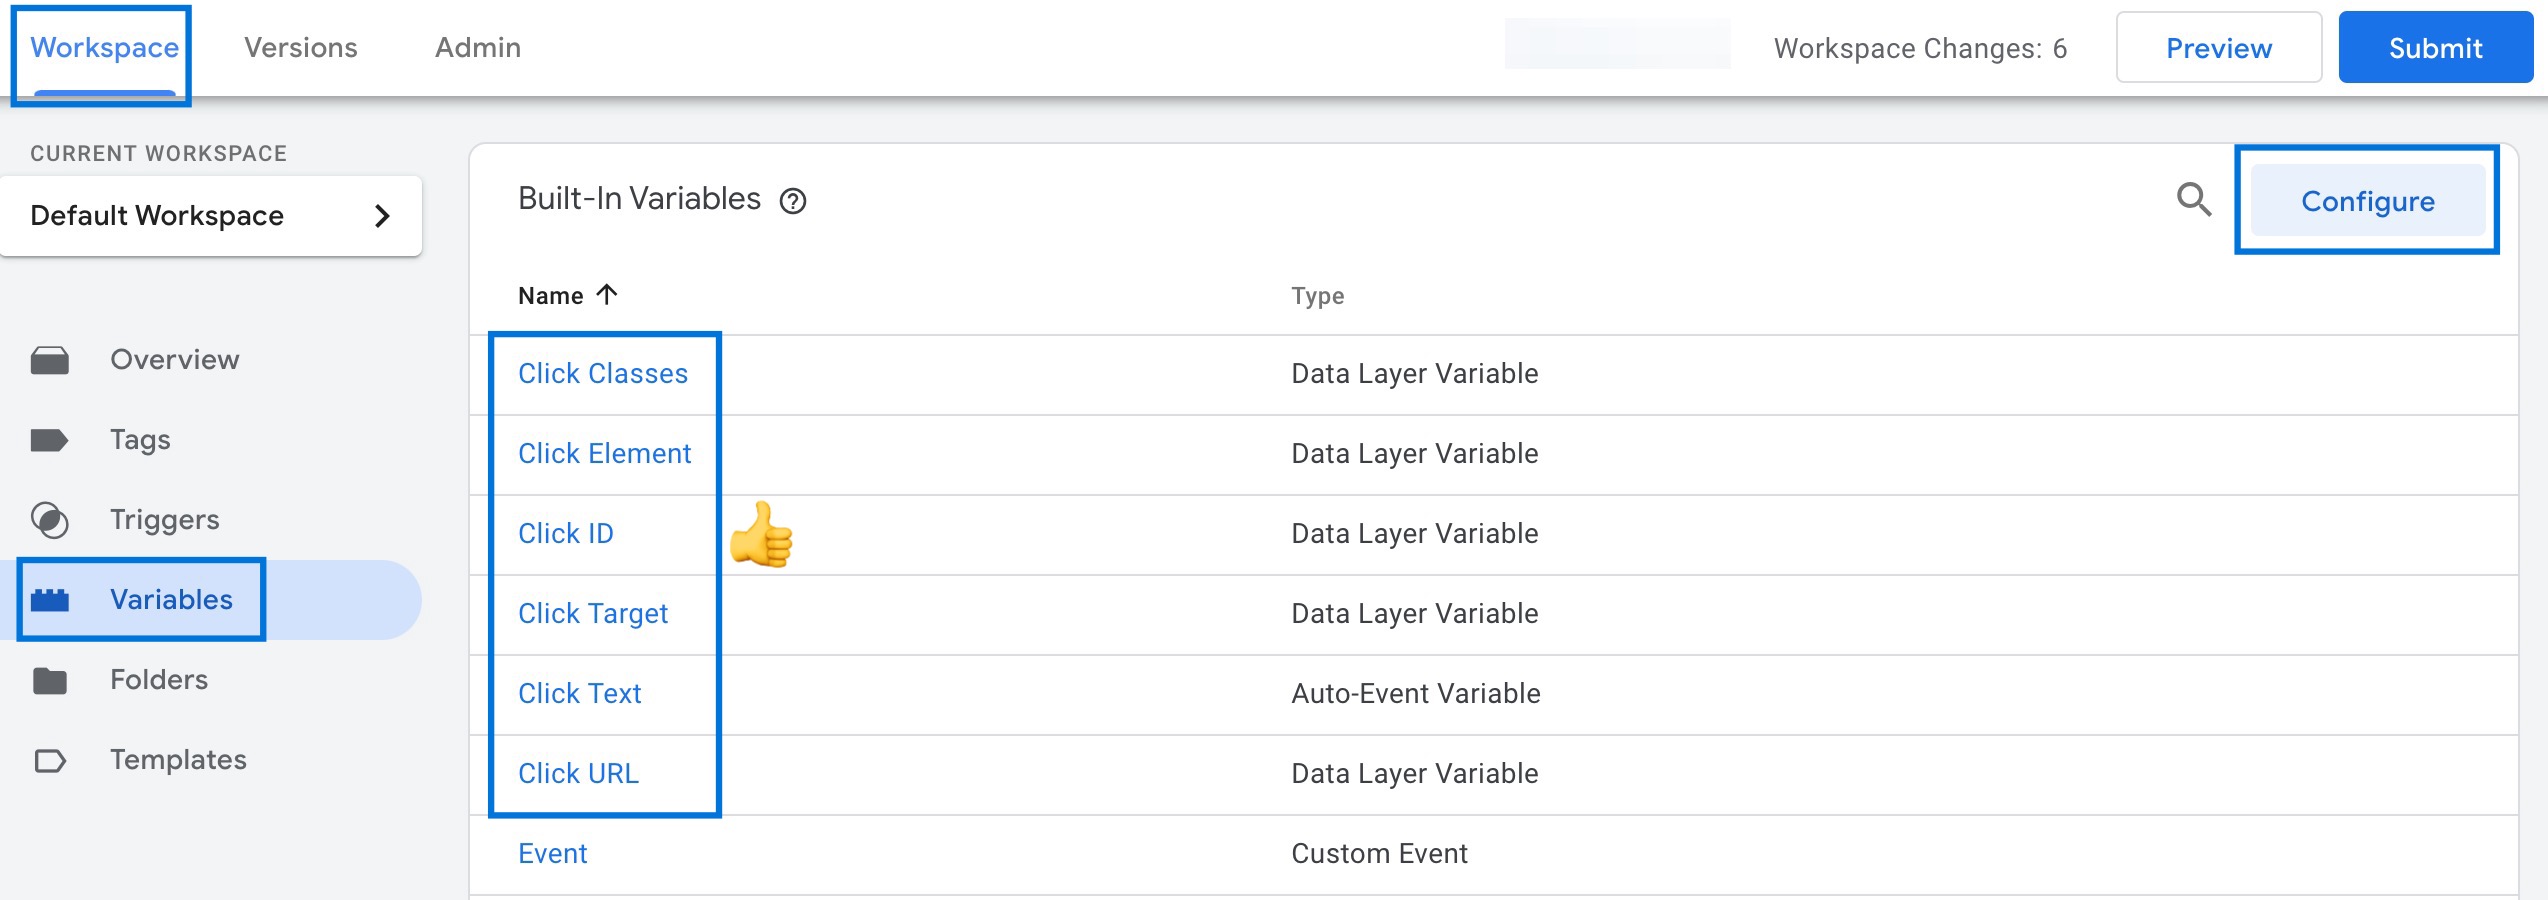
Creating trigger first might be useful. For this reason, go to Trigger tab in the left side menu. Click New.
Click Tag configuration box. Select All Elements and Some clicks. Set trigger condition as "Click Text contains Sign up for the newsletter". Do not forget to name your trigger in the top left. Save.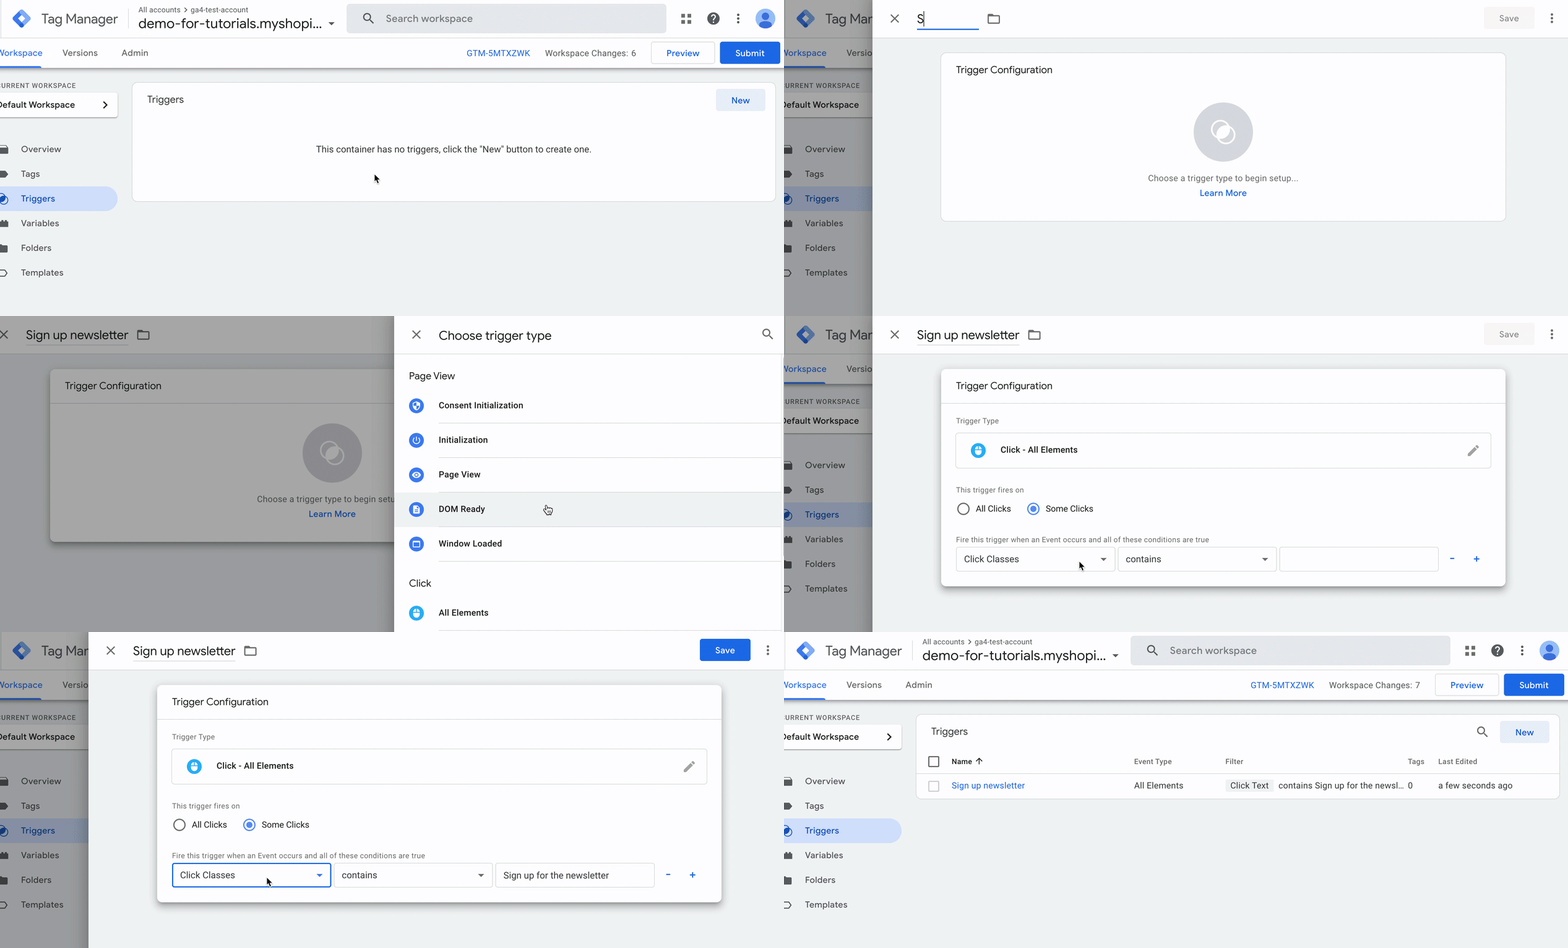
Go to Tag in the left side menu. Create a new tag.
Choose Google Analytics: GA4 Event. In Configuration Tag section, select "Google Analytics: GA4 Configuration tag". Type a name for the custom event (in our case, signup_newsletter can be a good descriptive event name, but you can name it as you wish). Choose the trigger you've created in the previous step. Give a proper name. Save.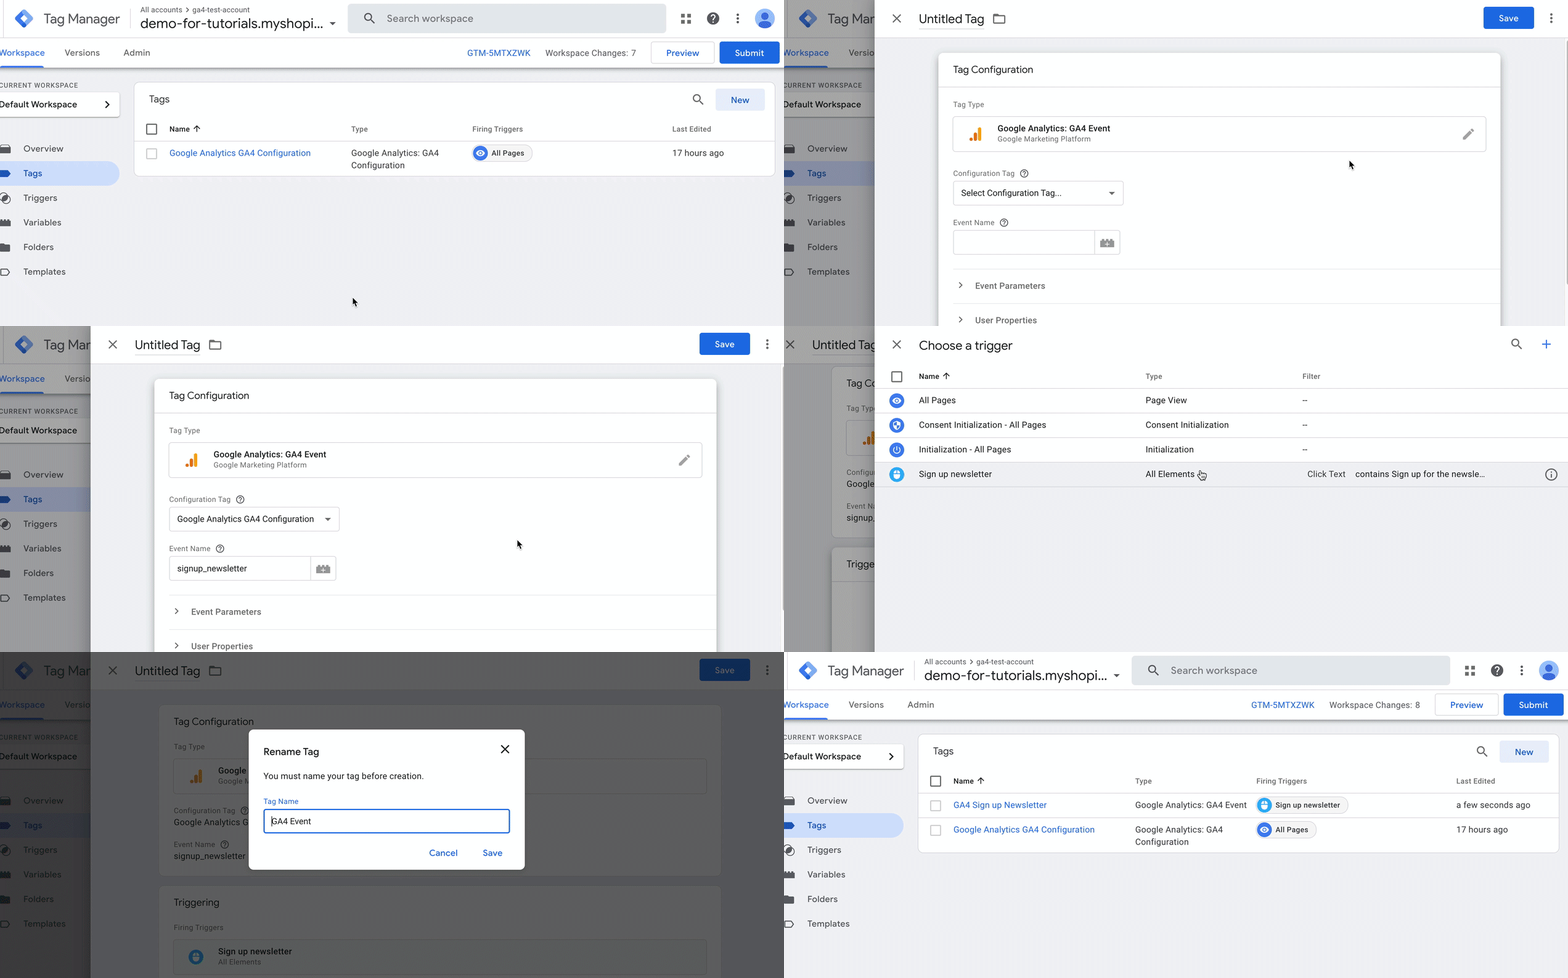
Click Preview button in the top right and connect to Tag Assistant.
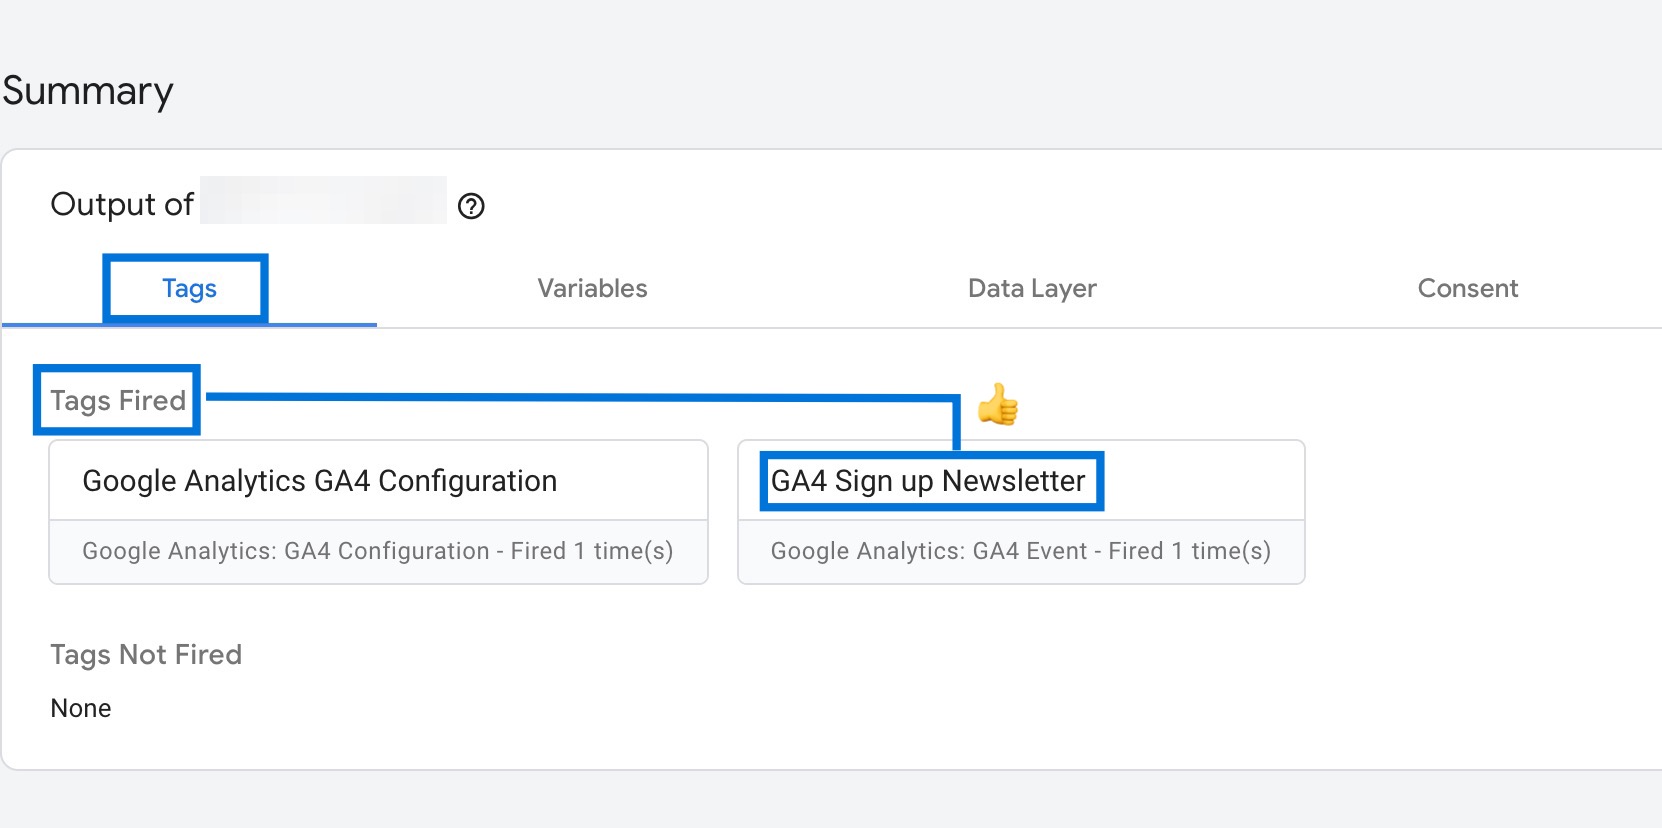
Enter your URL. Connect with Tag Assistant. Click the button (here it is "sign up for the newsletter") on your website to test your event. Go back to Tag Assistant and find your event. Done!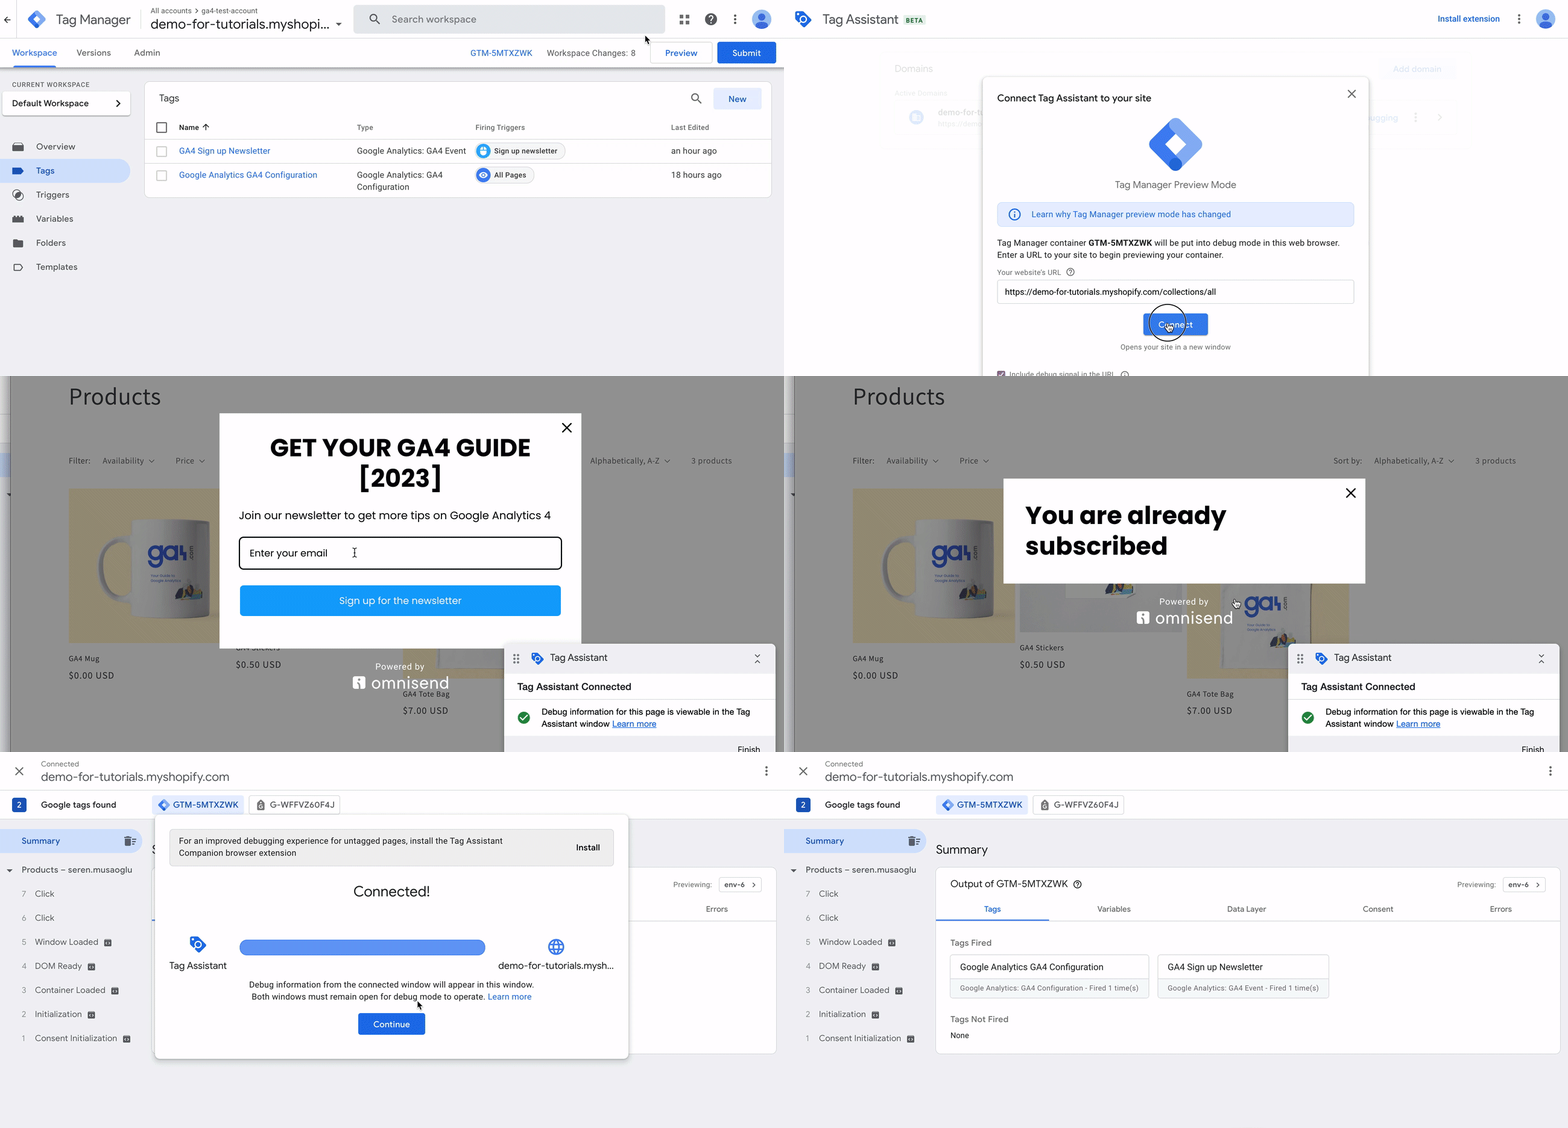
If you've set up properly, you can see your Sign up newsletter event under Tags fired.
Where to Find Custom Events in GA4?
Until custom events are registered in GA4, you won't be able to access the custom dimension data that GA4 received during that time. It's important to remember that the custom dimension data will be available 48 hours after these steps are done.
Register a custom definition in GA4
Now, let's register a custom definition:
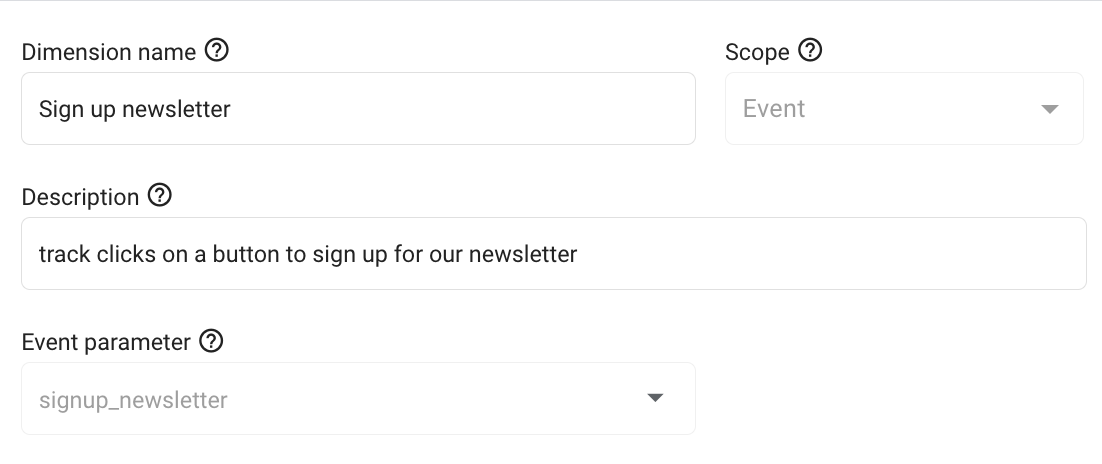
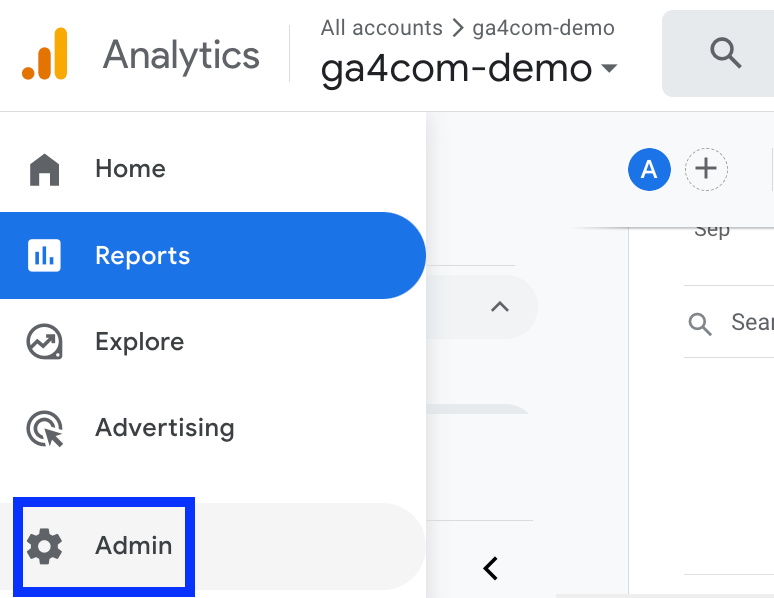
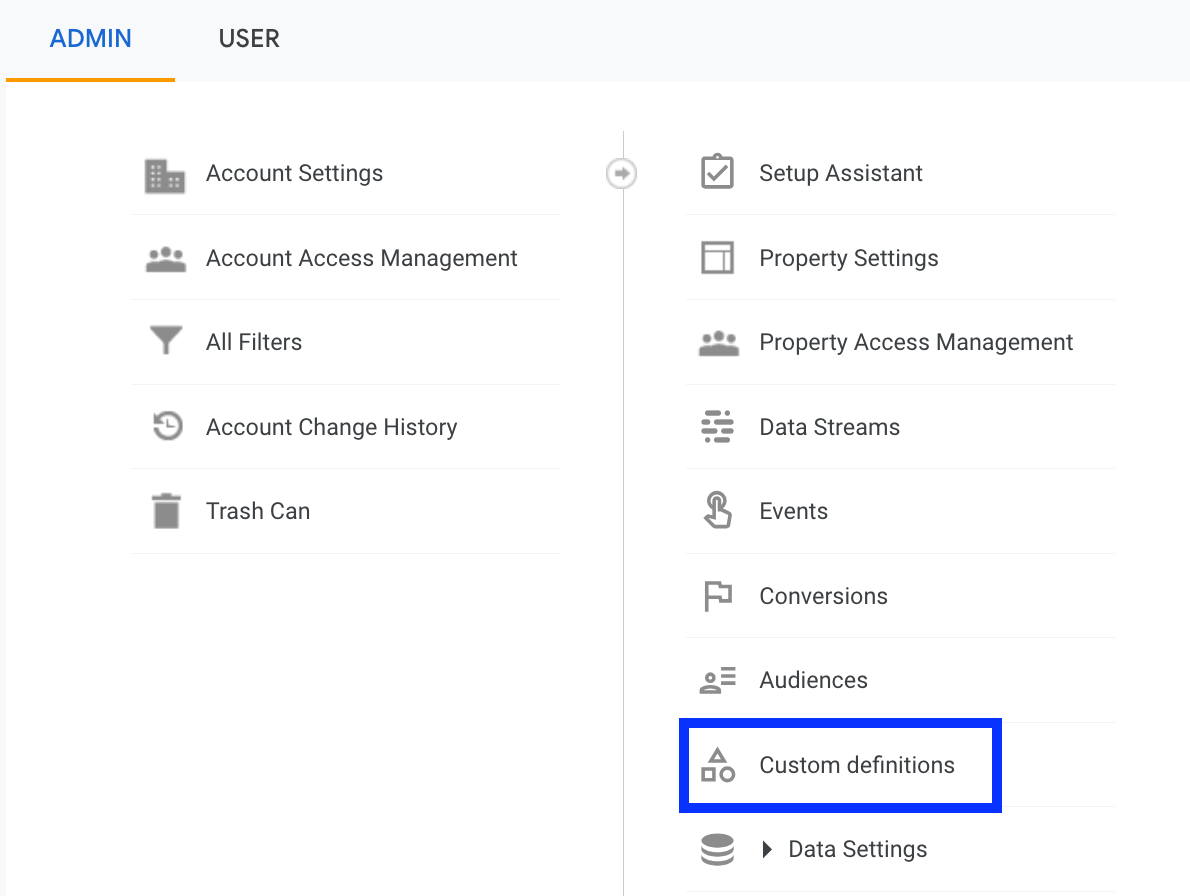
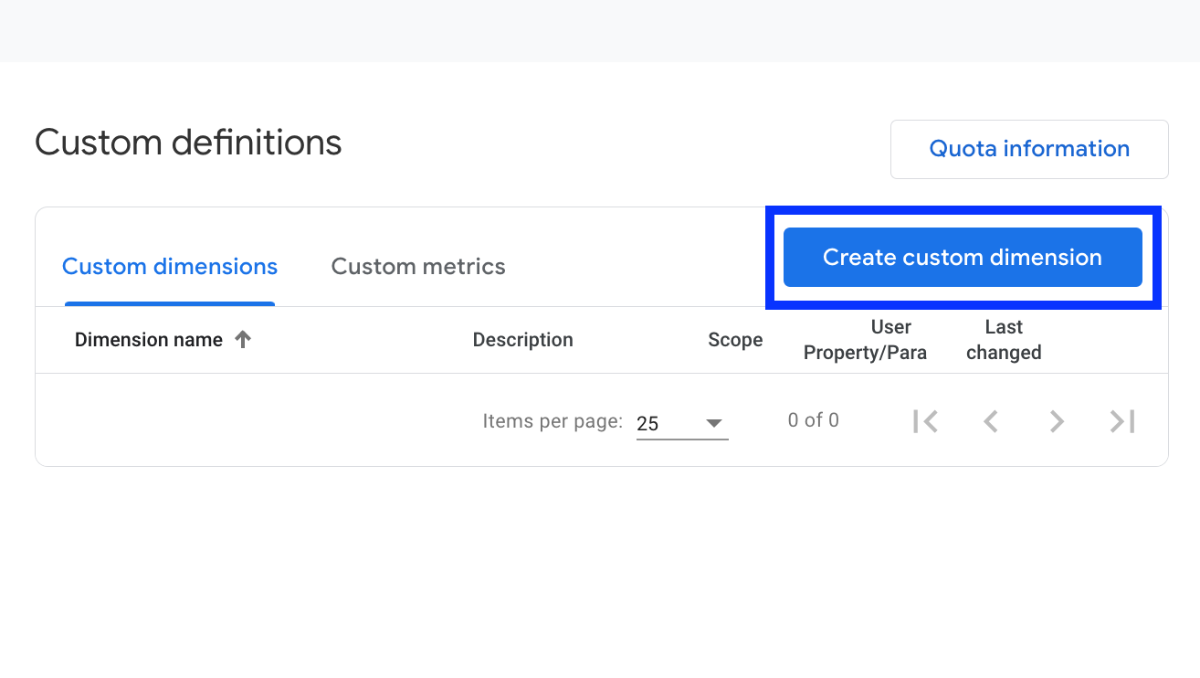
Give the following: Dimension name: Write a name that makes it easy to find this parameter. Scope: It is a "event" in my case. Description: To let other people know what this parameter means, write a short explanation. Choose the name of the parameter you want to use.

Useful Links
Here are some useful resources your might want to explore:
