Google Tag Manager (GTM) is a tool that helps website owners manage their website tags without the need for manual coding. By adding the Google Tag (formerly known as GA4 configuration tag) to GTM, website owners can track and analyze data from their website, app, or other digital platforms.
Here is a step-by-step guide to getting you started with GTM and GA4.
Create a Google Tag Manager Account
To create a GTM account, follow these steps:
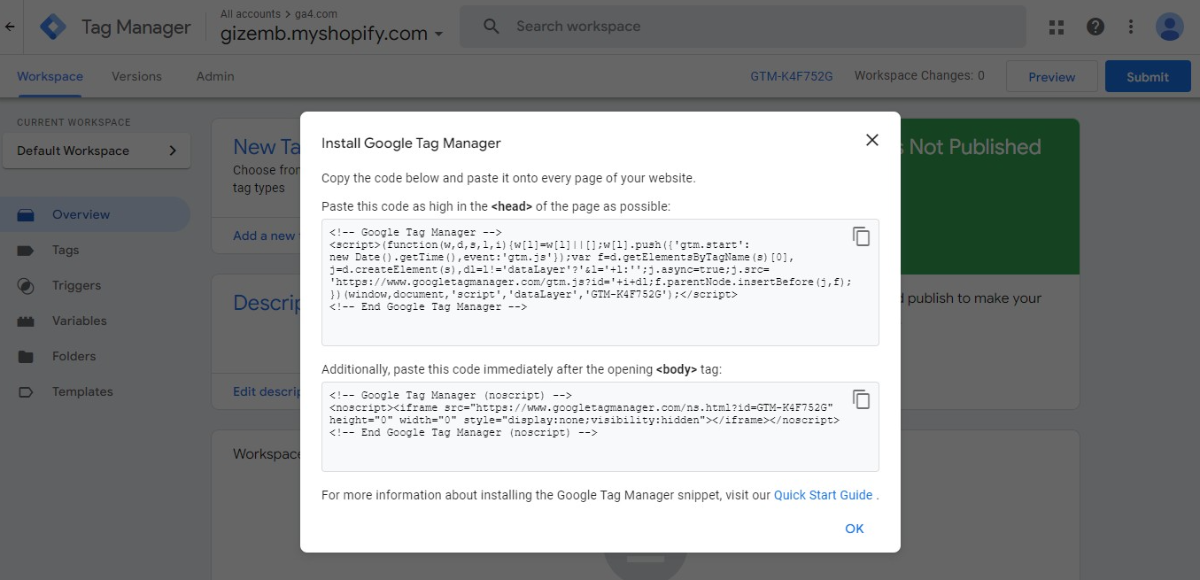
Go to the Google Tag Manager. Click “Create an account”.
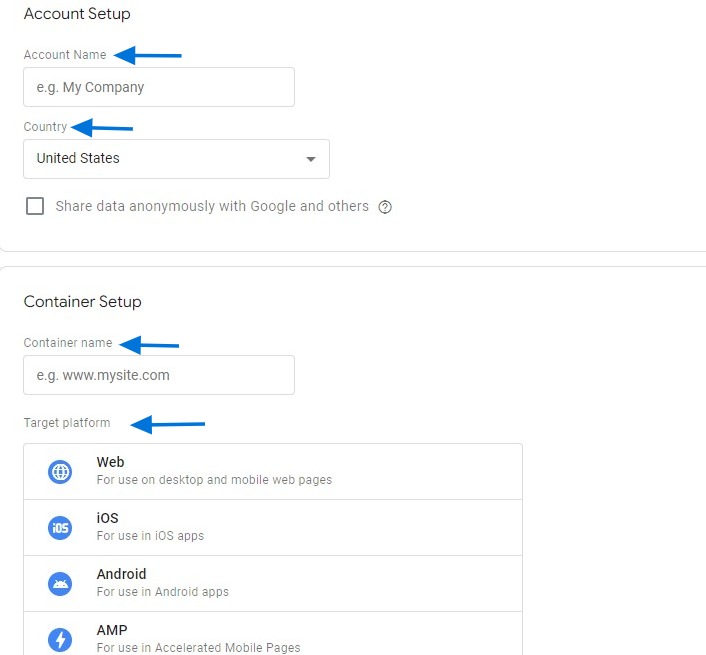
- Provide your organization's name as the account name.
- Select your country and choose whether to enable data sharing to improve Google products.
- Give your container a descriptive name for internal reference purposes.
- Select the appropriate target platform based on your needs - Web, App (iOS or Android), AMP, or Server. In this tutorial, we will choose the Web option.
- Click on the "Create" button to complete the process.
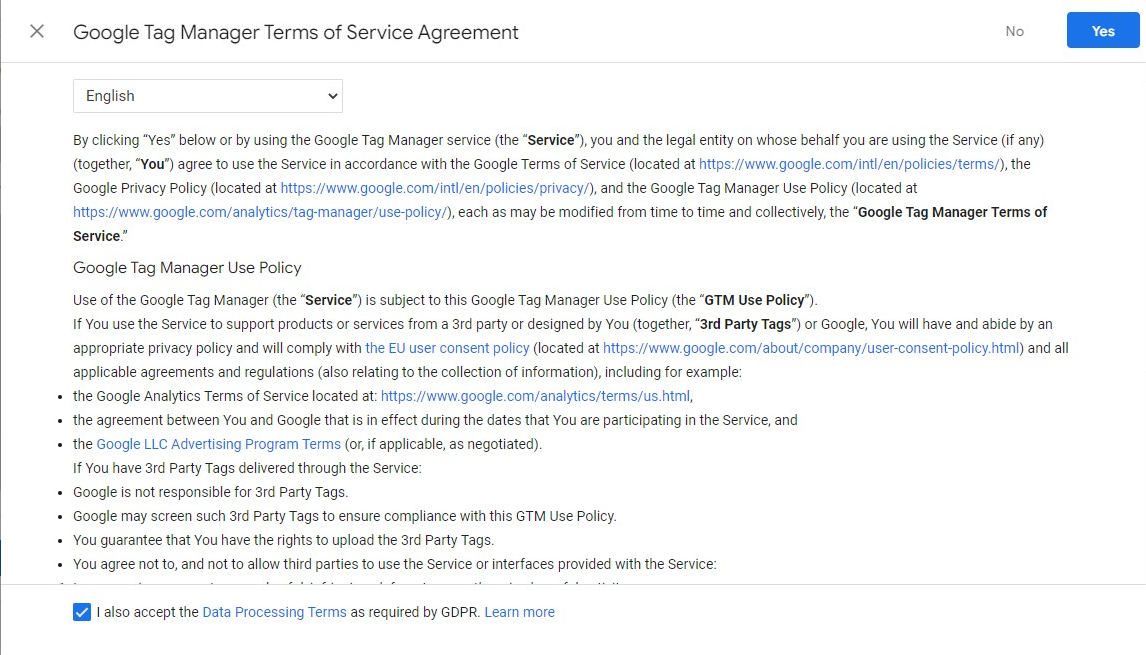
If you wish you can check the checkbox. Then, click "Yes."
You will be prompted to install the GTM code. Now let's move on to the next section to follow the installation instructions below.
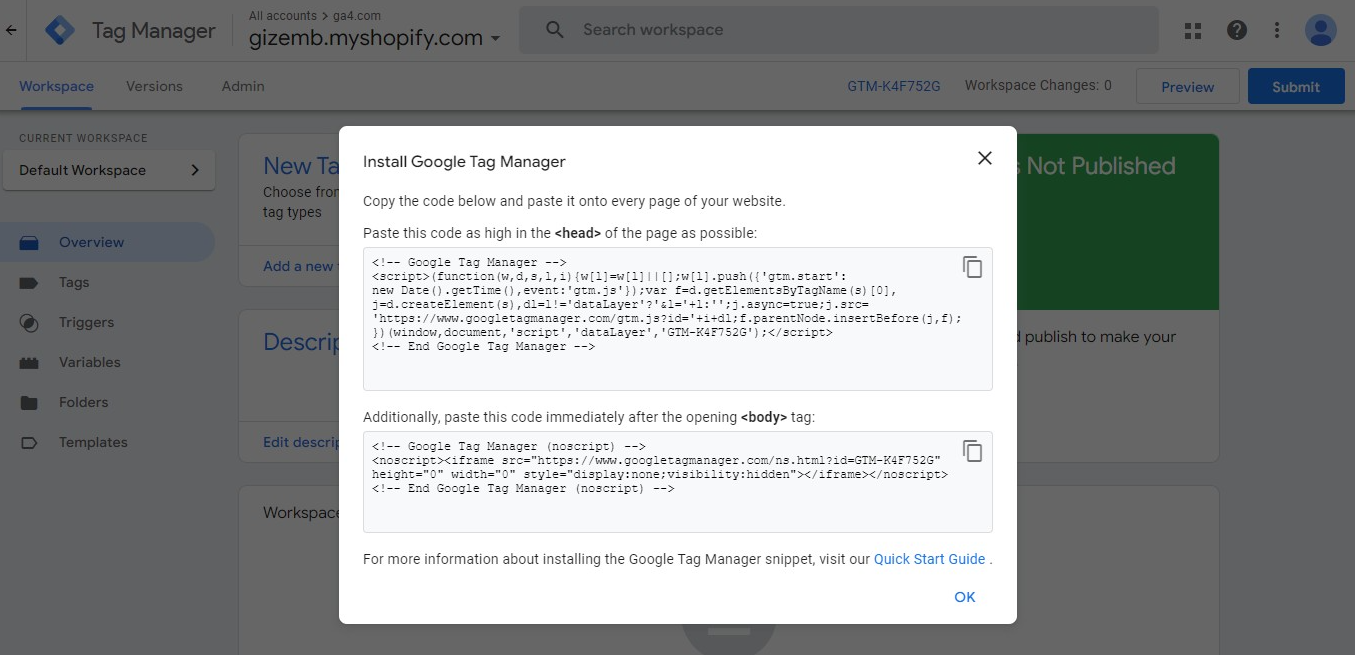
Install Google Tag Manager on Your Website
After creating your GTM account, the next step is to install the GTM container code on your website. Here’s how:
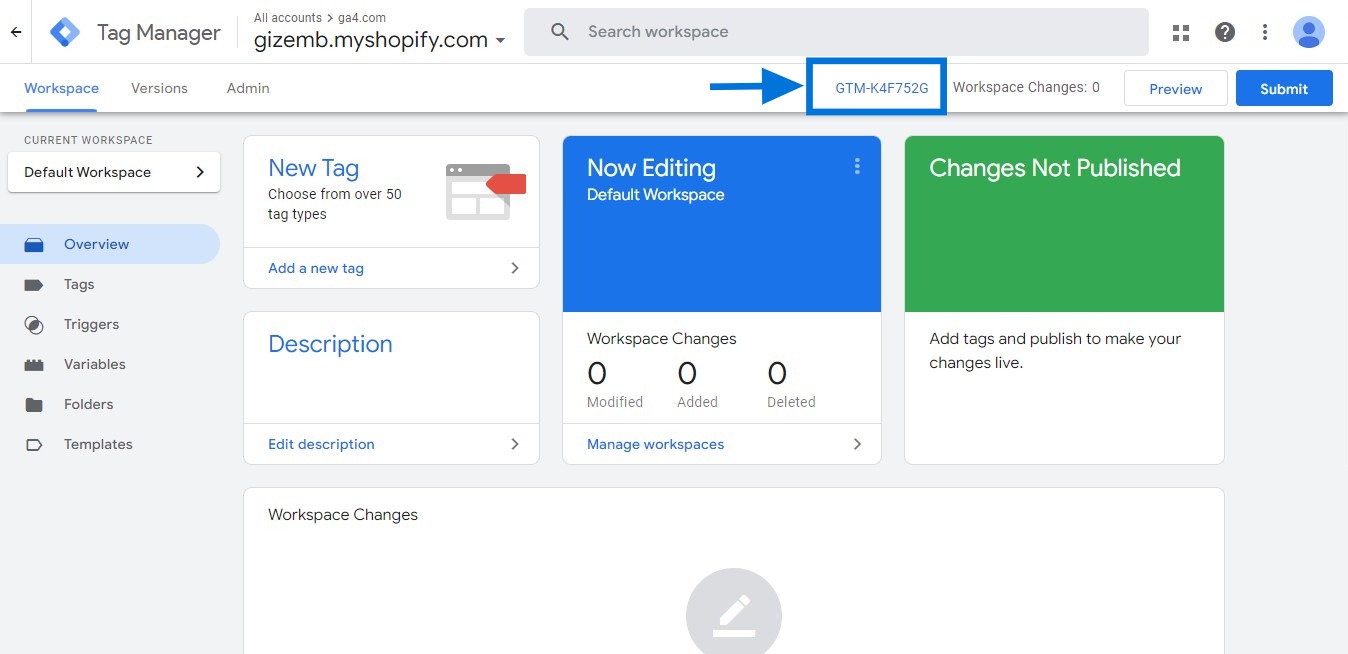
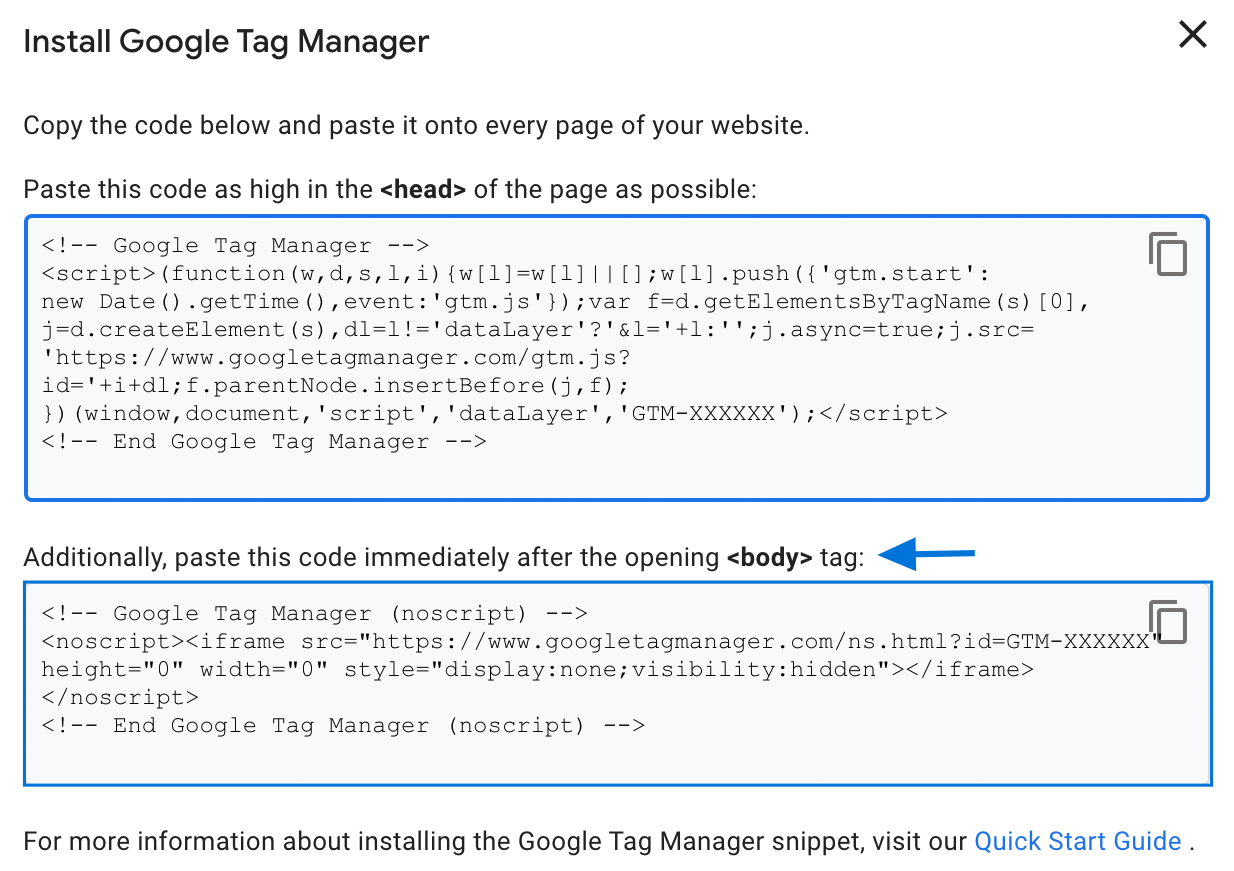
Click your container ID (formatted as GTM-XXXXXX) at the top of the window to open the Install Tag Manager window.
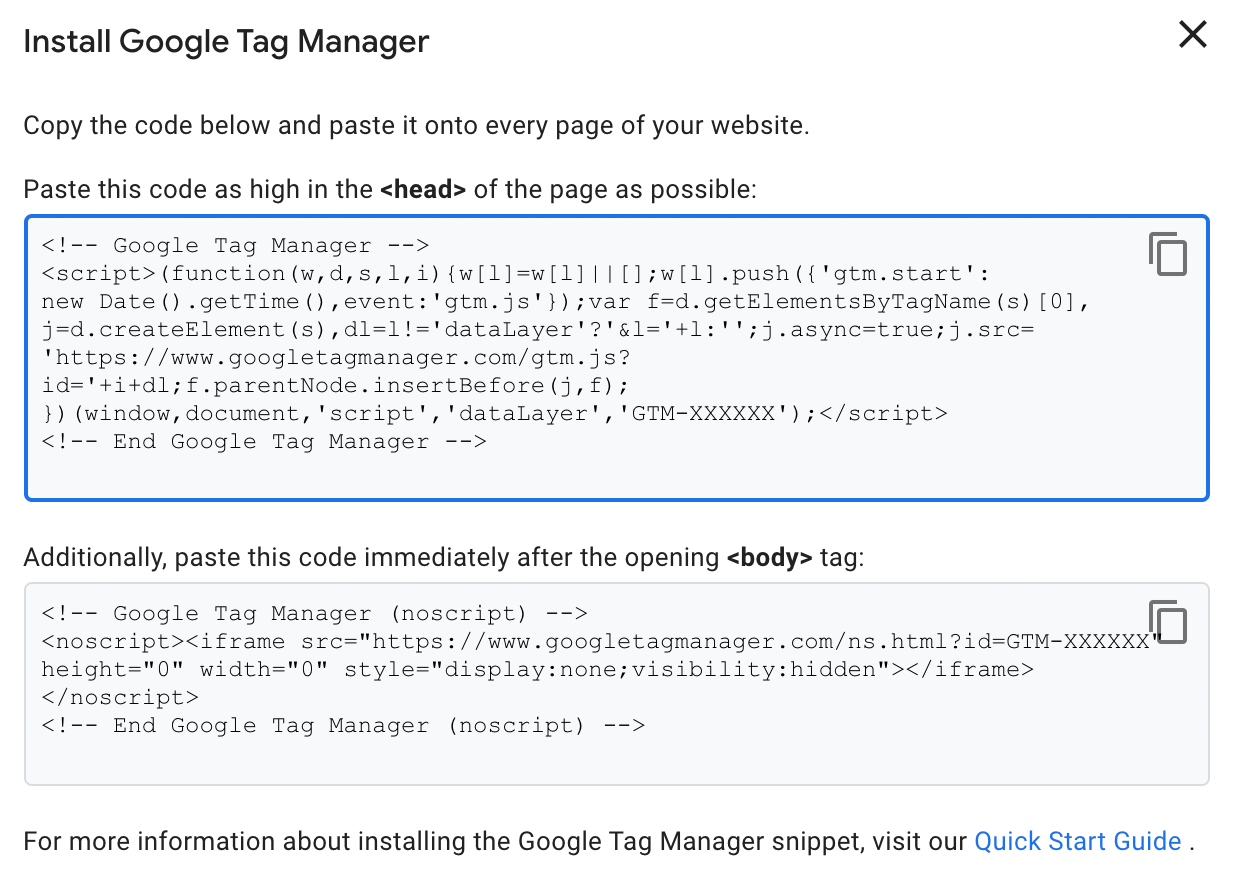
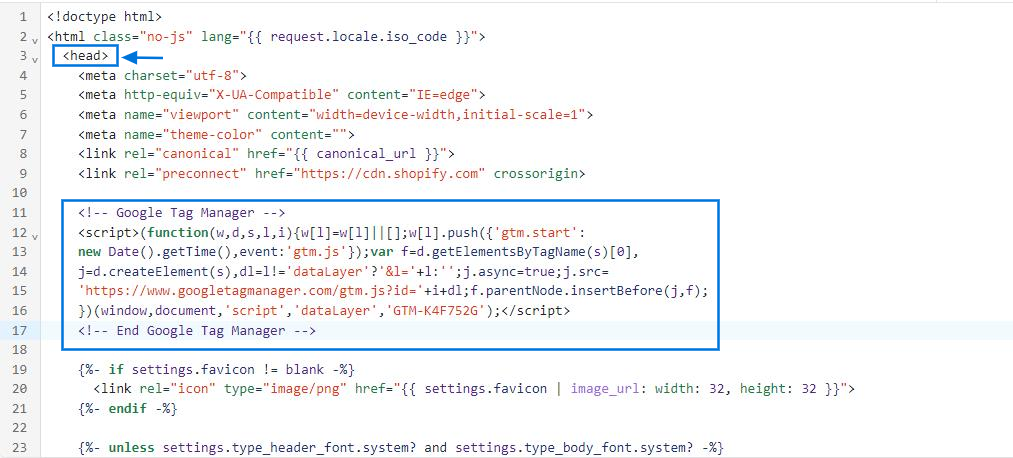
Copy the code below and paste it as high in the <head> of the page as possible:
It should look like this:
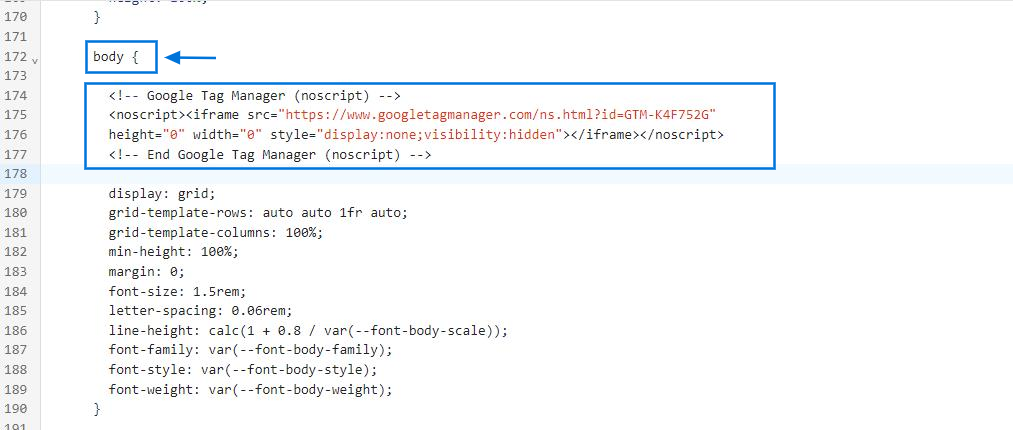
Additionally, paste this code immediately after the opening <body> tag.
It should look like this:

Set up Google Tag (GA4 Configuration Tag)
Once the GTM container code is installed on your website, the next step is to set up the Google Tag. Google Tag is the updated version of GA4 configuration tag. Here’s how:
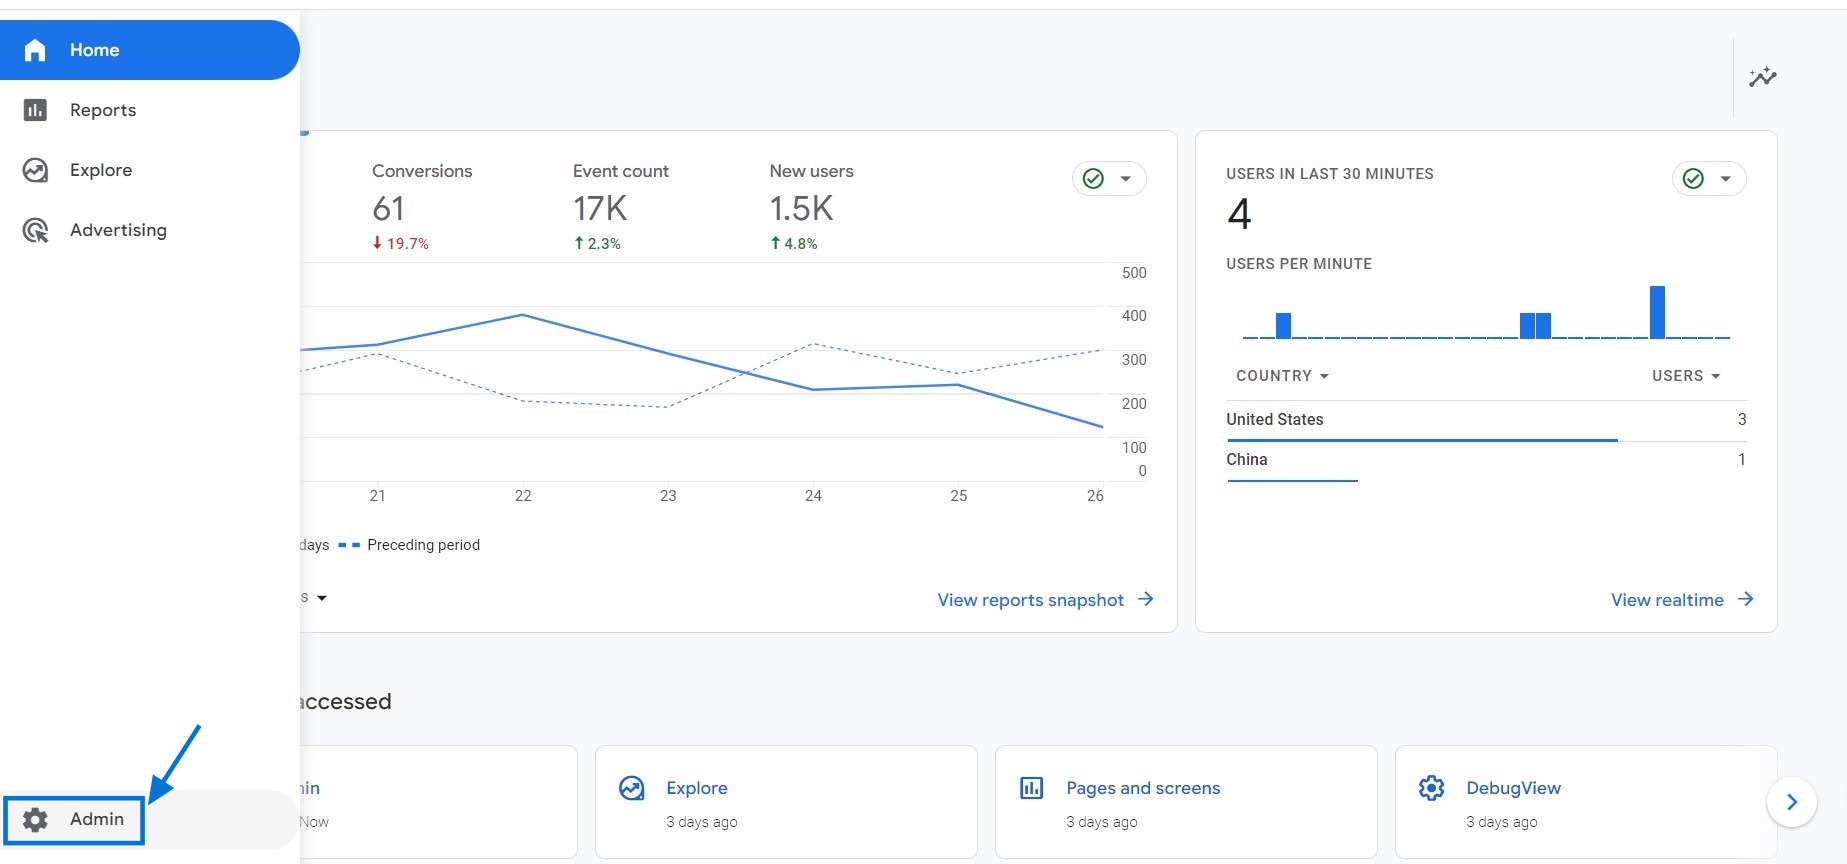
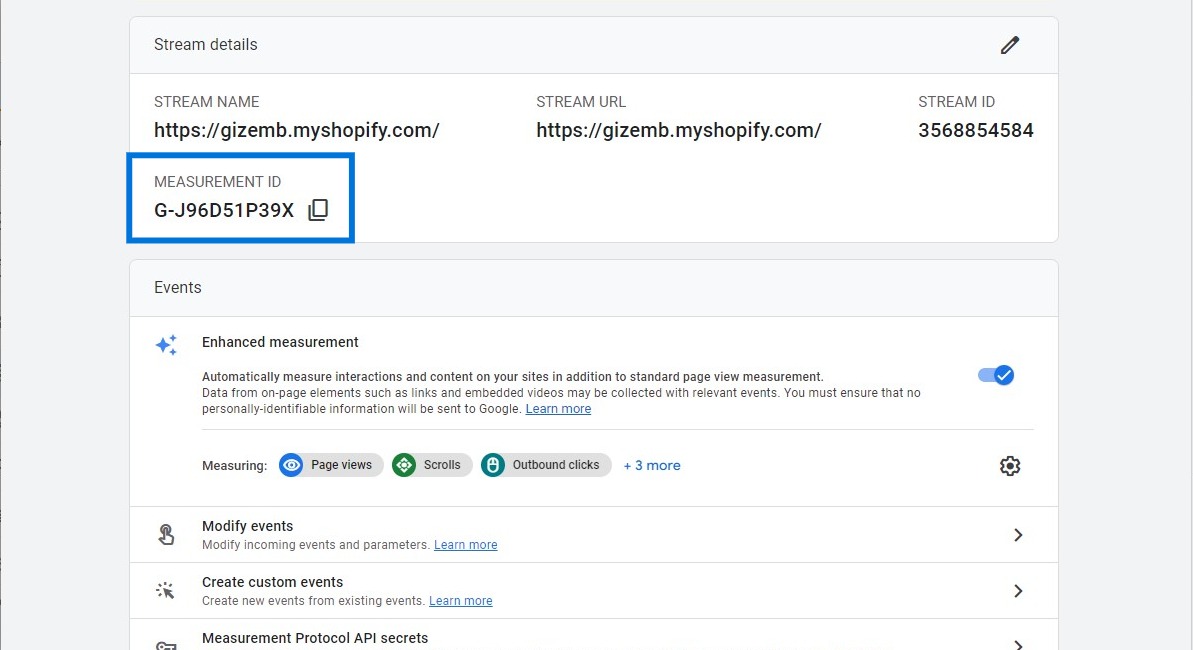
Go to your Google Analytics 4 account. Click the Admin icon in the lower-left corner of the screen.
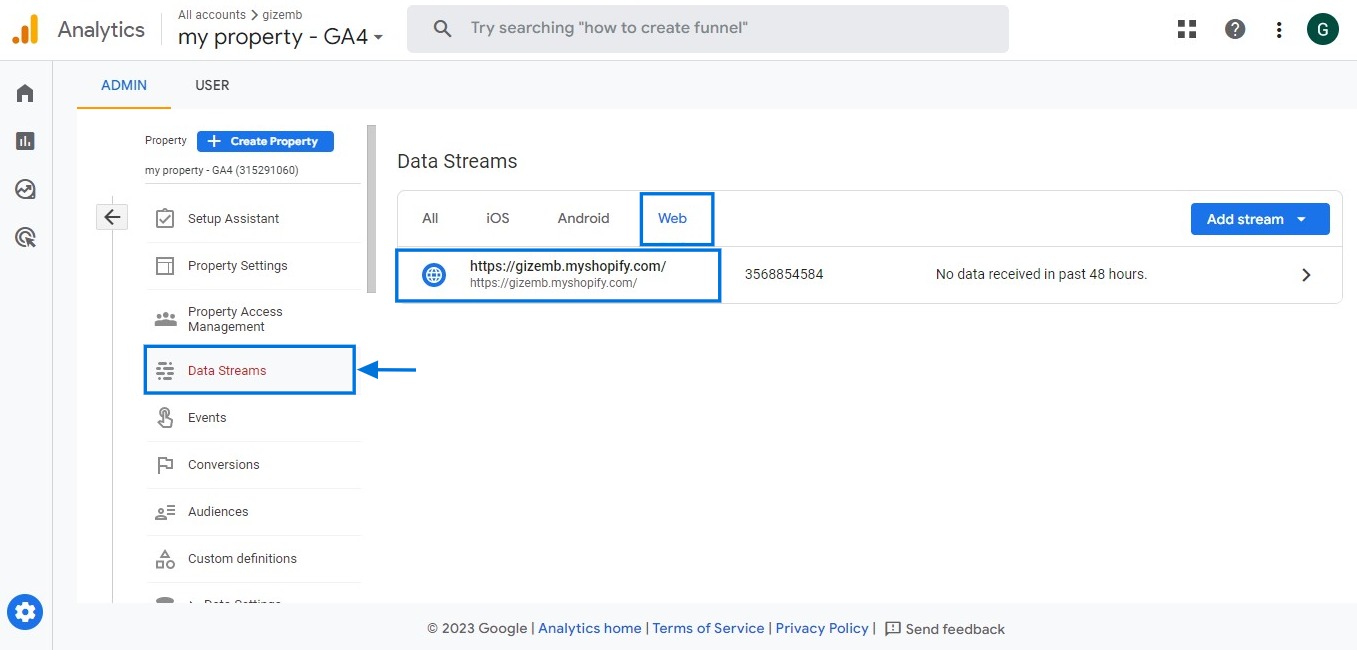
In the Property column, click Data Streams. Find the data stream you want to use for your Google Tag Manager tag, and click on it. In this tutorial, we will choose the Web option.
Copy the Measurement ID from the page.
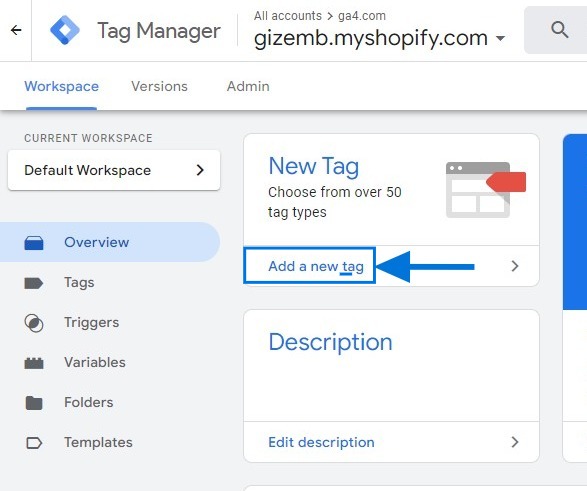
Go back to your Google Tag Manager account. Then, click "Add a New Tag".
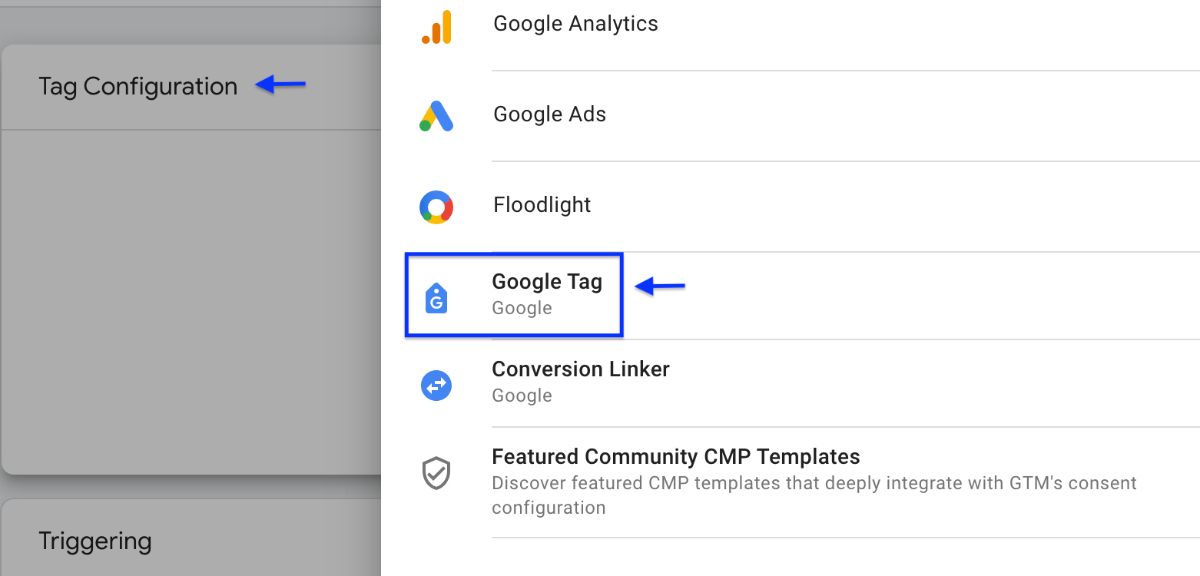
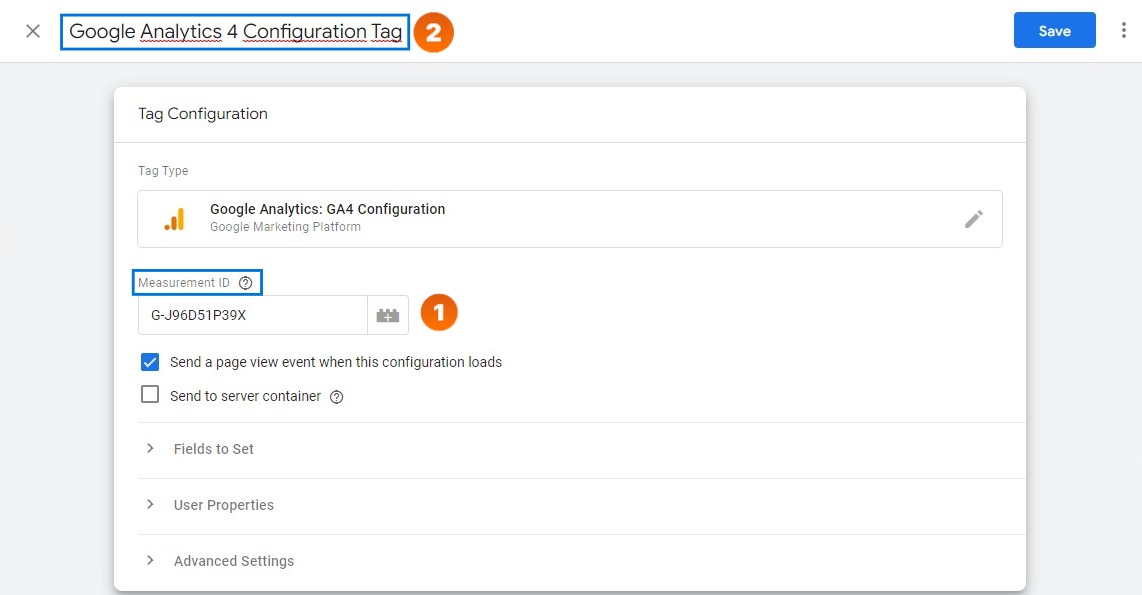
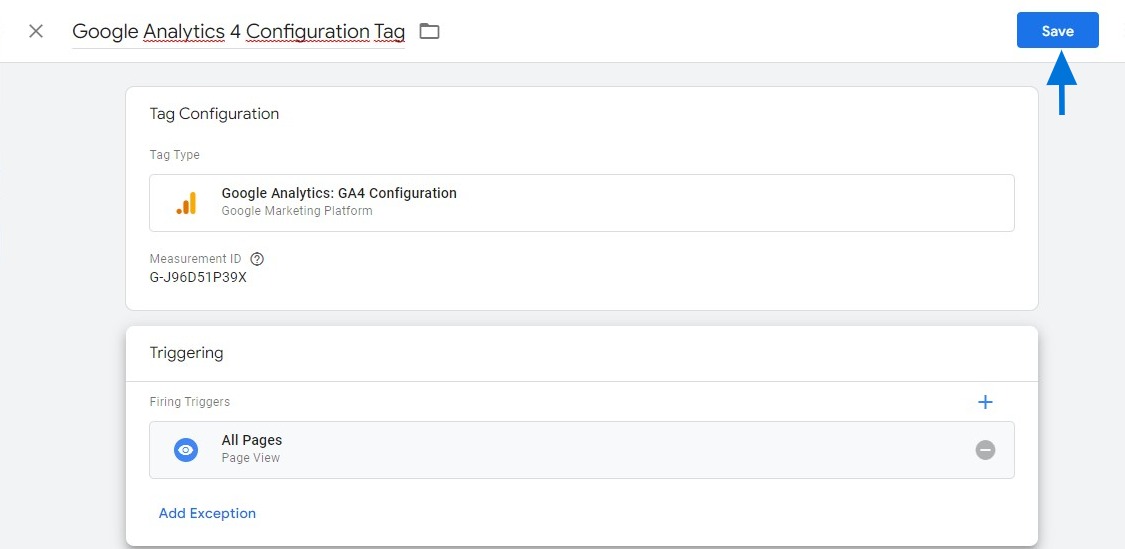
Under "Tag Configuration," select "Google Analytics: GA4 Configuration."

- Now, paste your Measurement ID in the "Measurement ID" field.
- Enter a descriptive name to the Untitled Tag area for your tag, such as "Google Analytics 4 Configuration Tag."
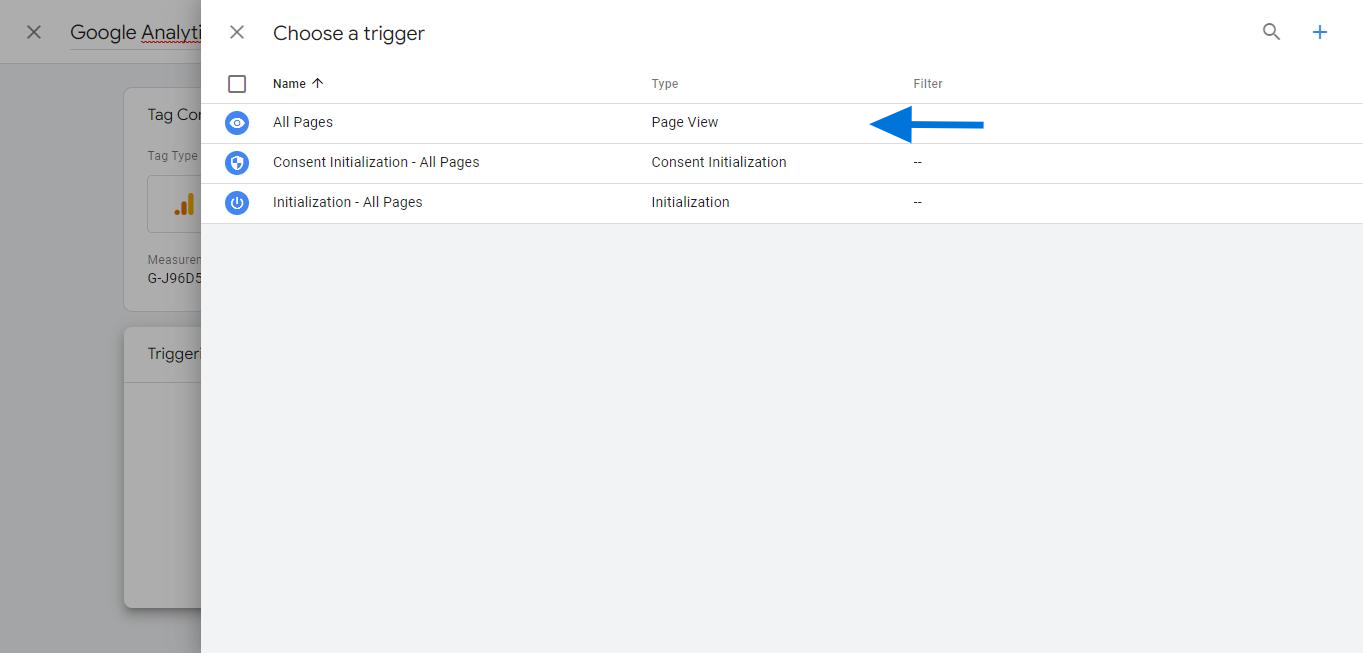
Click the 'Triggering' option. From there, select 'All Pages' to apply the desired trigger for your GTM installation.
Click on the 'Save' button to finalize your GTM installation.
Publish Your GTM Container
After setting up the Google Tag, the final step is to publish your GTM container. Here’s how:
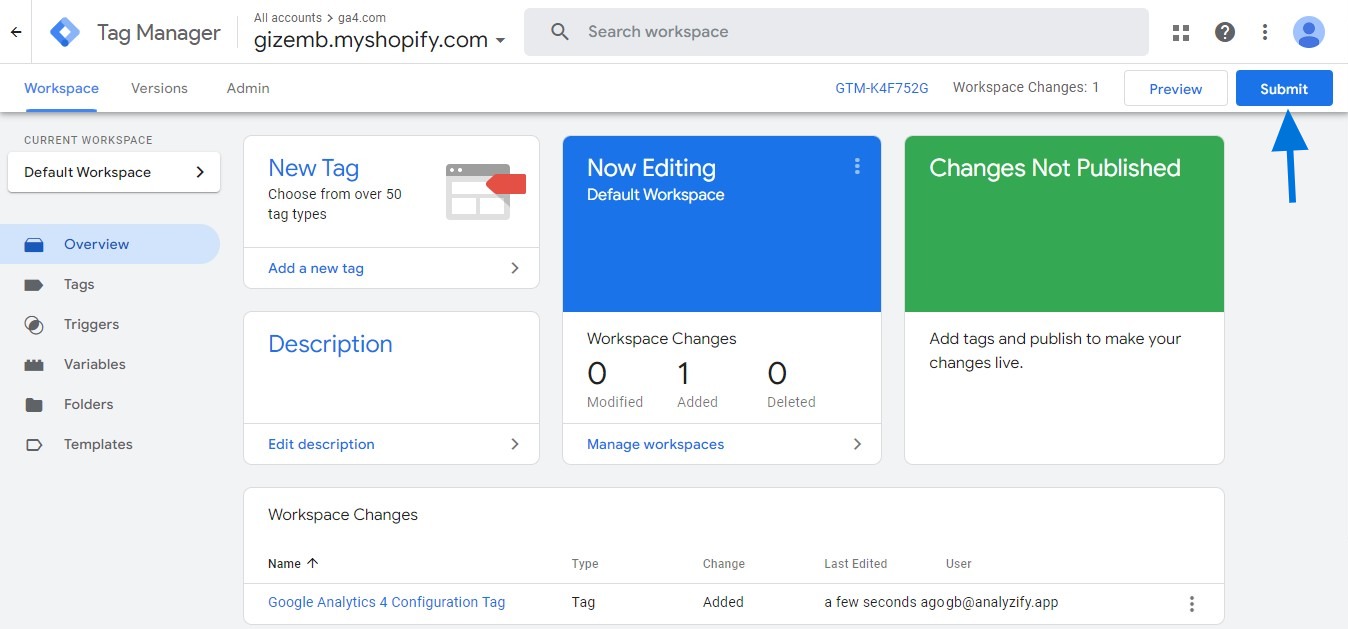
Click "Submit."
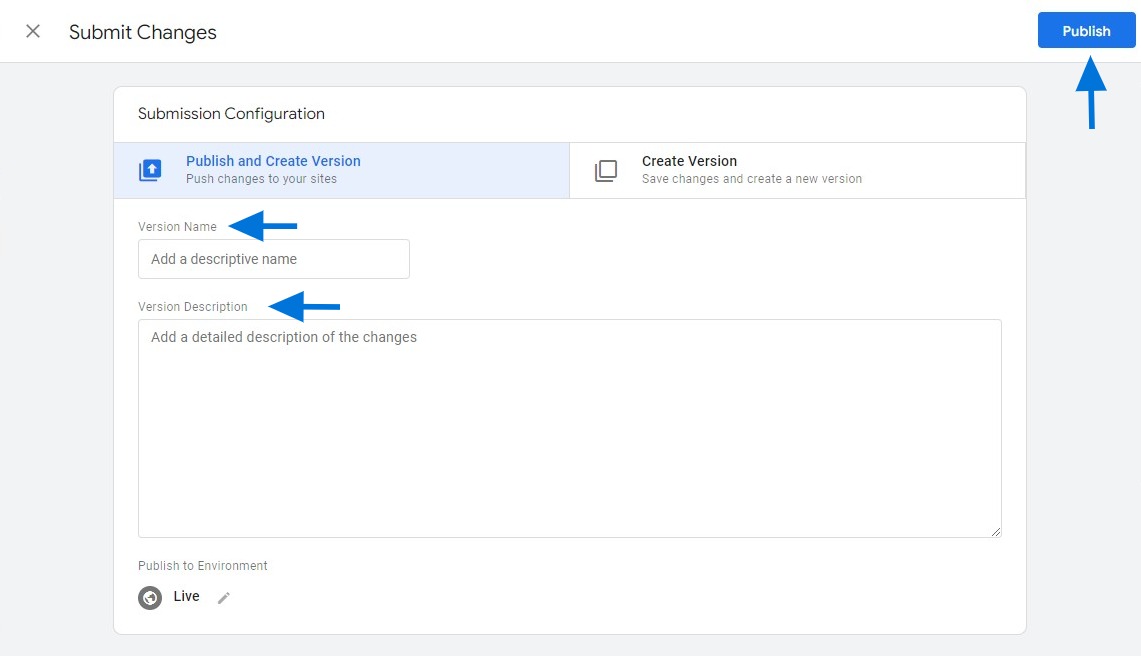
Enter a version name and description for your changes. Click Publish to make your changes live on your website.
Congratulations, you have successfully set up GTM and GA4 on your website! With GTM and GA4, you can track and analyze data to better understand your website visitors, improve user experience, and increase conversions.
