Without turning on data collection in GA4, your analytics will miss crucial insights needed to effectively track and measure performance.
Every pageview, user interaction, and conversion will go unrecorded – meaning you'll miss important insights about your website's performance.
Here you’ll ensure your analytics setup captures every important user interaction, giving you the insights you need to make smart decisions.
Getting Ready to Turn On Data Collection in GA4
Before starting the setup, make sure you have the following essentials in place:
- A GA4 Property with Admin Permissions: Make sure you’ve created a Google Analytics 4 property in your Google Analytics account. Additionally, you’ll need Admin-level access to manage settings and enable tracking effectively. If you don’t have a GA4 property yet, check out the instructions on the post “Create New GA4 Account & Properties”
- Access to Your Website’s Code or Google Tag Manager (GTM): To add the GA4 tracking code, you need access to your website’s source code or an active Google Tag Manager container. This access is essential for integrating the tracking tag directly into your site or managing it via GTM without touching your website’s code. If you’re unsure how to get this access, consult your developer or website administrator.
Step-by-Step Guide to Turning On Data Collection in GA4
Here is a detailed guide on turning on data collection in GA4, covering the setup process, enabling Enhanced Measurement, and verifying your implementation:
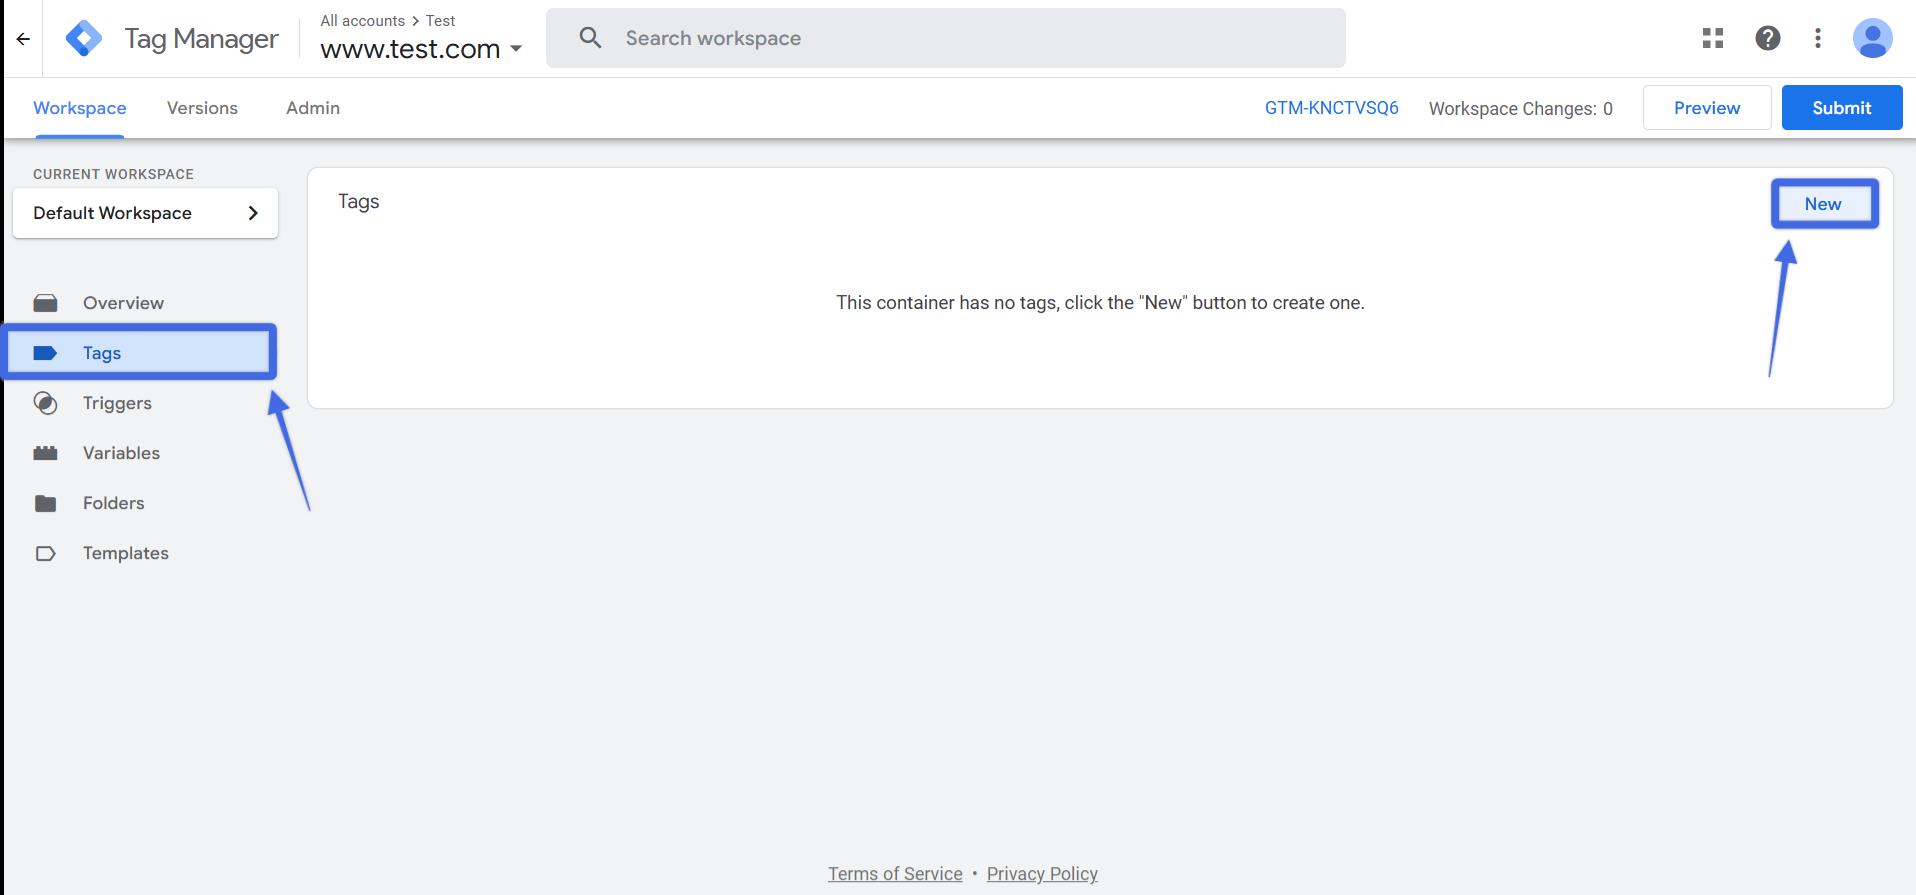
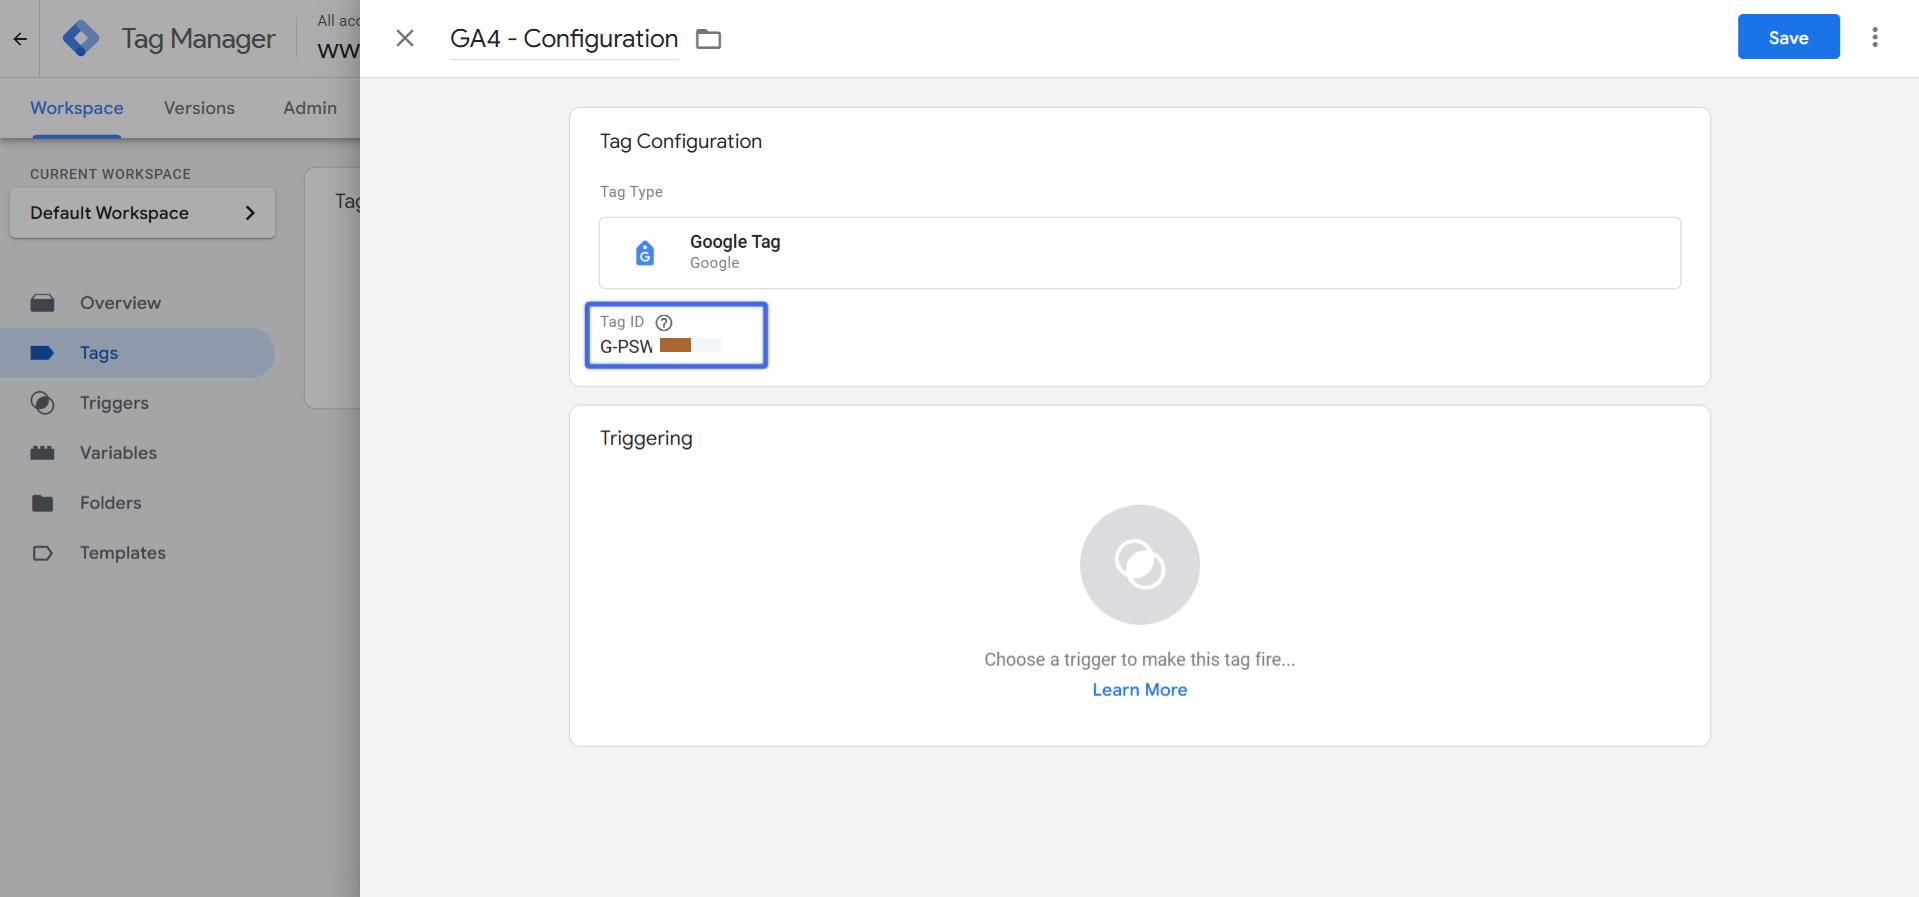
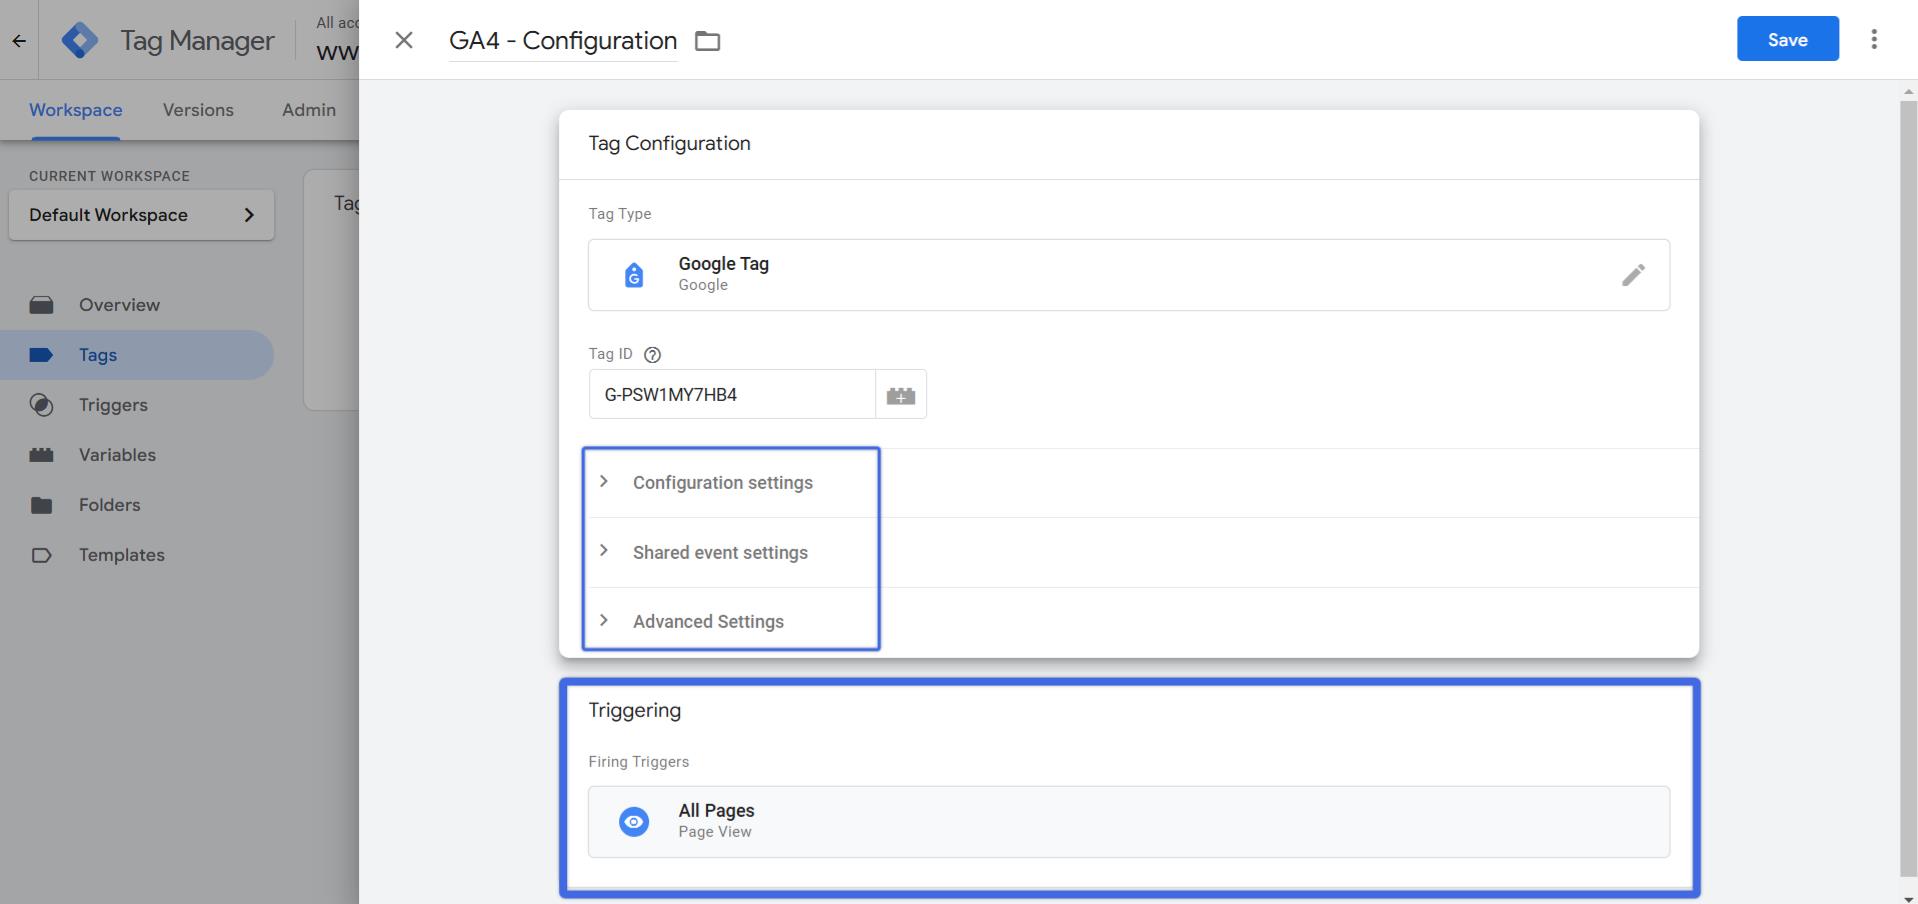
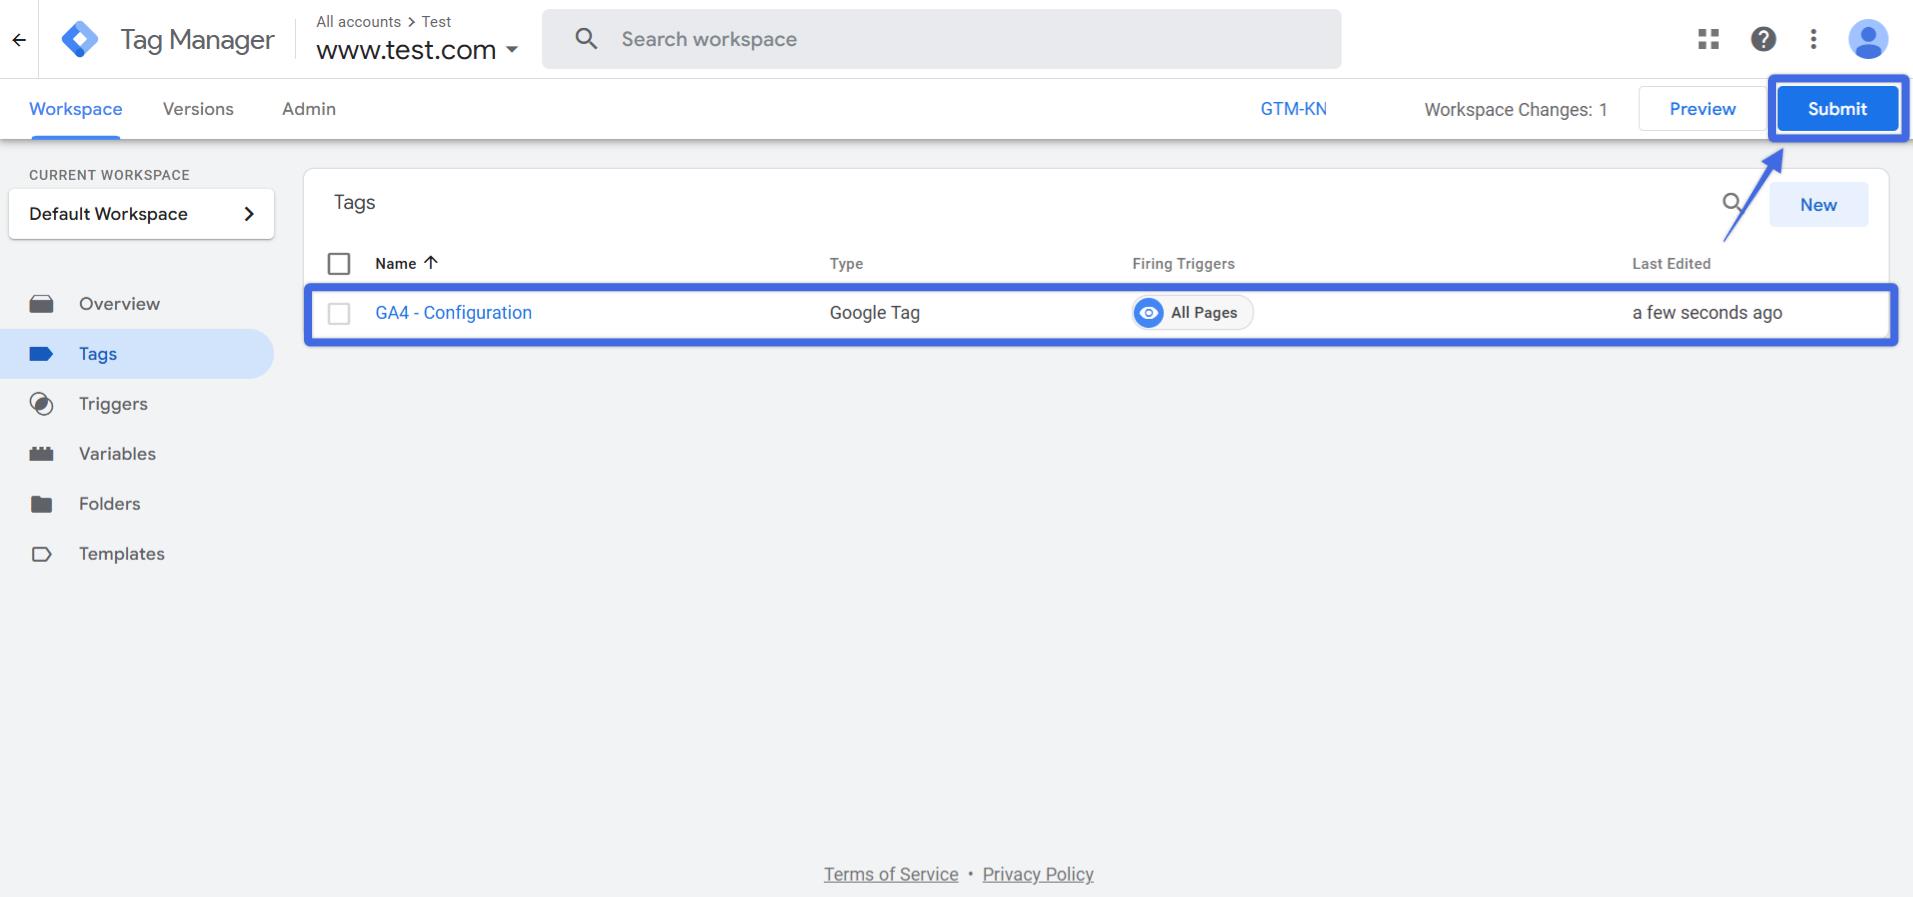
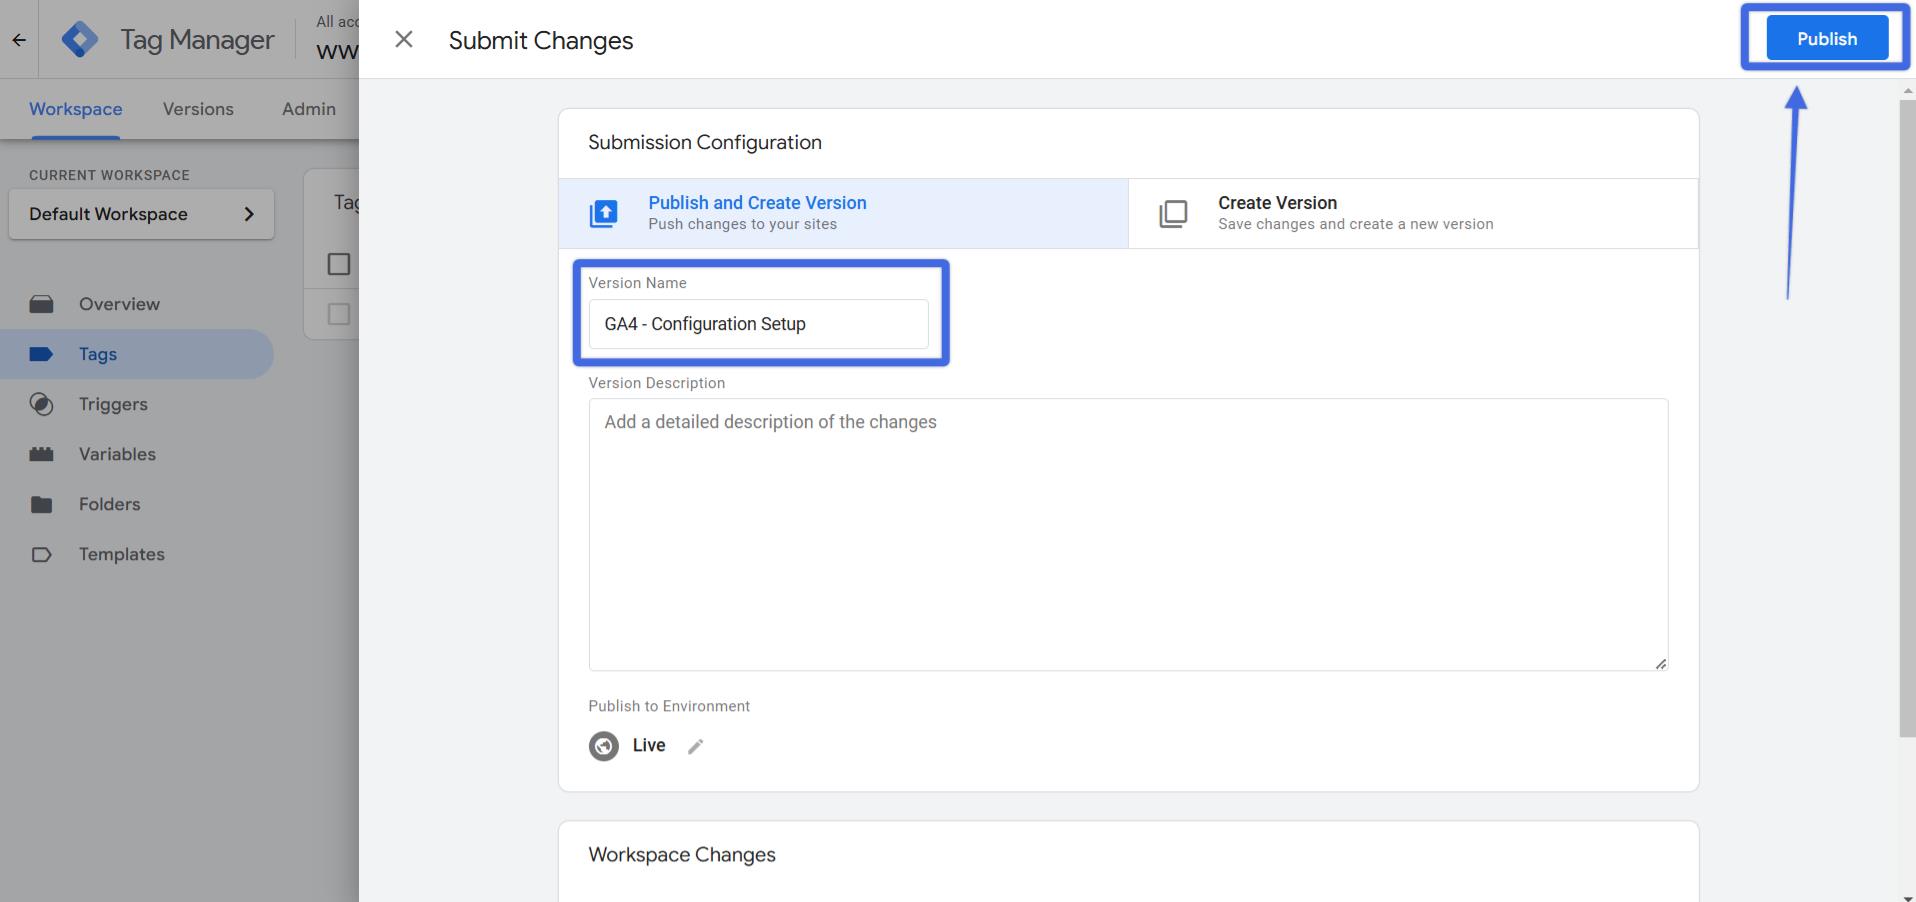
Step 1: Installing the GA4 Tracking Code (Choose Your Method)
Here’s a clear, step-by-step guide to help you install the code using two common methods: directly embedding it in your website’s source code or through Google Tag Manager (GTM).
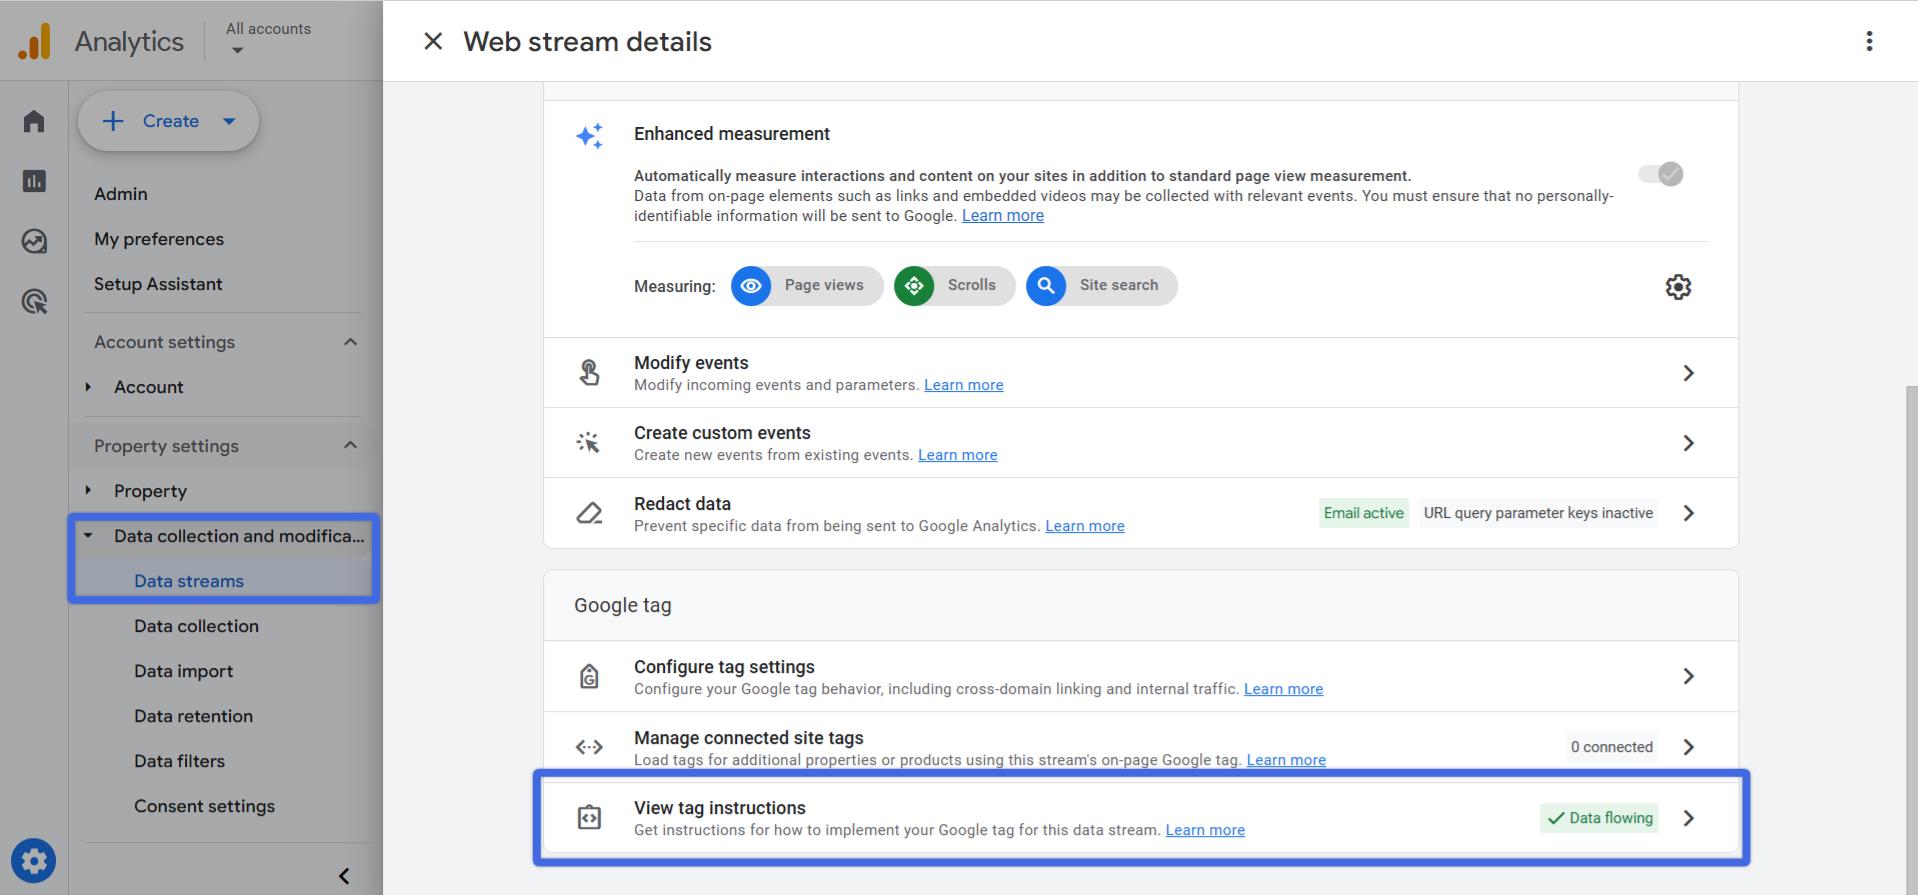
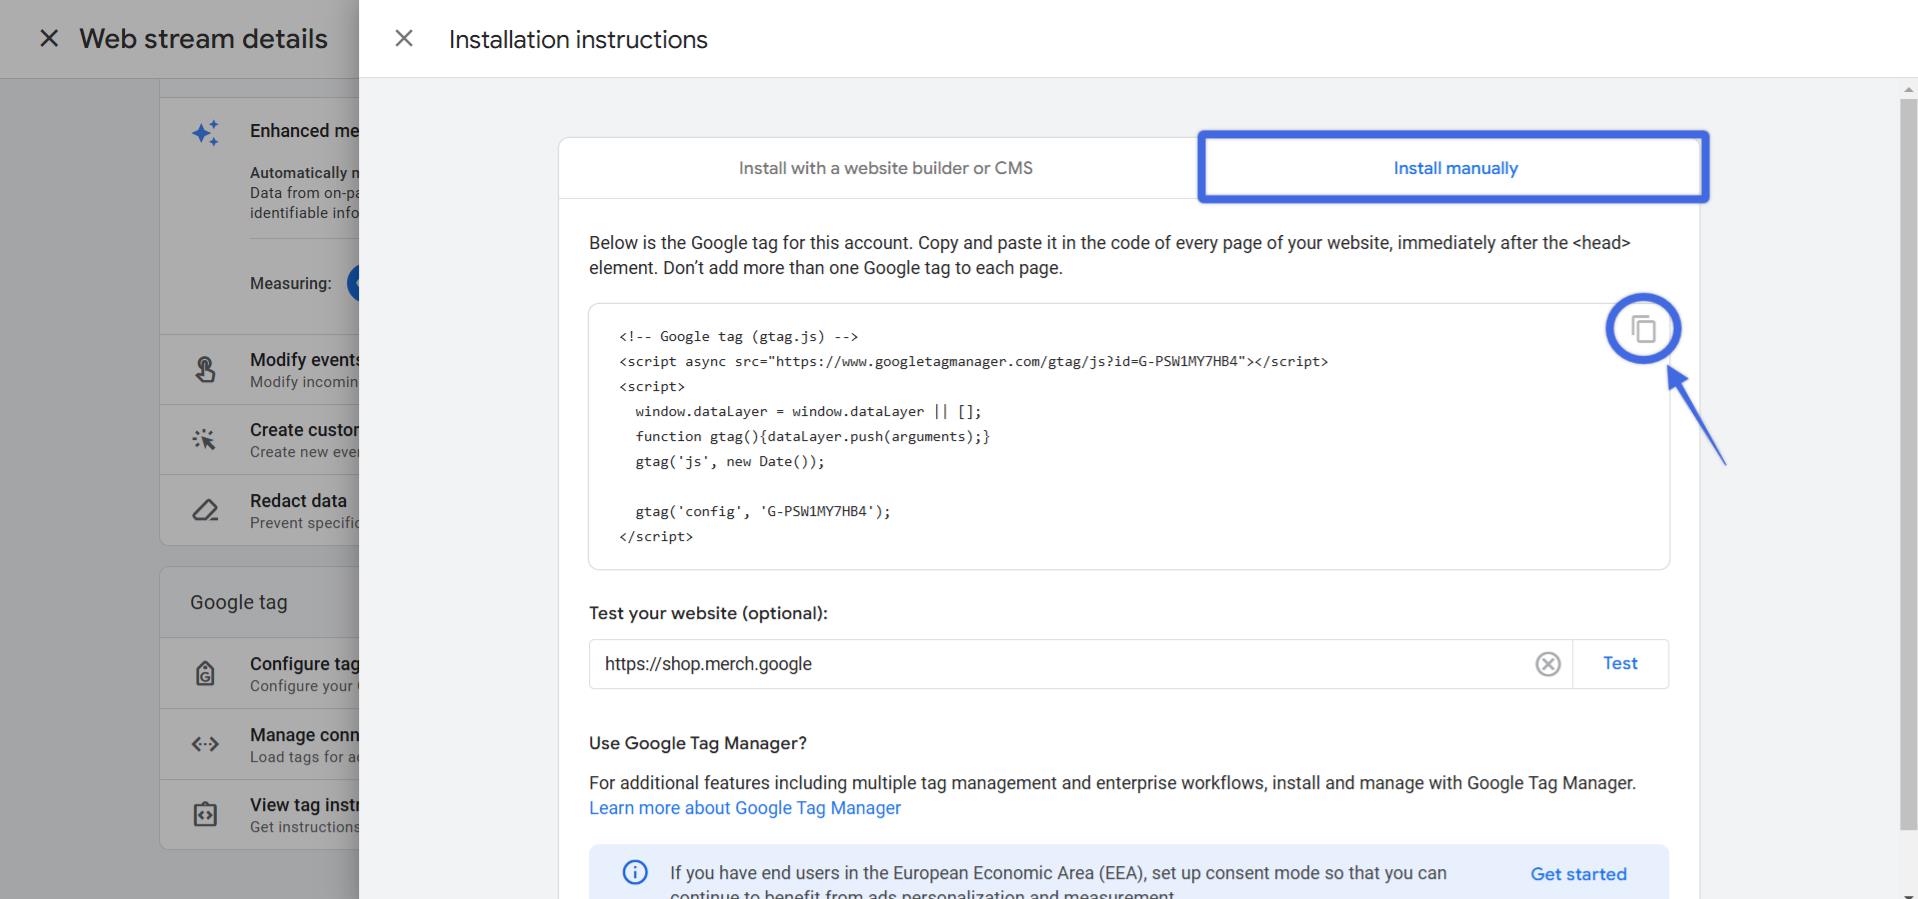
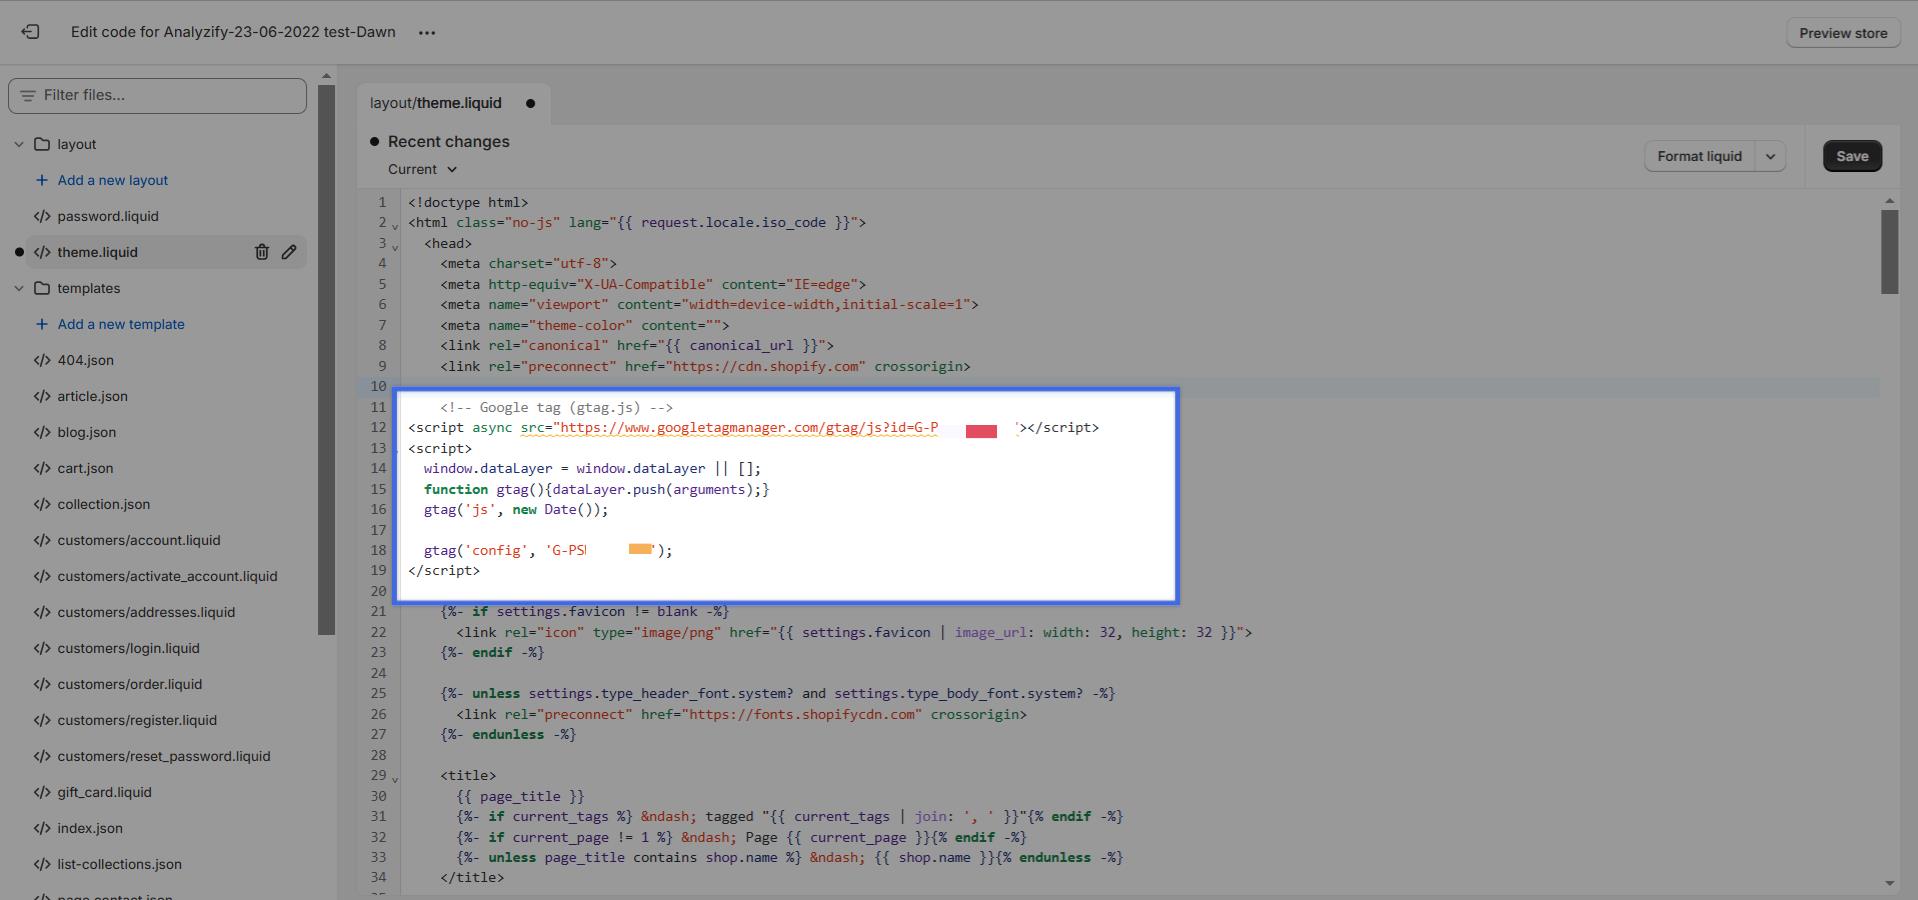
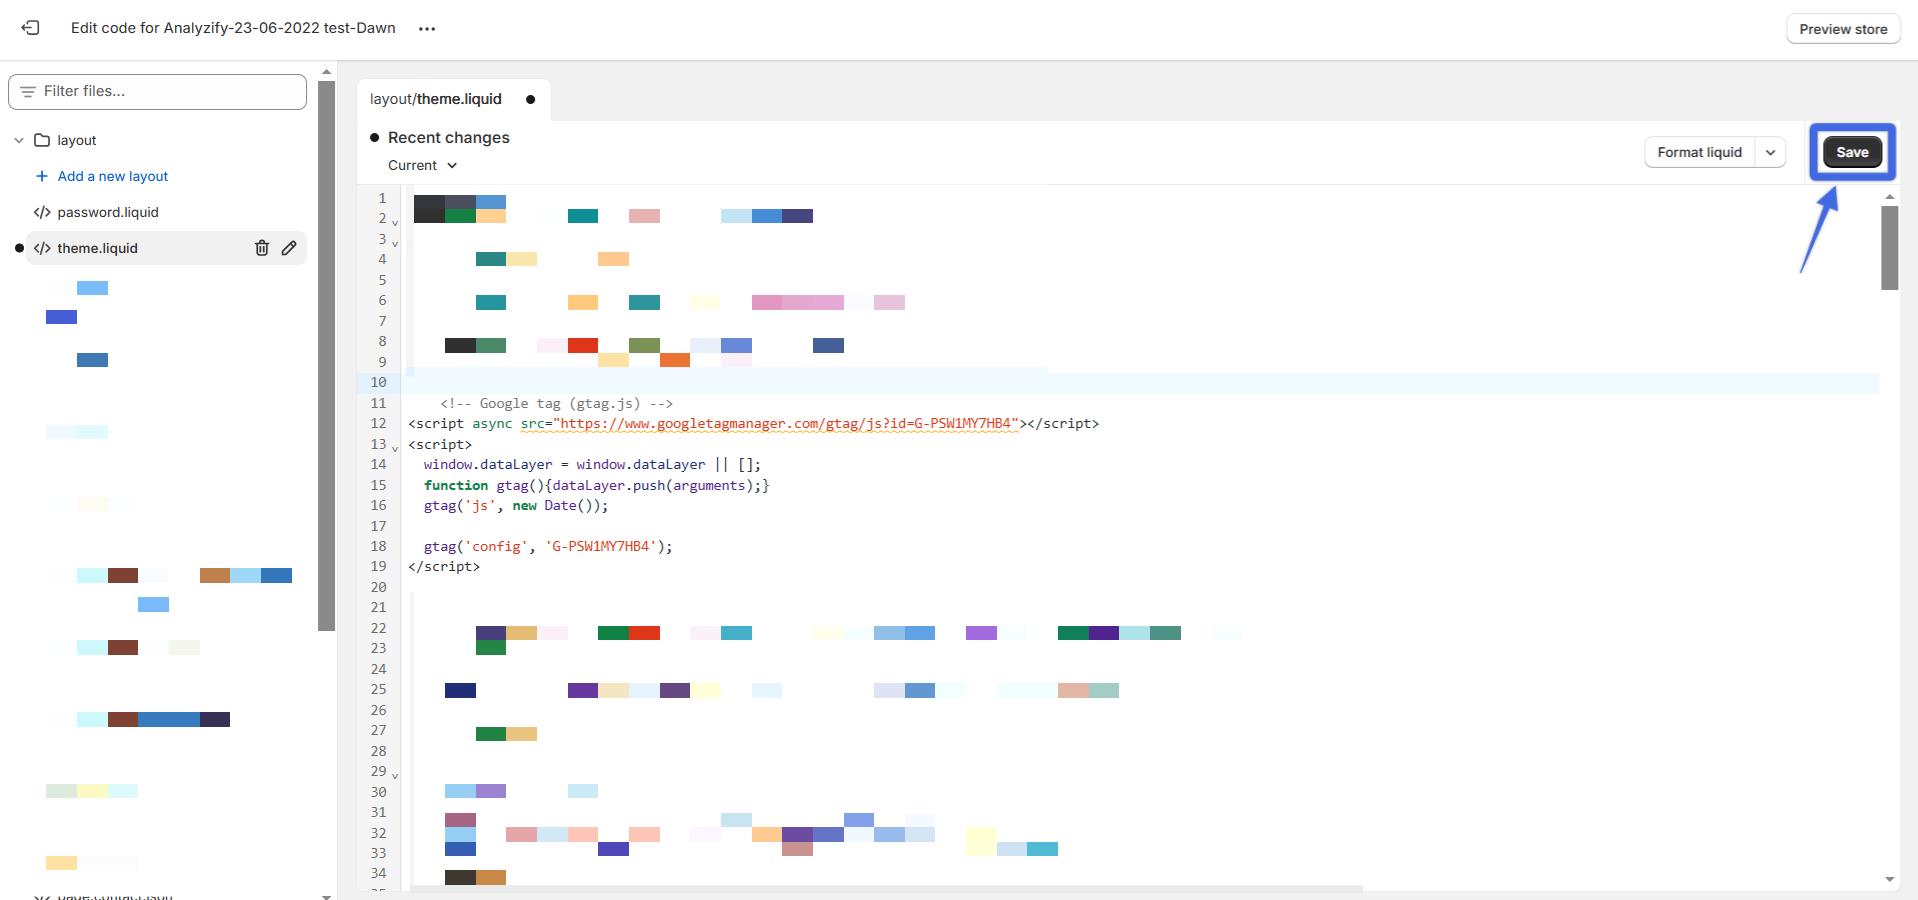
Step 2: Enabling Enhanced Measurement
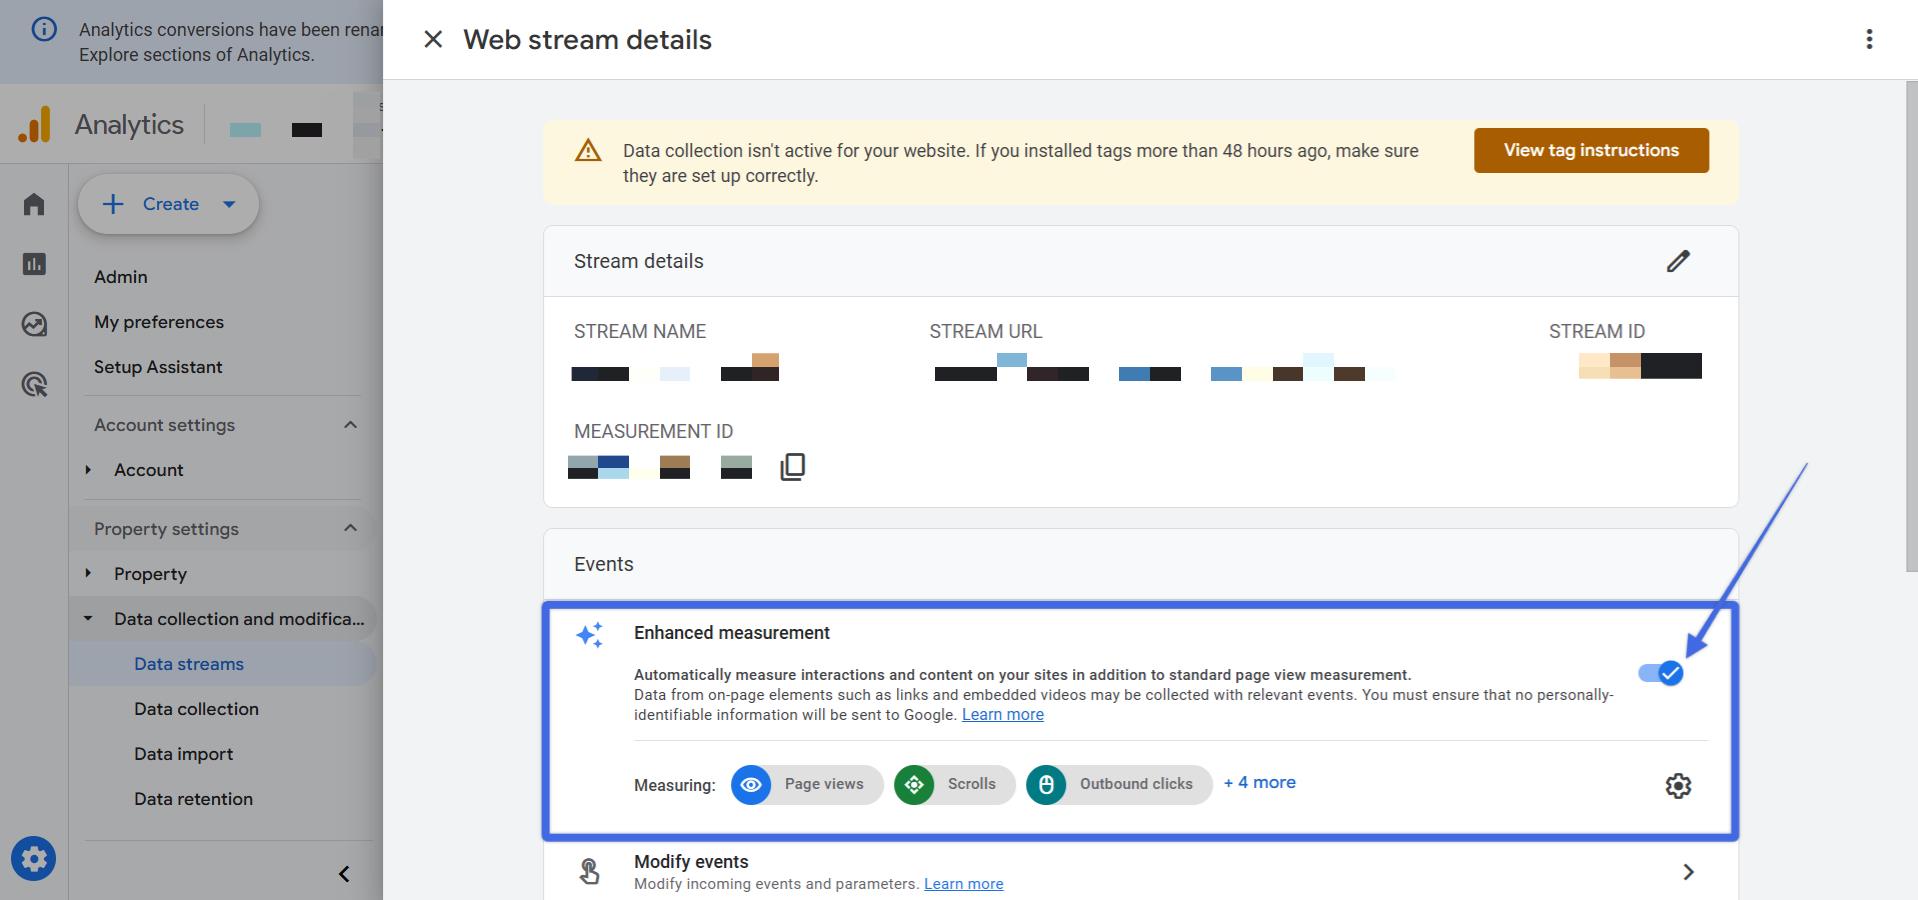
Enhanced Measurement allows GA4 to collect additional data automatically, such as page views, scroll tracking, outbound clicks, and file downloads.
Follow these steps to enable it:
Step 3: Verifying Your Setup
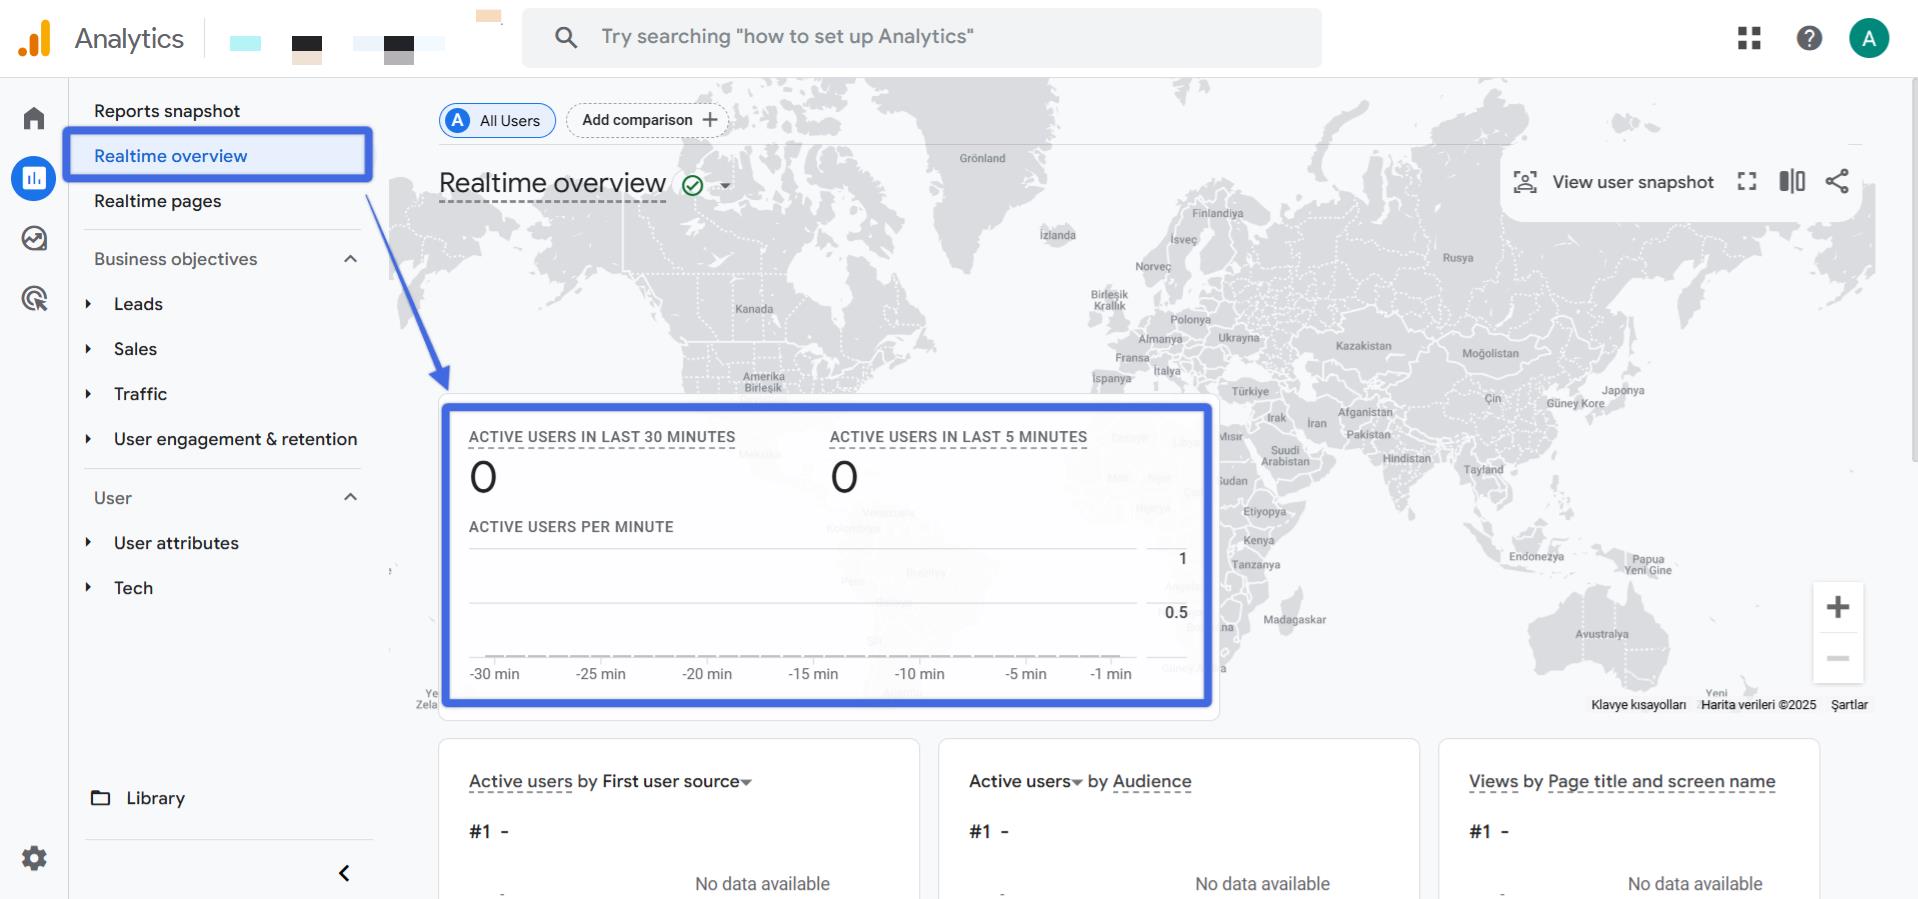
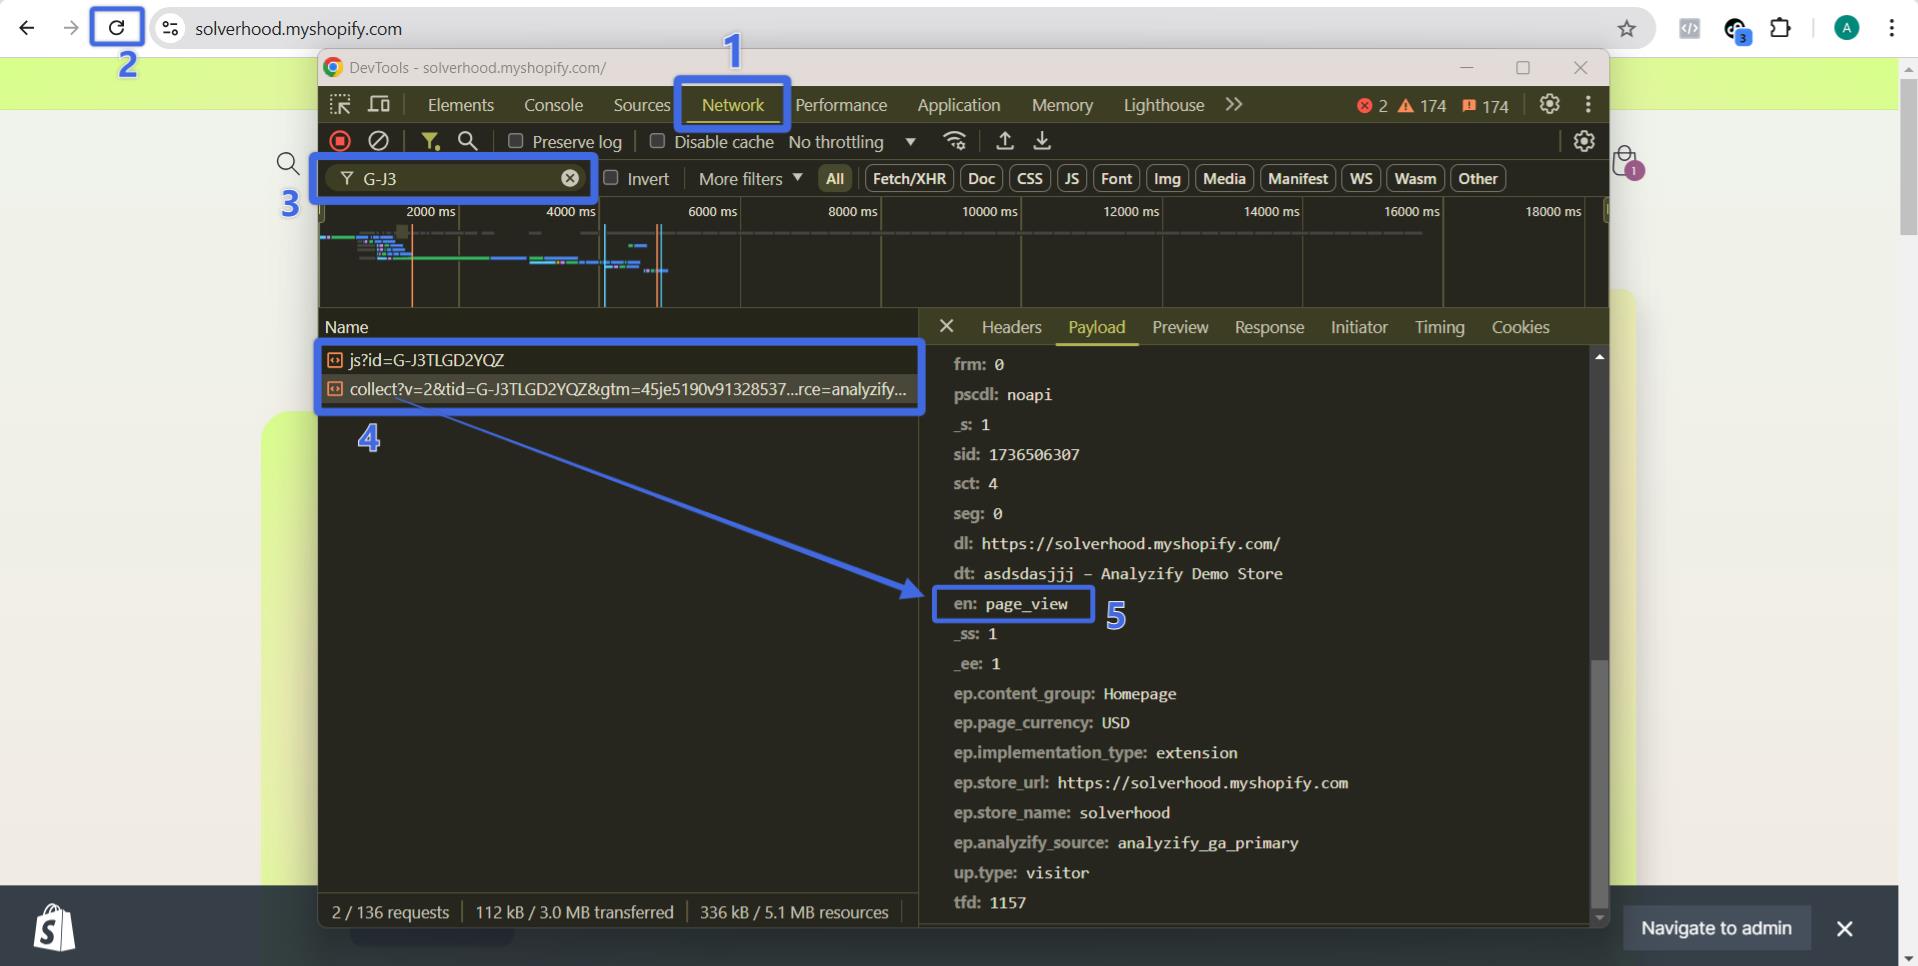
To ensure the tracking code is working properly, follow these verification steps:
Troubleshooting Common Issues With Data Collection In GA4
If data isn’t showing in GA4, check the following:
- Measurement ID: Ensure the correct Measurement ID is entered in your code or GTM tag.
- Code Placement: Verify the tracking code is in the section and loads on every page.
- Ad Blockers: Disable ad blockers during testing as they can block tracking.
- Property Initialization: Note that newly created GA4 properties may experience a slight delay in data collection.
By following these steps, you’ll have GA4 tracking set up and ready to deliver valuable insights about your website’s performance.
Additional Settings For Data Collection in GA4
After enabling data collection, it’s important to optimize your GA4 configuration to ensure accurate tracking and long-term data availability.
Here are a few key settings to review and adjust:
Important Admin Settings:
- Configure Data Retention: First, navigate to Admin > Property > Data Settings, where you can set your data retention period ranging from 2 to 14 months, which determines how long GA4 maintains your user and event data.
- Explore Additional Settings: In addition to data retention, GA4's Admin section contains several other crucial configuration options that should be reviewed and adjusted according to your needs.
- Review Best Practices: For a comprehensive guide on recommended GA4 settings and essential configurations that should be implemented, you can explore the full documentation on Suggested GA4 Settings & Reports.
FAQ: Common Questions About Enabling Data Collection in GA4
Here are the frequently asked questions about turning on data collection settings in Google Analytics (GA4):
1. Do I need coding skills to set up GA4 tracking?
No, you don’t necessarily need coding skills. If you’re comfortable using Google Tag Manager (GTM), you can add the tracking code without touching your website’s source code. For those without GTM, adding the tag directly to your website may require basic coding knowledge or assistance from a developer.
2. Where can I find my GA4 Measurement ID?
You can find your Measurement ID in the Data Streams section of your GA4 property. Select your website’s data stream, and you’ll see the Measurement ID displayed near the top of the page.
3. How long does it take for data to appear in GA4 after setup?
It typically takes 24-48 hours for data to populate in your GA4 reports. However, you can check real-time reports within seconds to verify if the tracking code is functioning correctly.
4. What is Enhanced Measurement, and why should I enable it?
Enhanced Measurement is a feature in GA4 that automatically tracks additional events such as page views, scrolls, outbound clicks, and file downloads. Enabling it simplifies data collection without requiring additional code.
5. What should I do if my data isn’t showing in GA4?
If data isn’t appearing in your reports, check the following:
- Ensure the Measurement ID is correctly entered in your code or GTM tag.
- Verify the tracking code is placed in the section of your website.
- Disable ad blockers during testing.
- Be patient, as newly created properties may have a delay in data flow.
6. Can I adjust how long GA4 retains my data?
Yes, GA4 allows you to set the data retention period between 2 and 14 months. To adjust this, navigate to Admin > Property > Data Settings in your GA4 account.
7. How can I verify that my GA4 tracking code is working?
You can verify your tracking by:
- Checking Realtime Reports in GA4 for activity.
- Using browser developer tools to inspect network activity and confirm "collect" requests are being sent with "page_view" events.
Conclusion
Once data collection is enabled, give it 24-48 hours to start populating your reports. You can then begin analyzing your traffic, user behavior, and conversion data.
Remember to regularly check your data collection status to ensure continuous tracking of your website activities.
